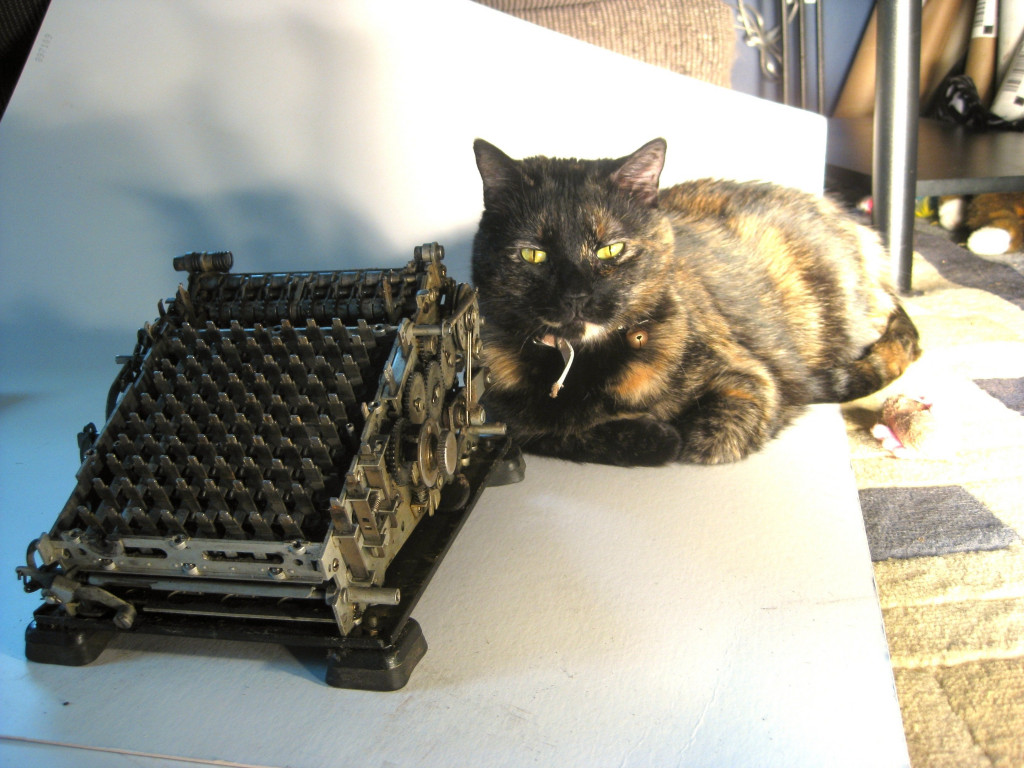
Монро К.А. Разрушение

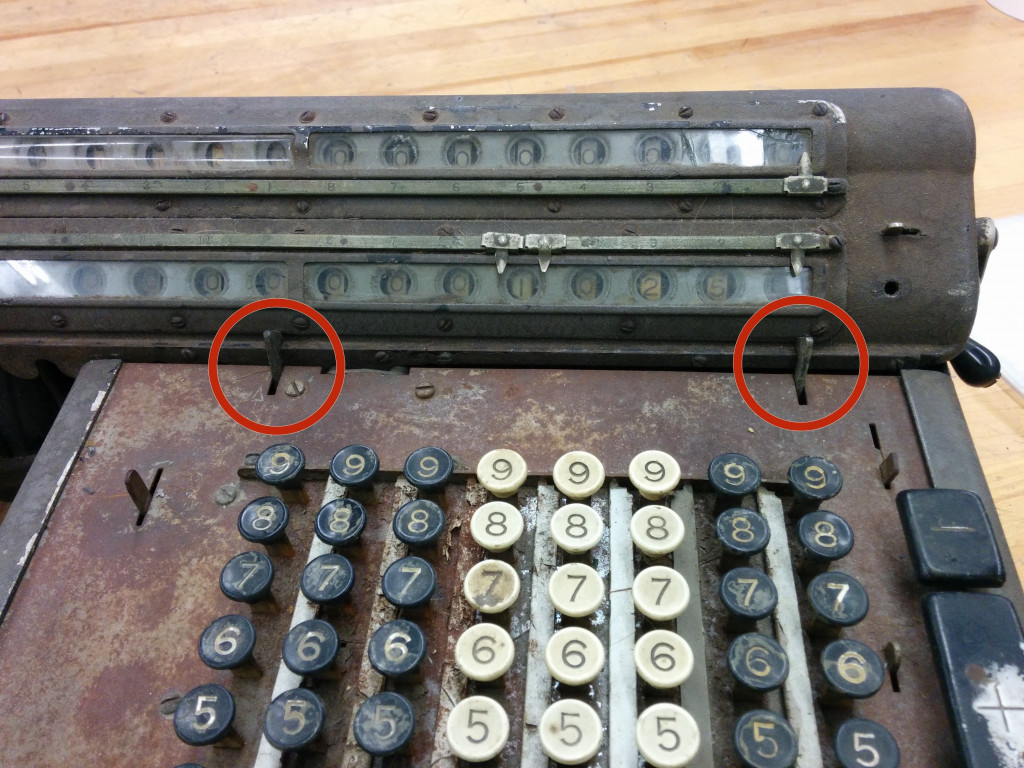
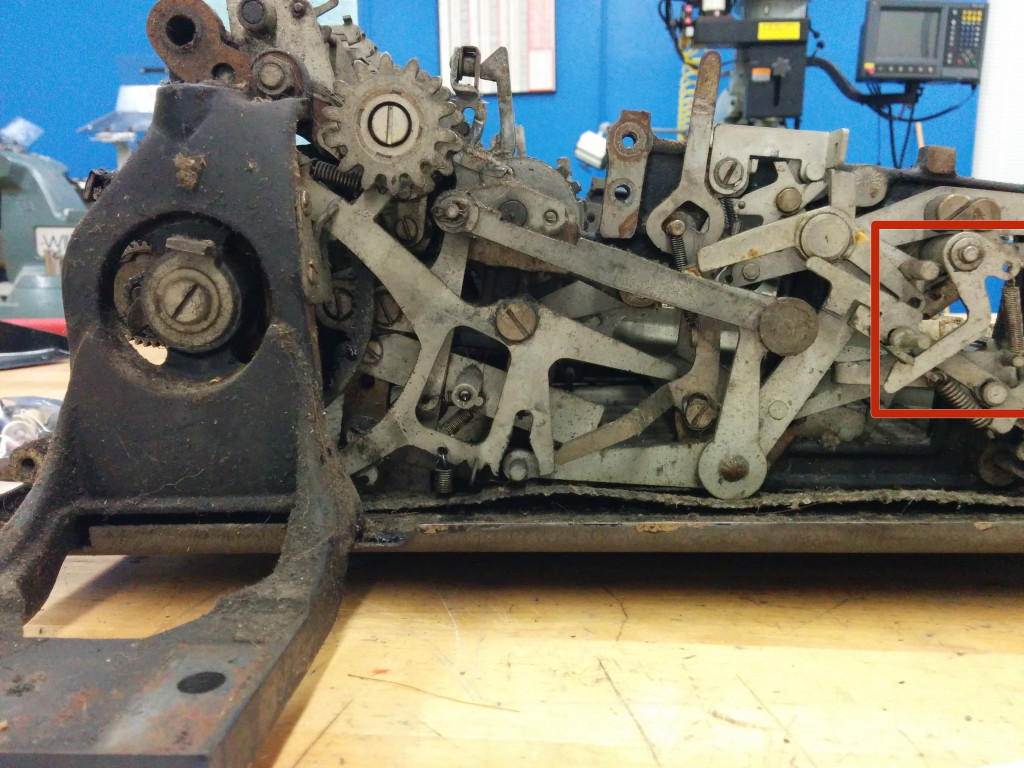
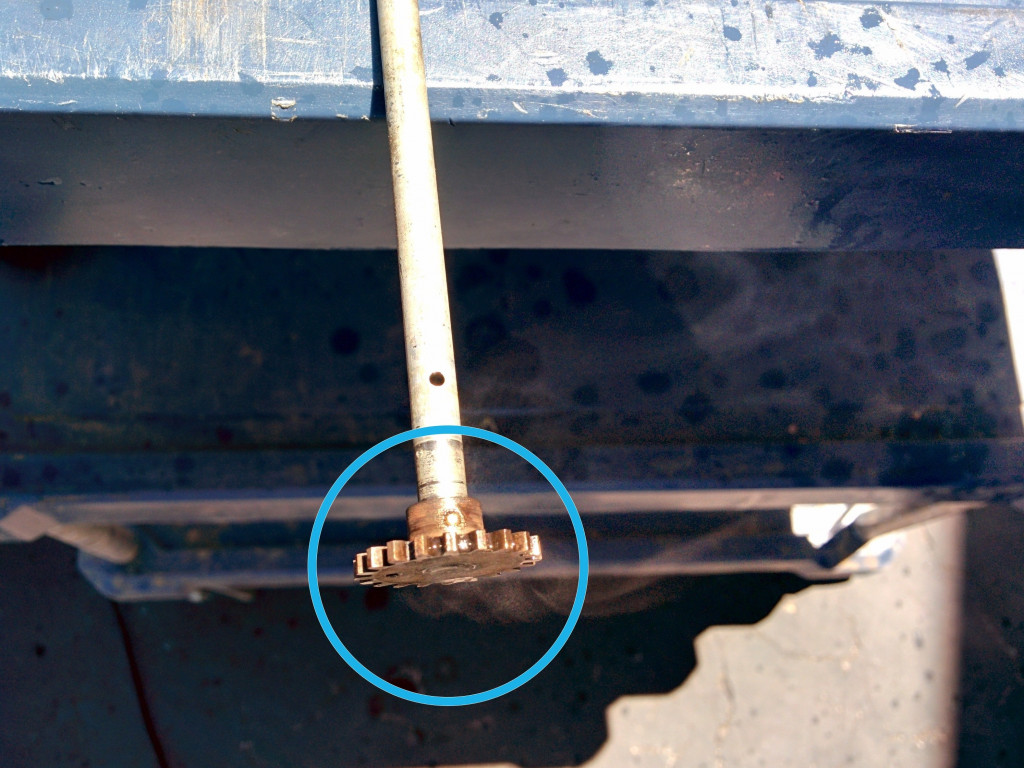
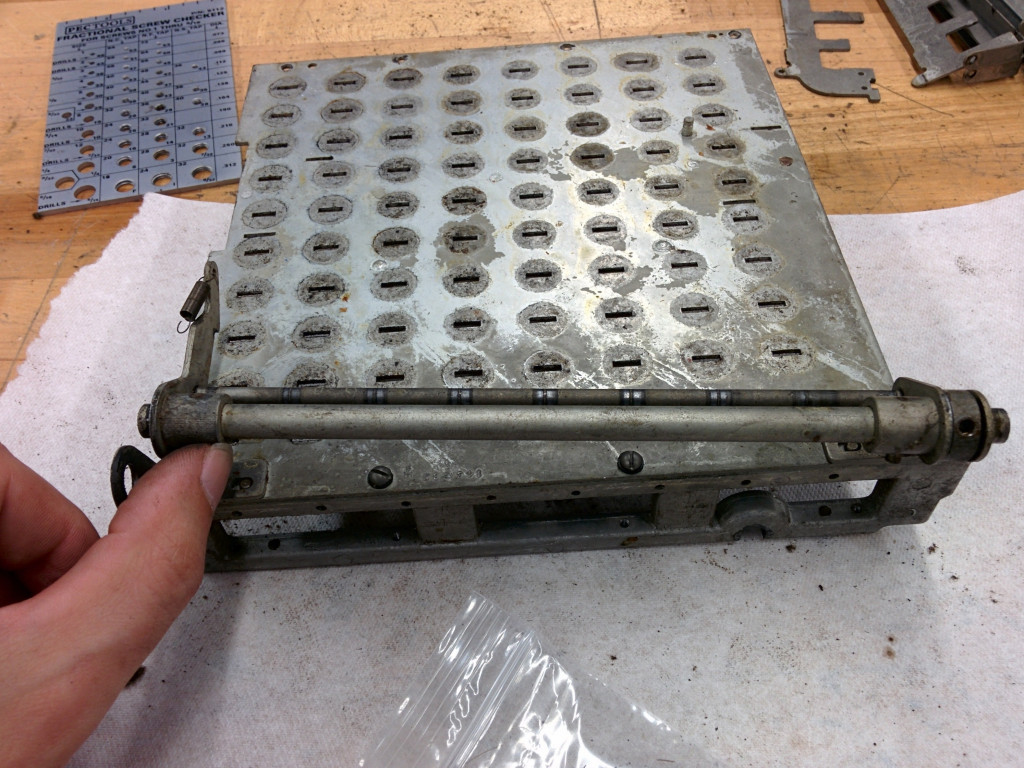
Шаг 1 Снять каретку
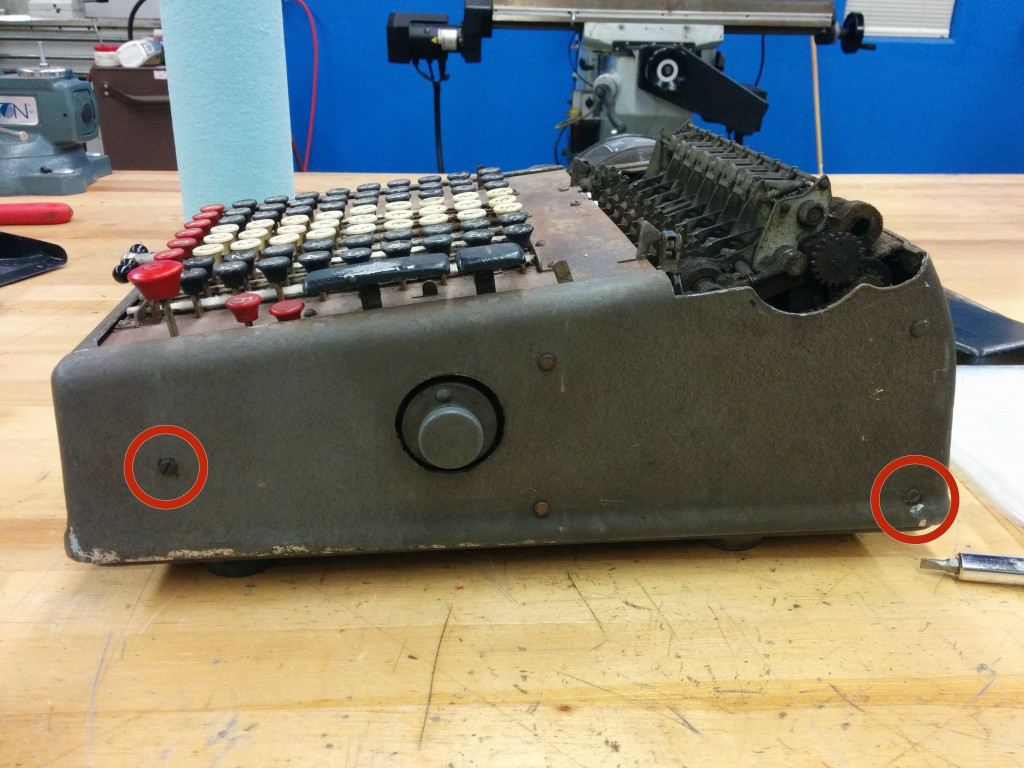
Расположите калькулятор так, чтобы его клавиатура была обращена к вам. Эта ориентация определяет левую и правую стороны калькулятора.
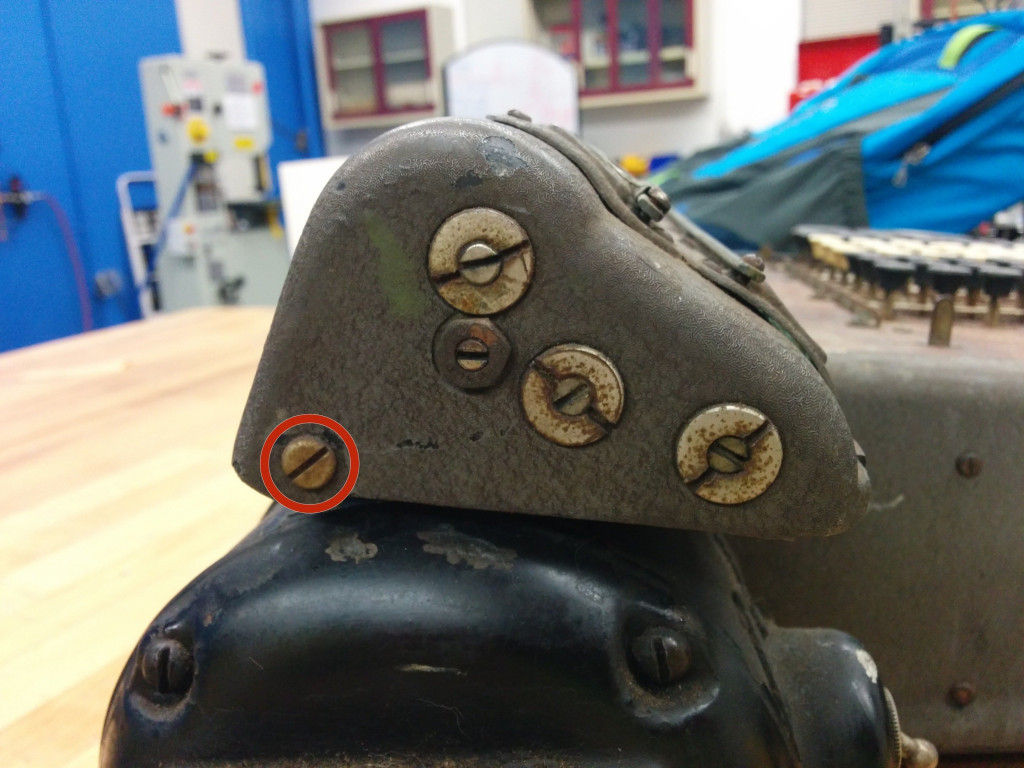
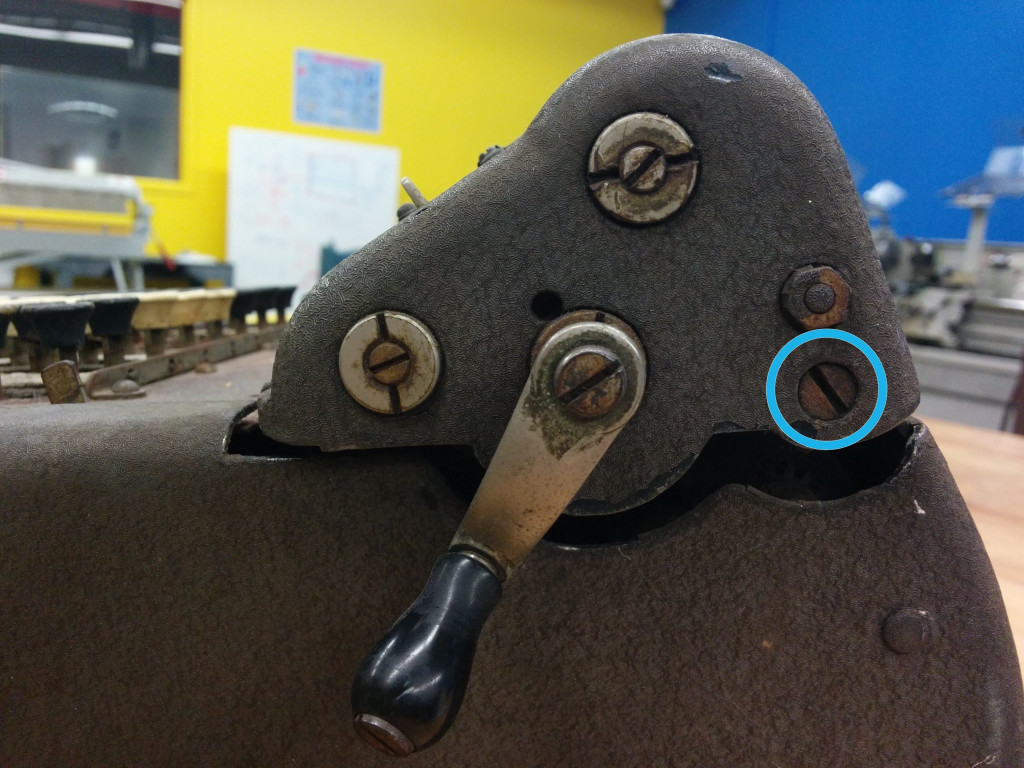
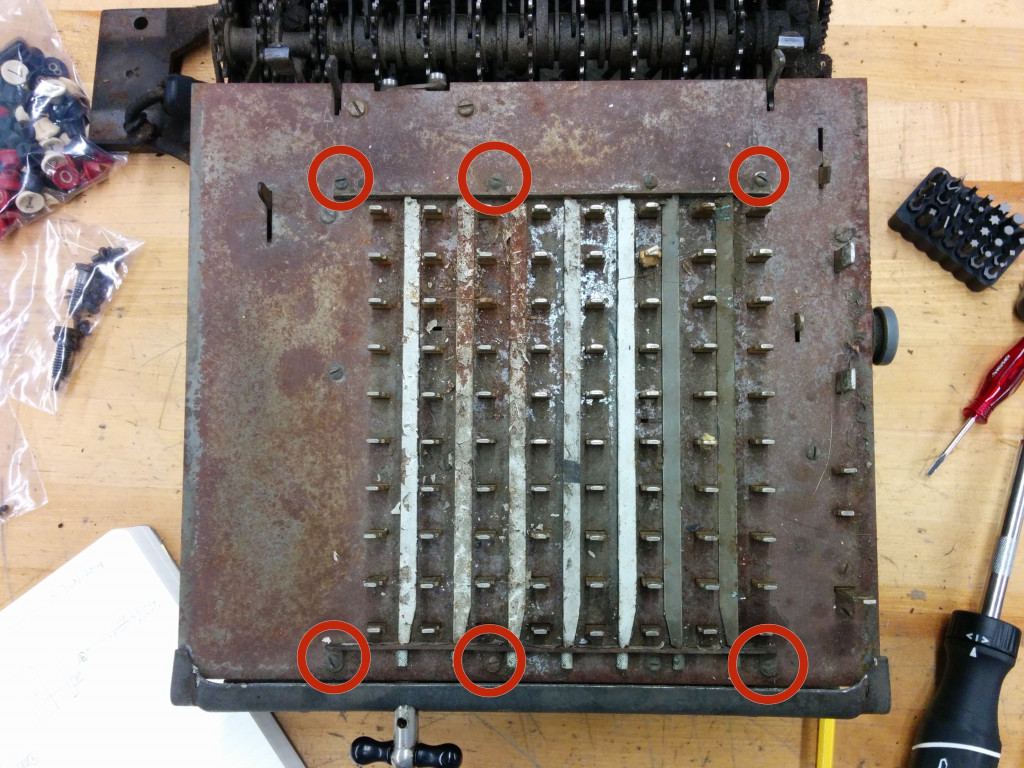
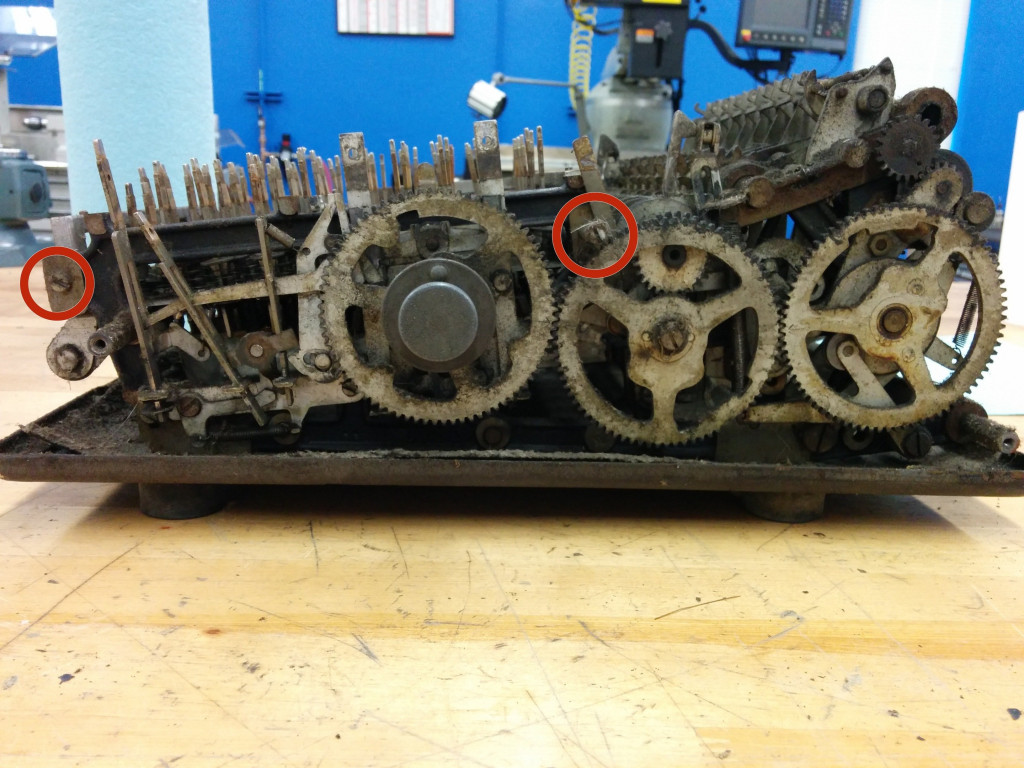
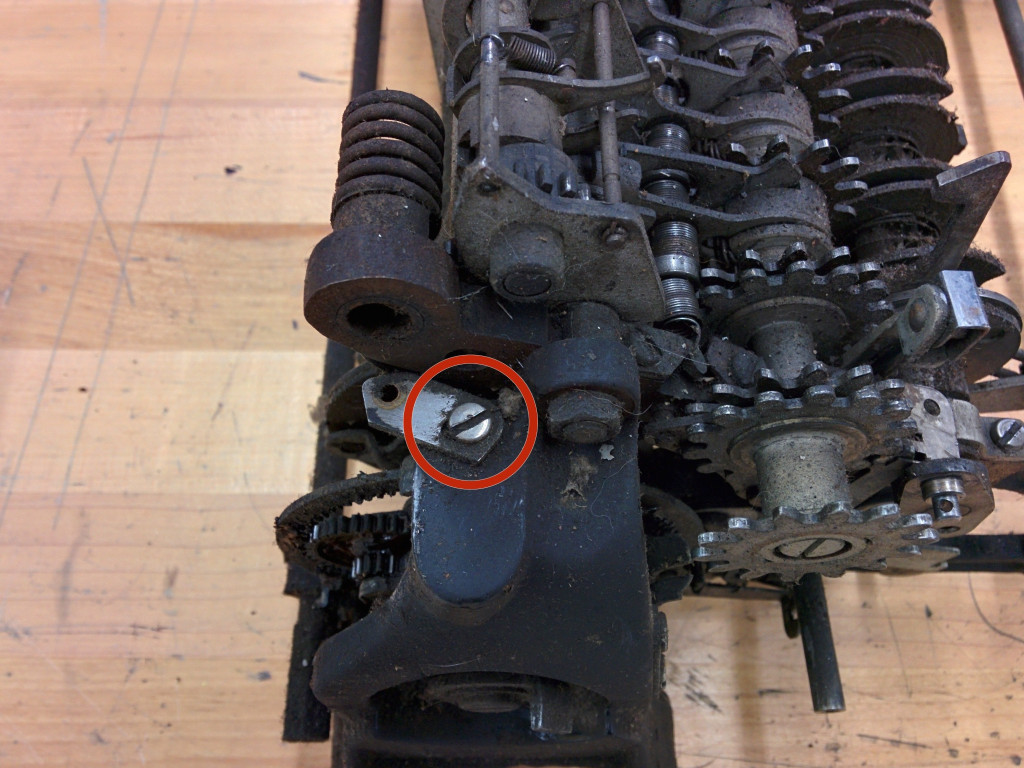
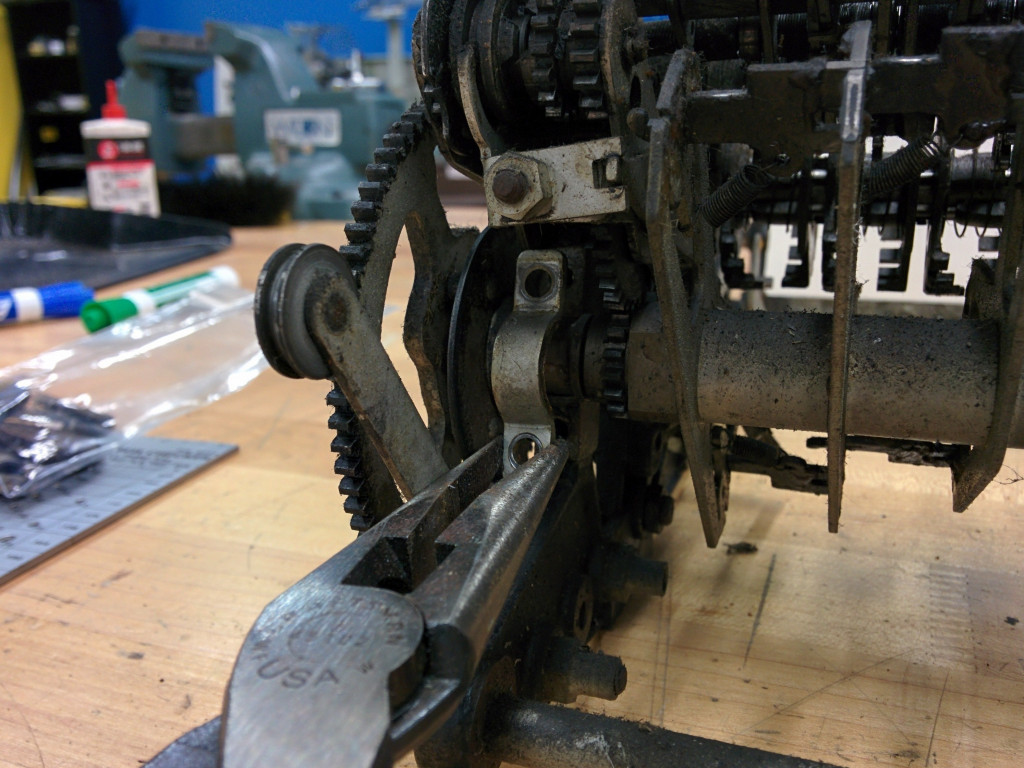
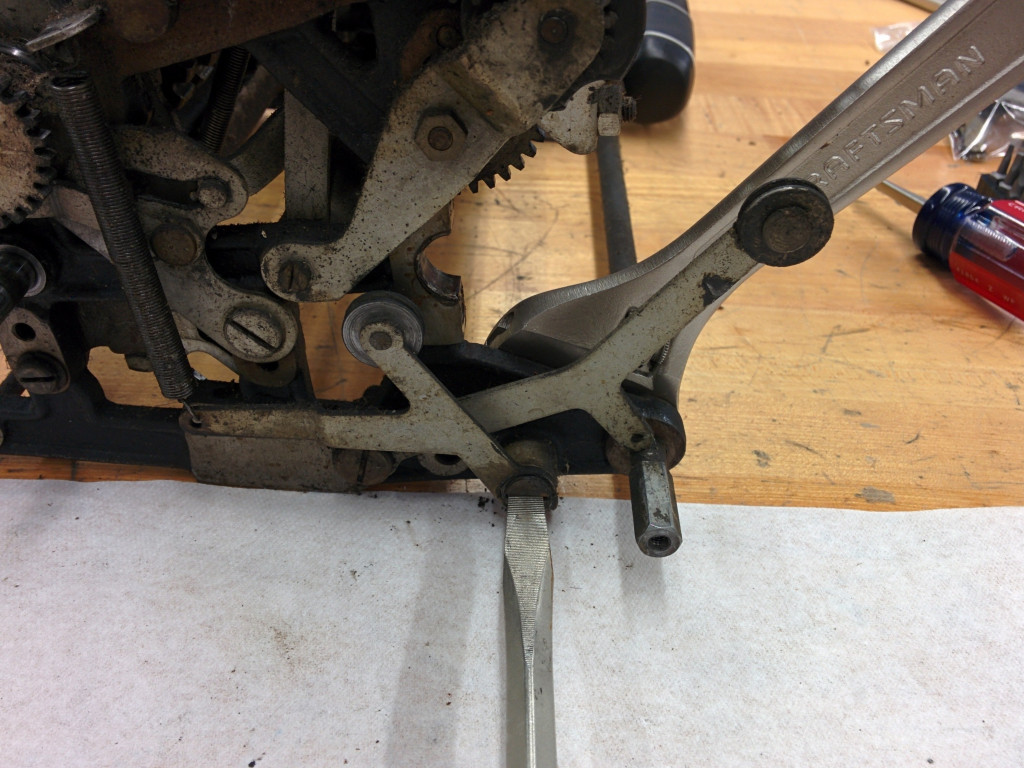
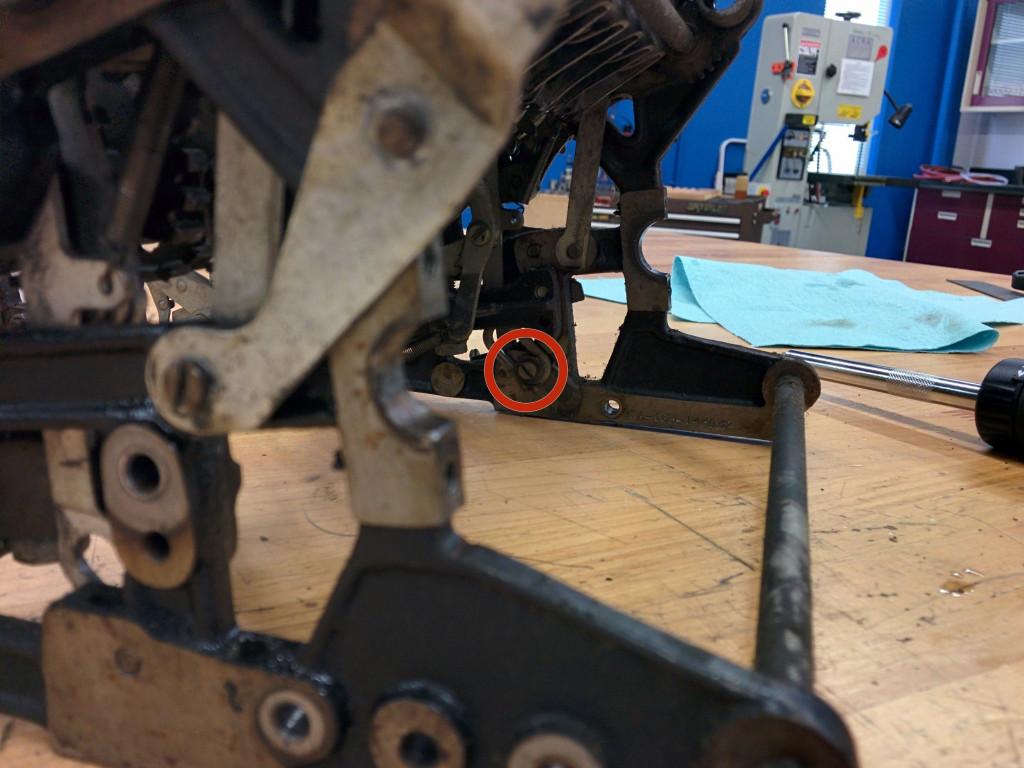
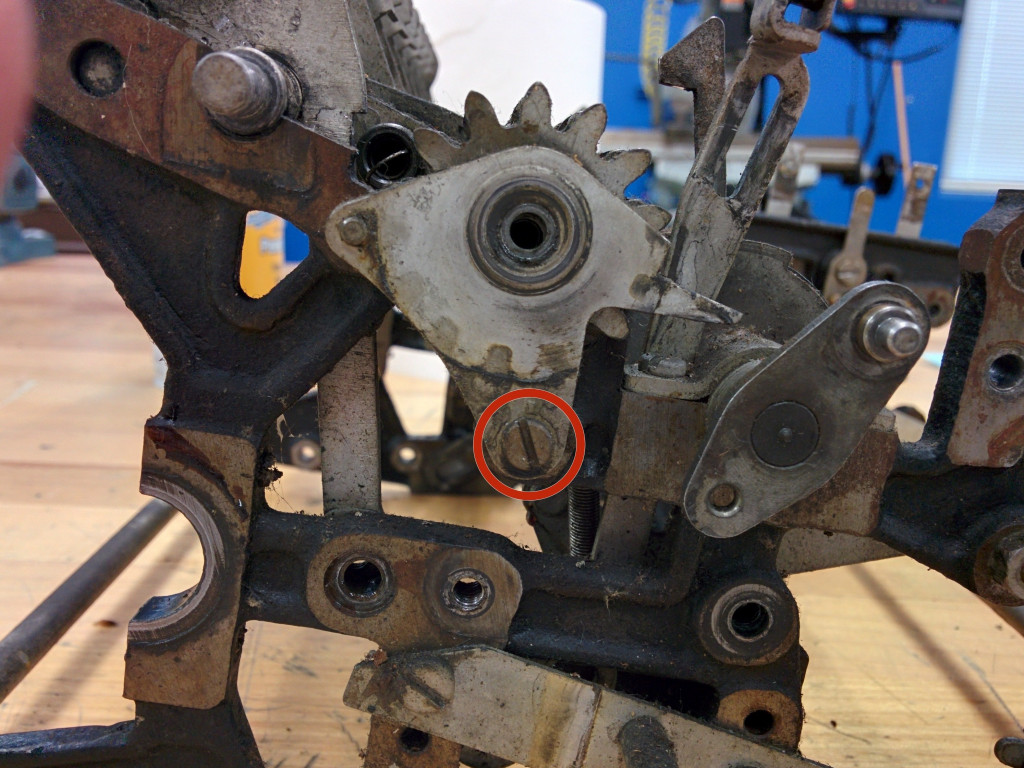
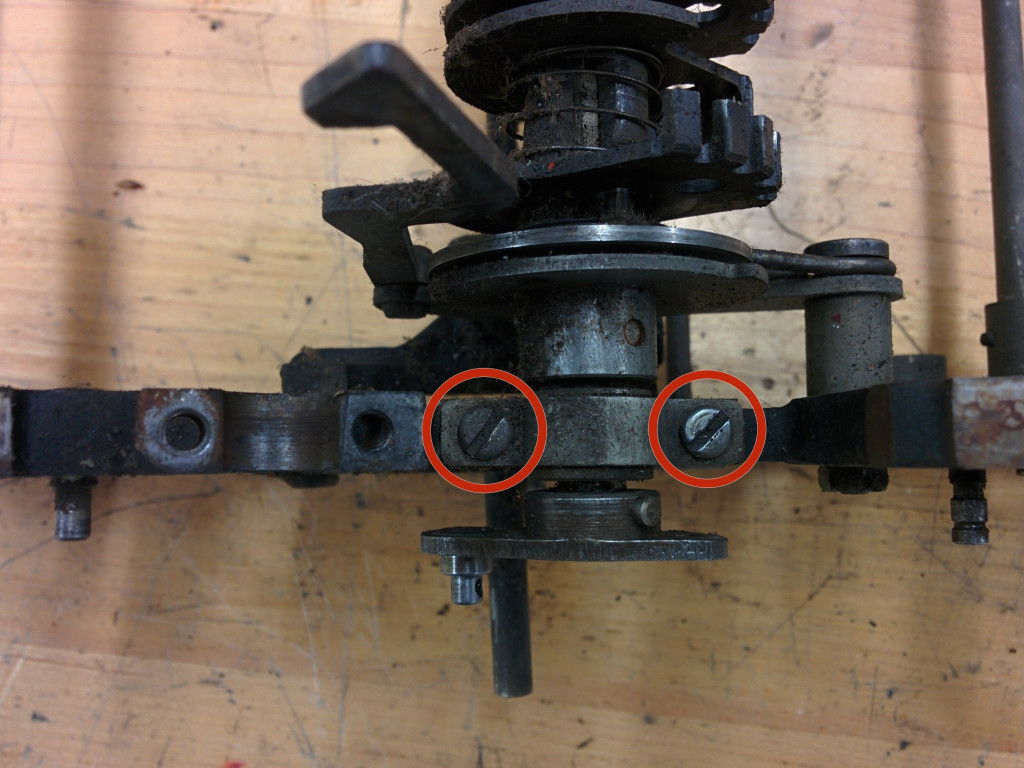
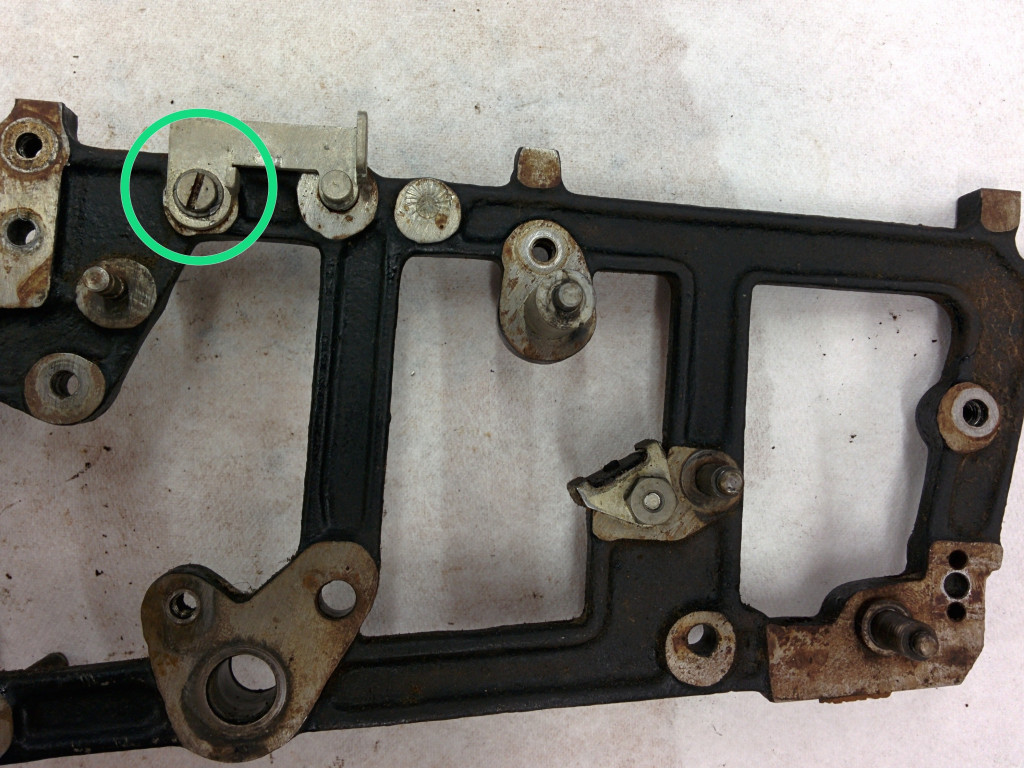
Отвинтите нижний левый винт на левой стороне каретки.
Если он просто продолжает вращаться, вам может понадобиться вставить отвертку на другом конце вала, к которому этот винт подключен, в правом нижнем углу с правой стороны каретки. Не включай! Просто поверните левую сторону.
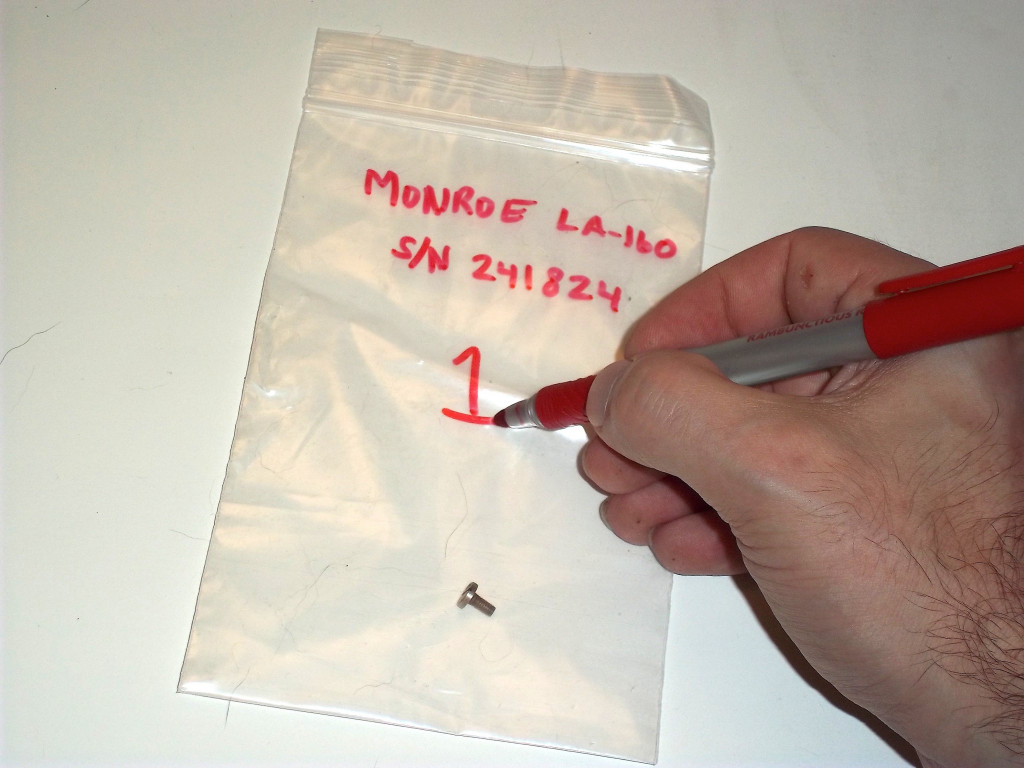
Шаг 2
Пометьте сумку как «мешок № 1». Мы скоро найдем серийный номер калькулятора.
Погладить себя по спине. Вы теперь официально организованы.
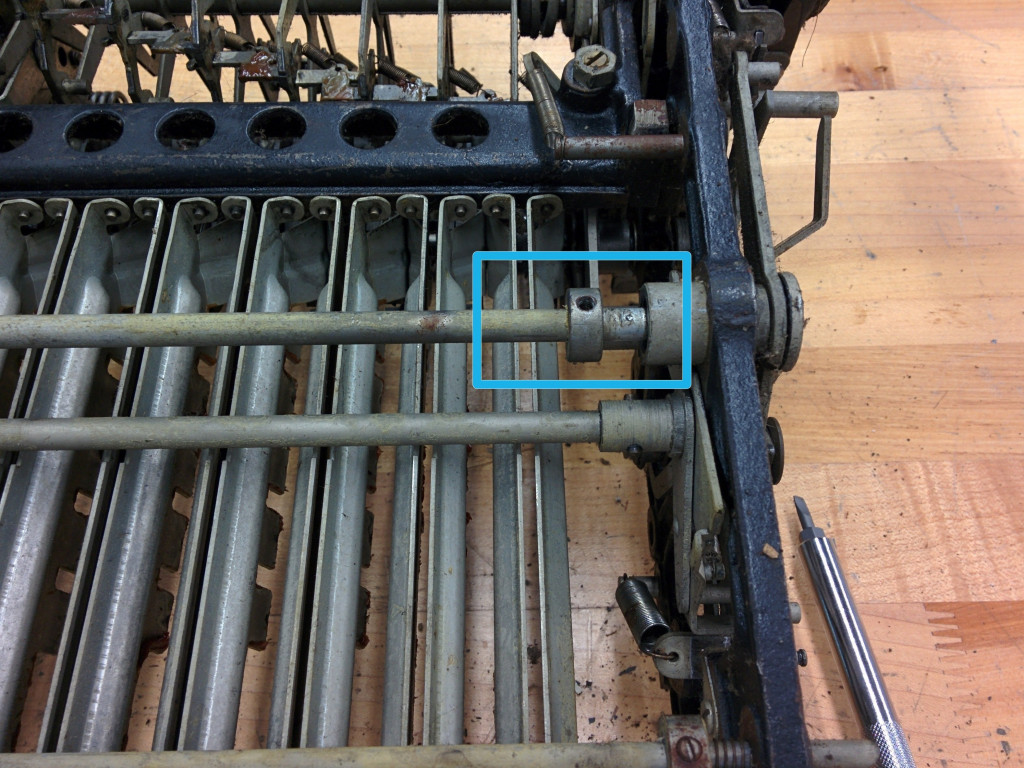
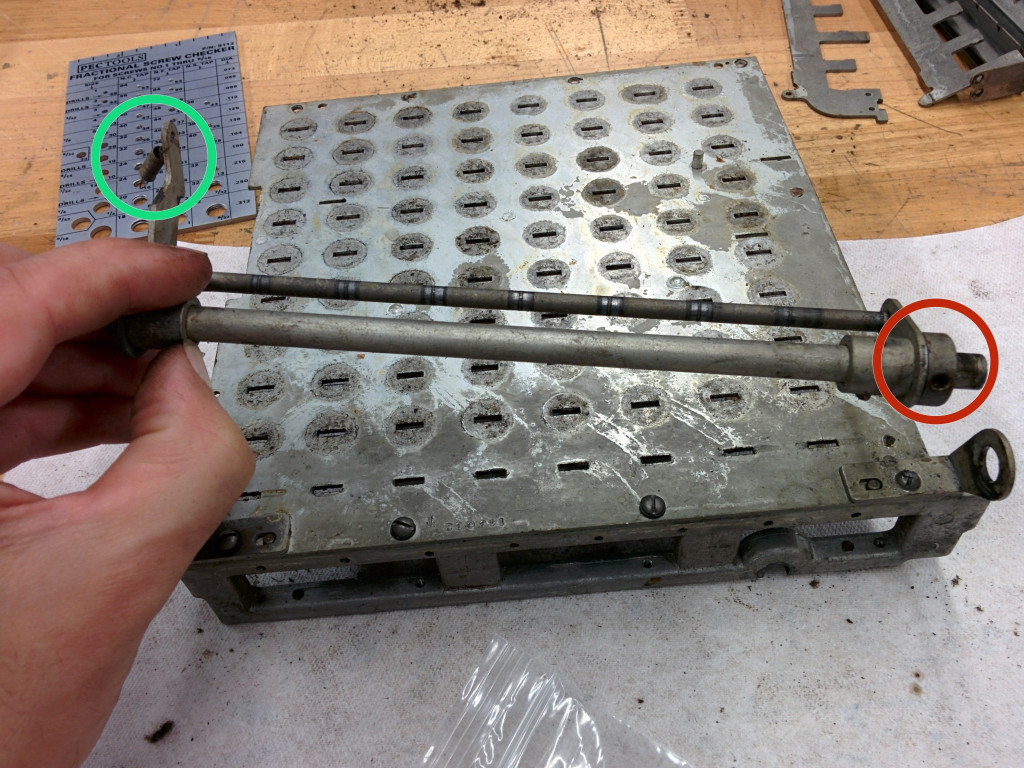
Шаг 3
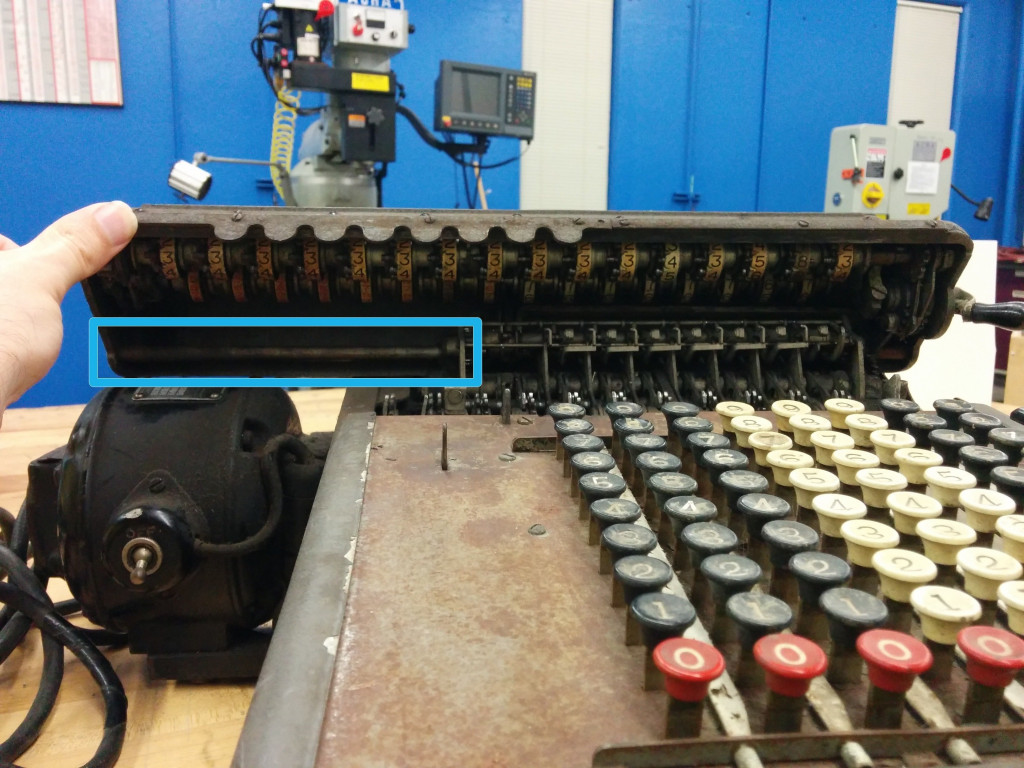
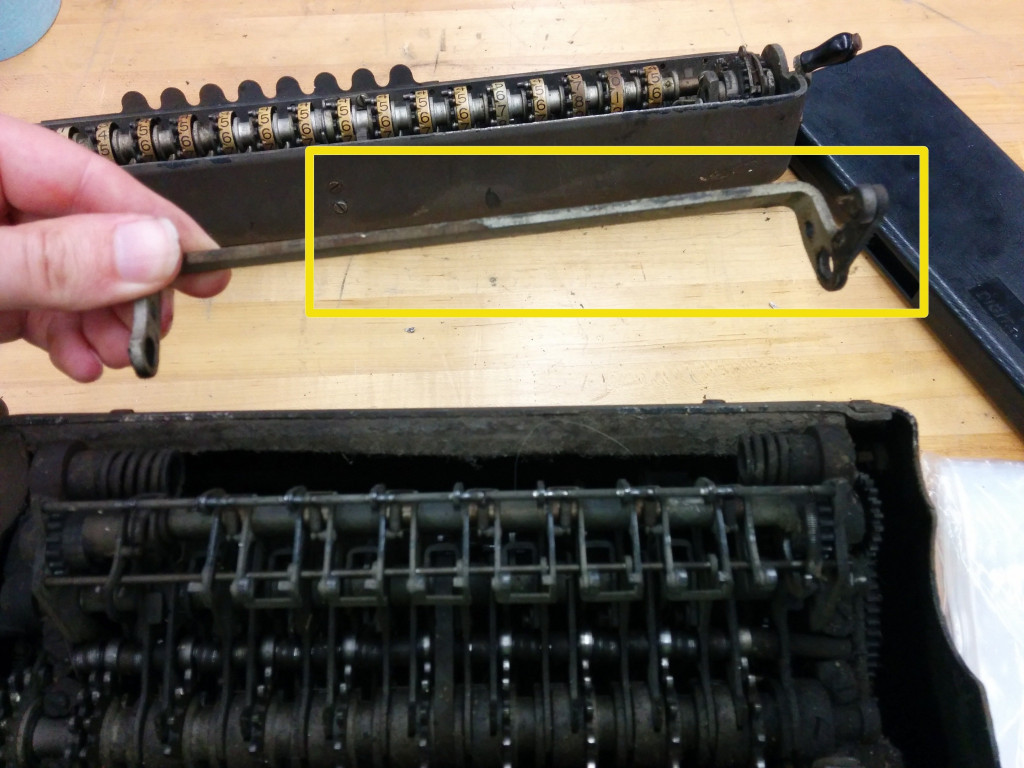
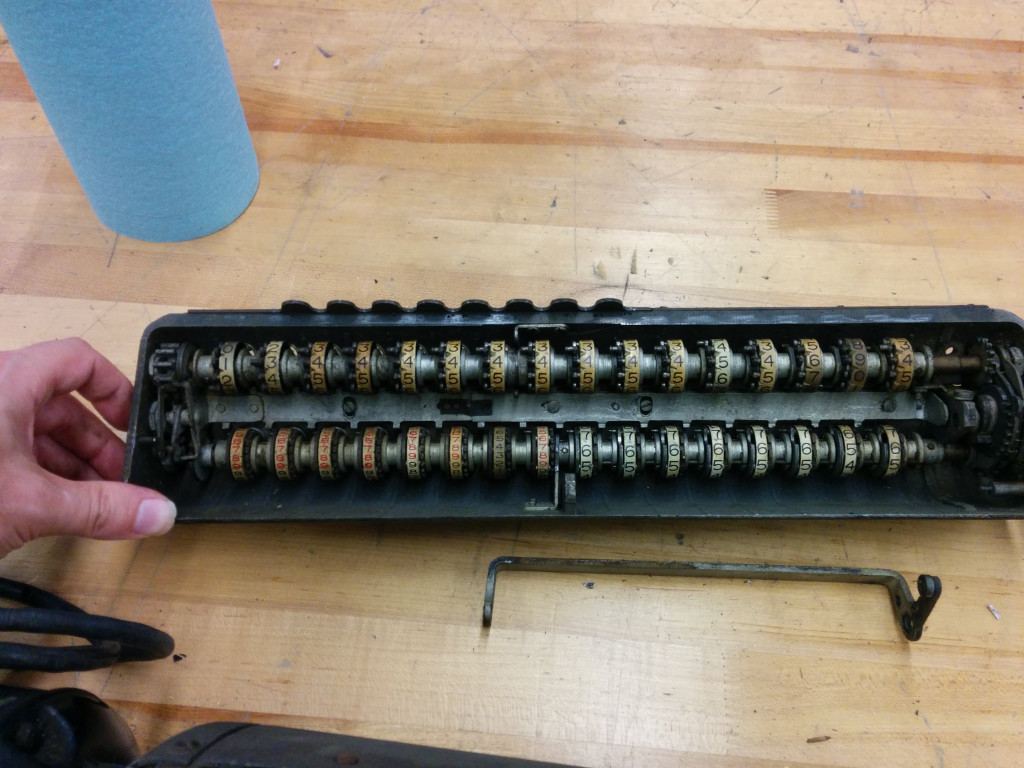
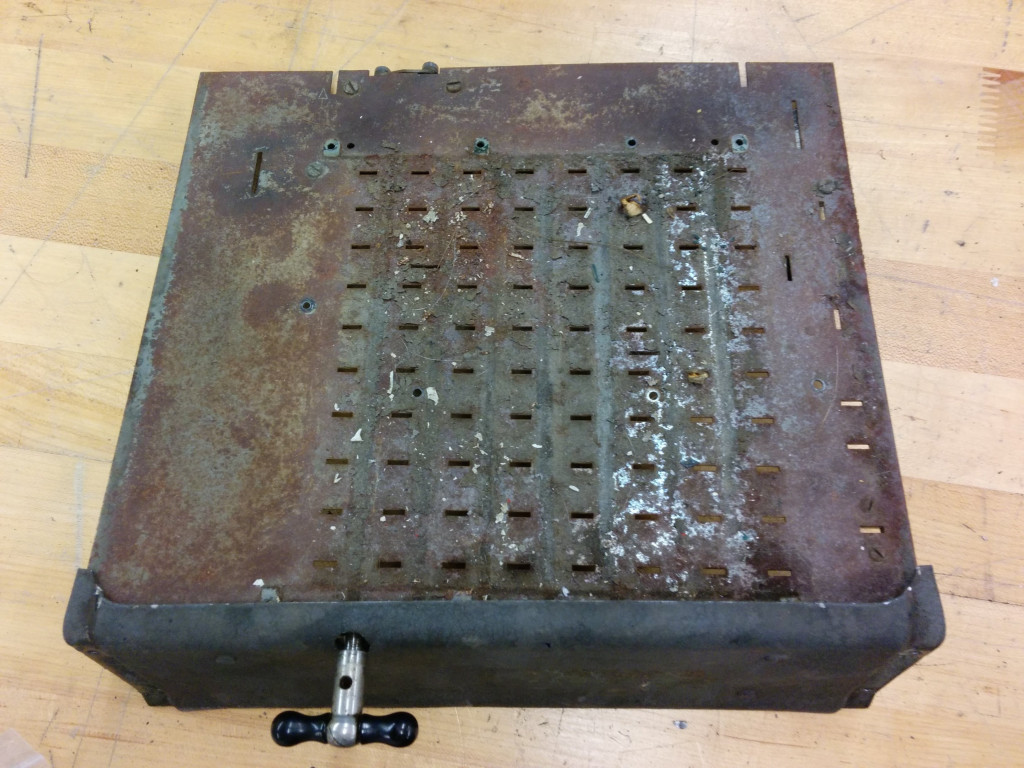
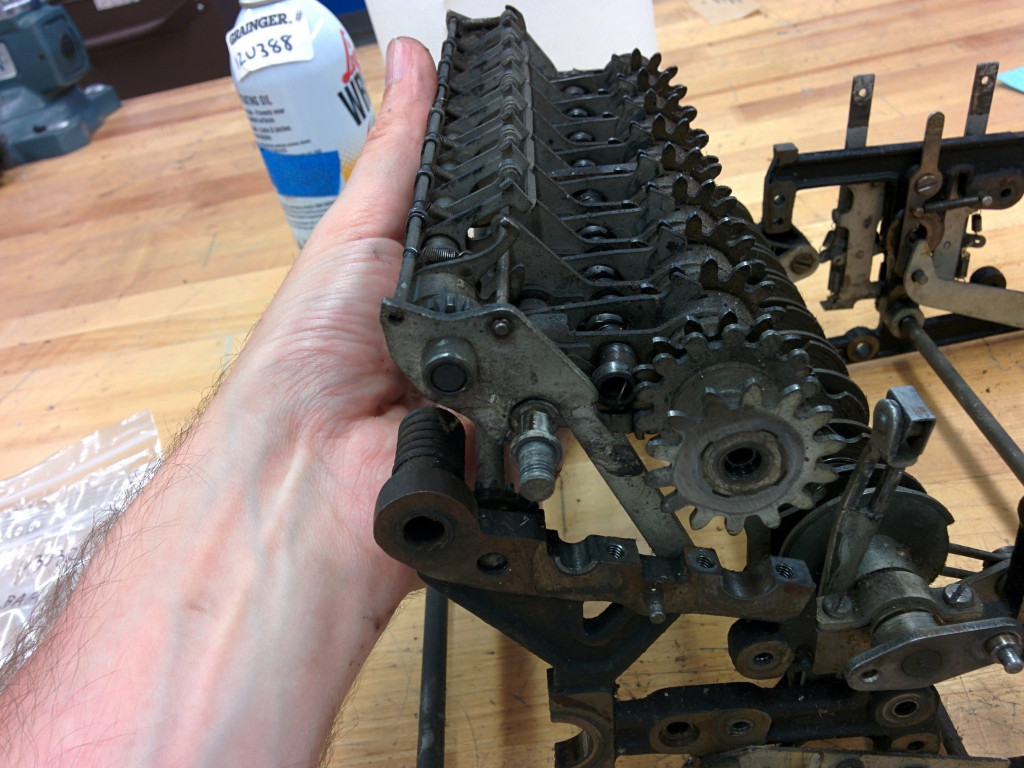
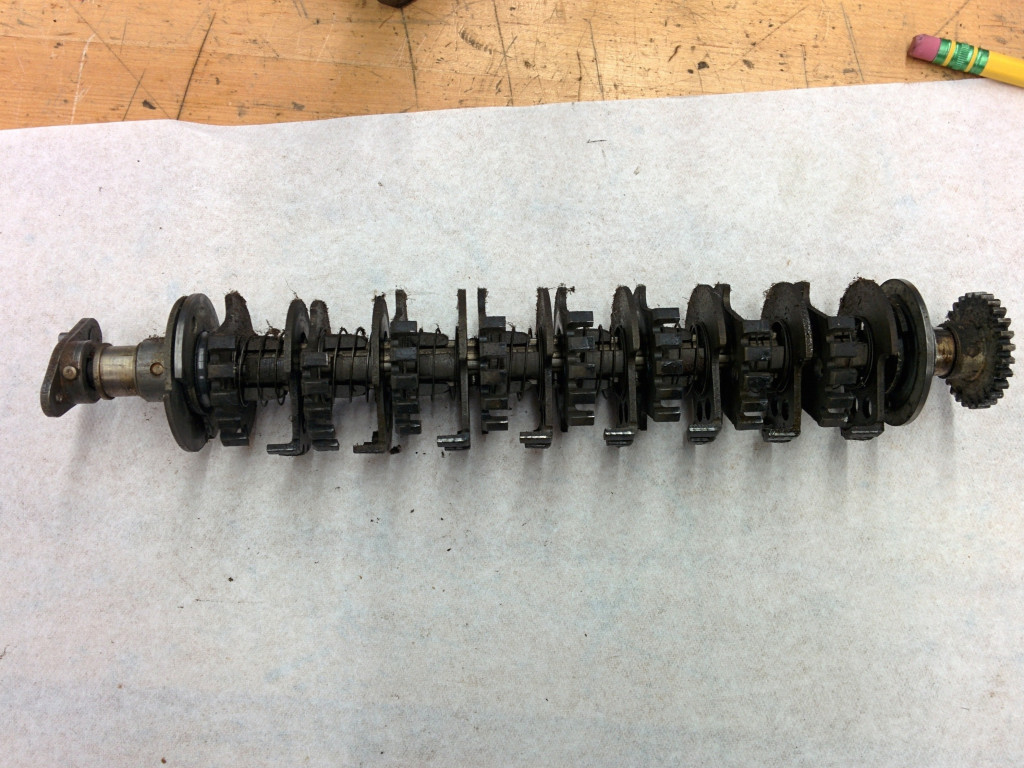
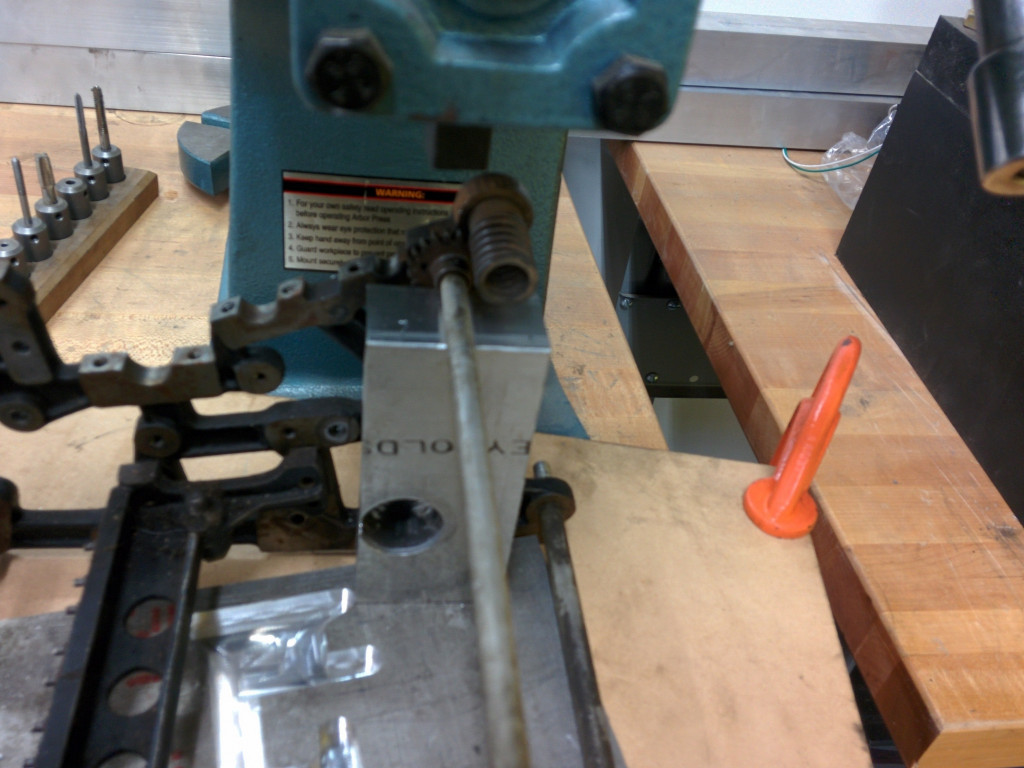
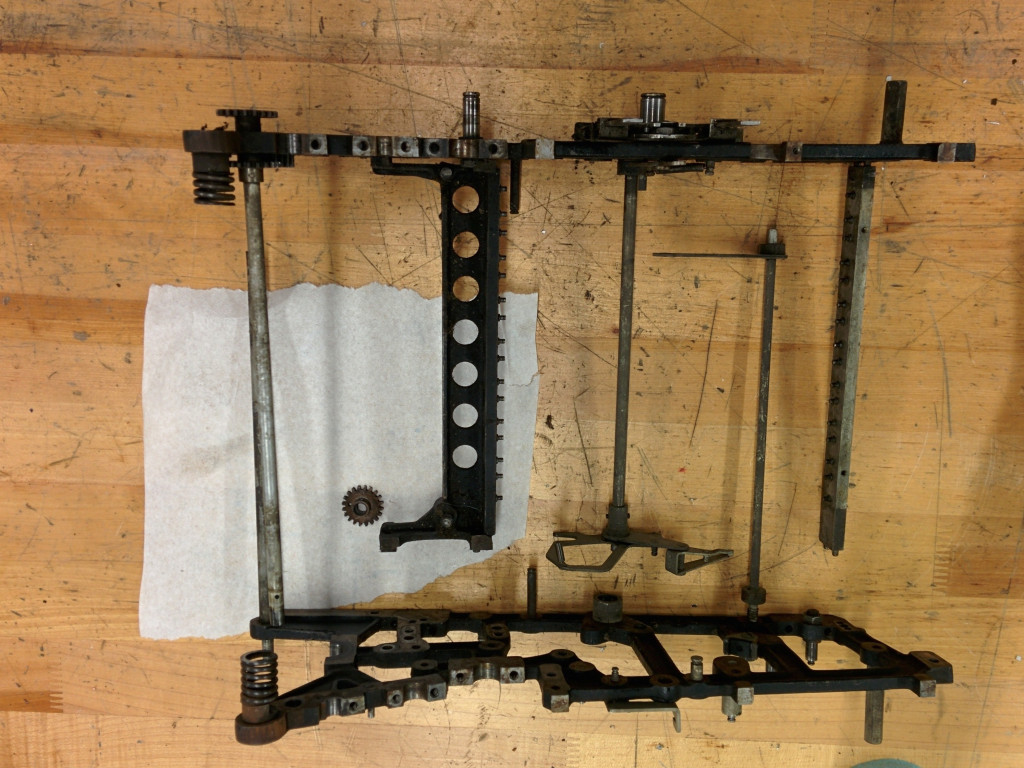
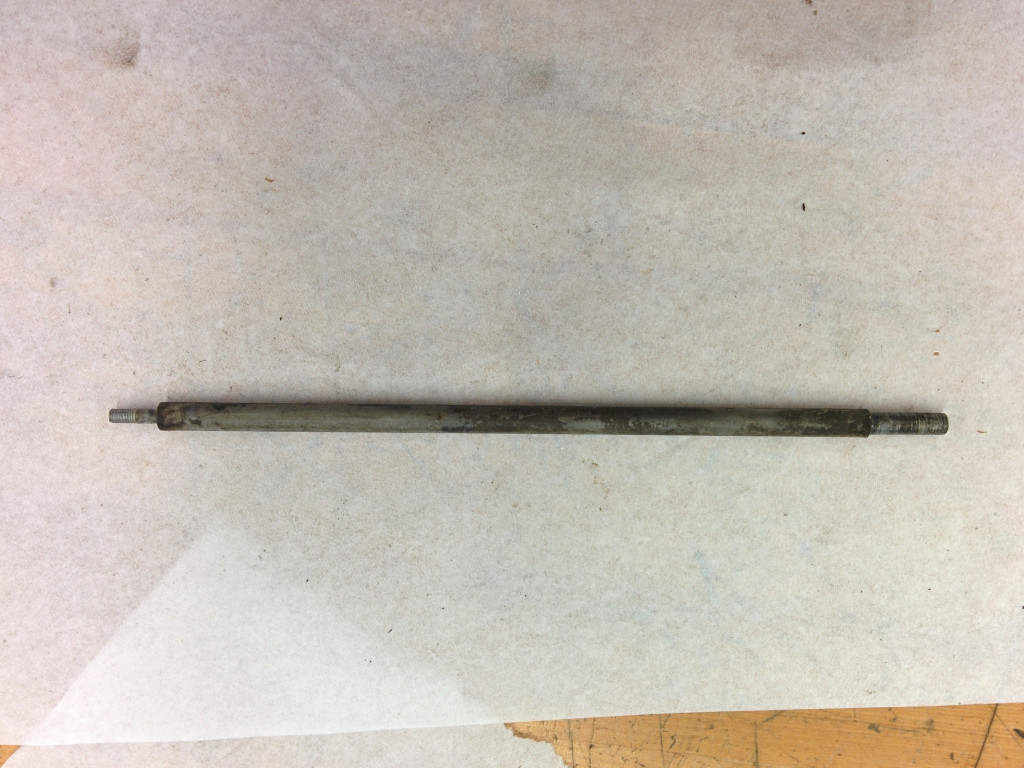
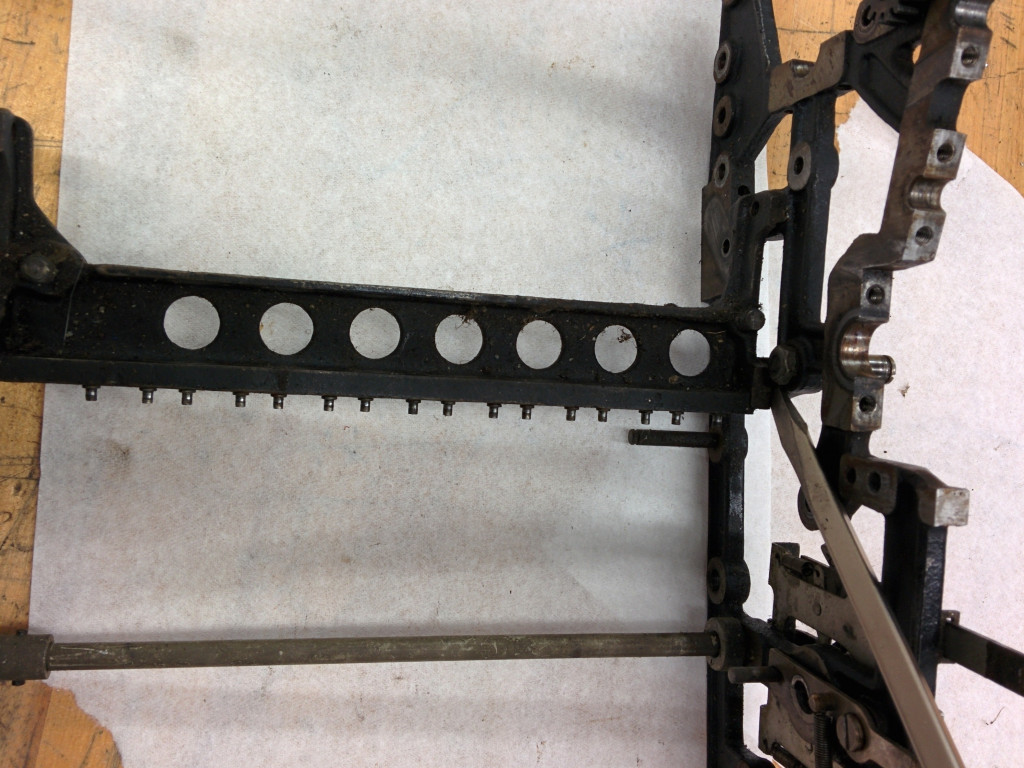
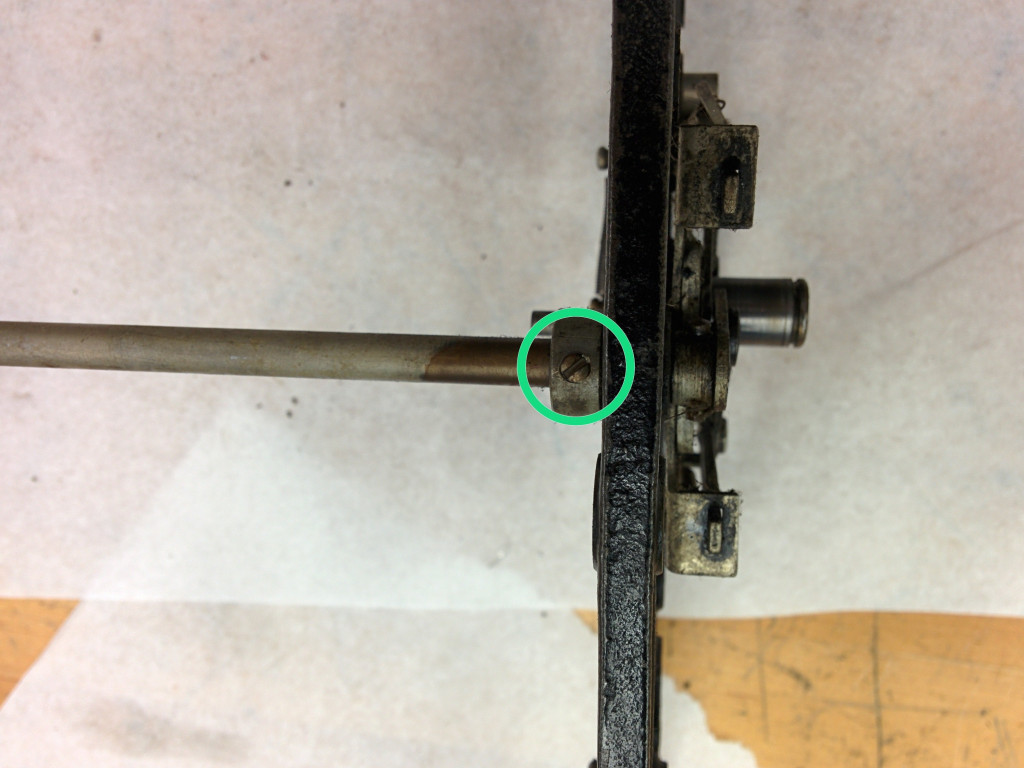
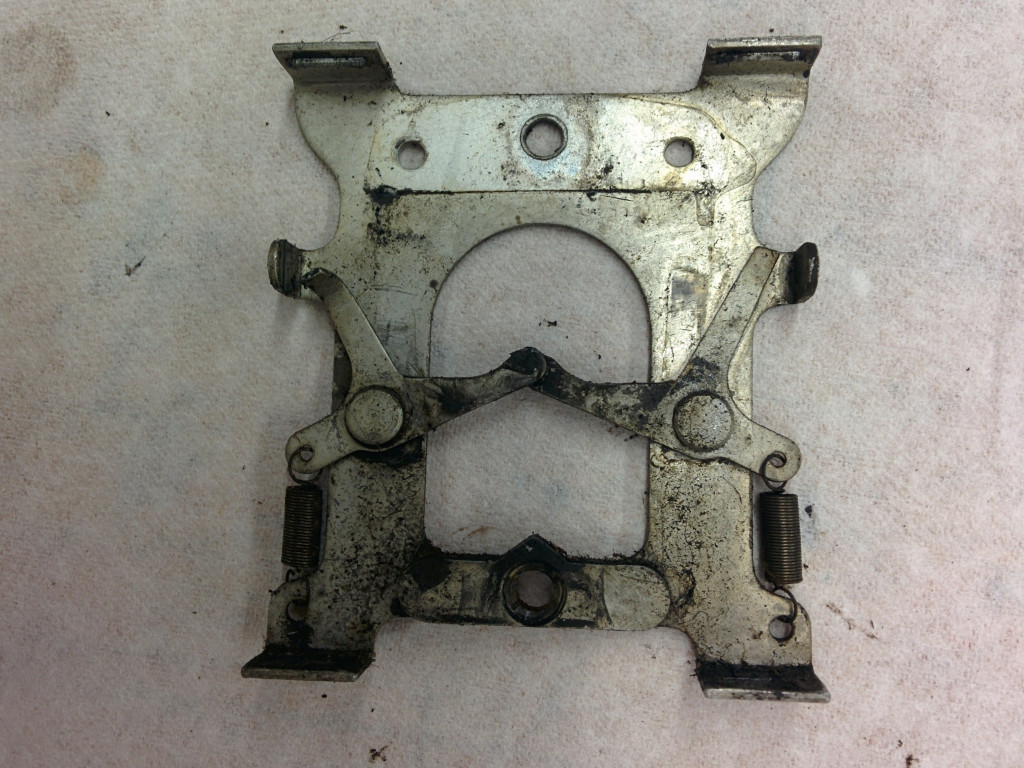
Этот вал проходит по длине каретки. Выдвиньте это вправо. Вам, вероятно, придется поворачивать карету вверх и вниз, чтобы она вышла. Девяносто лет воздействия воздуха не могли быть хорошими для этого.
Теперь полностью снимите каретку.
Эта другая часть отрывается с этим.
Шаг 4
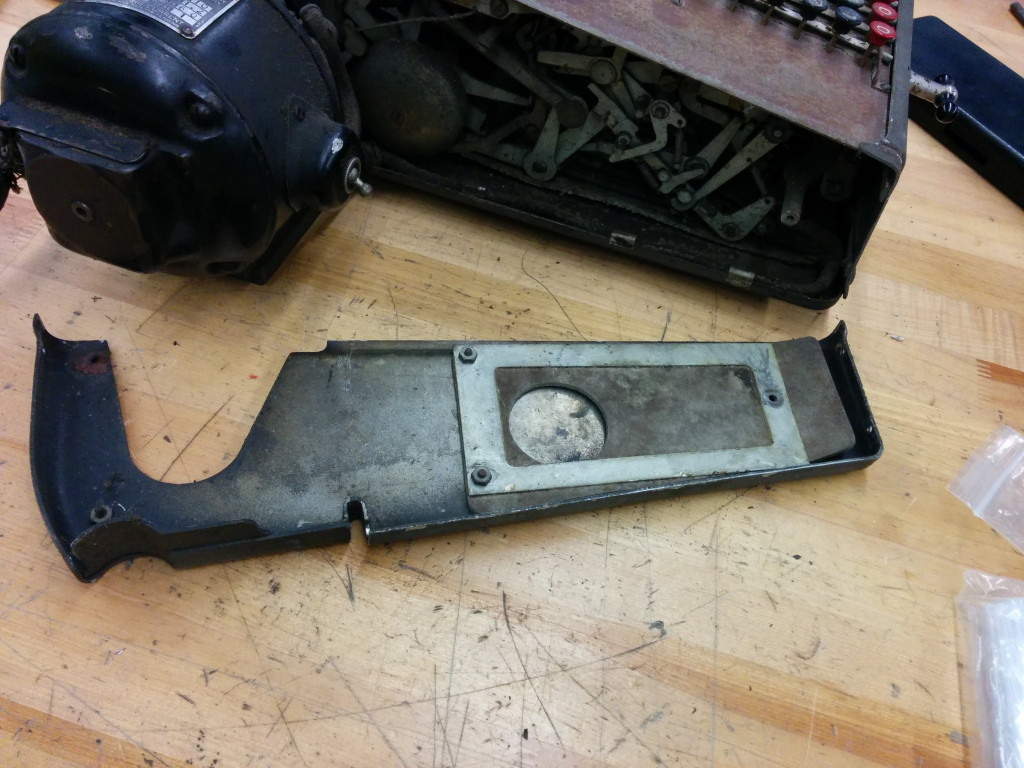
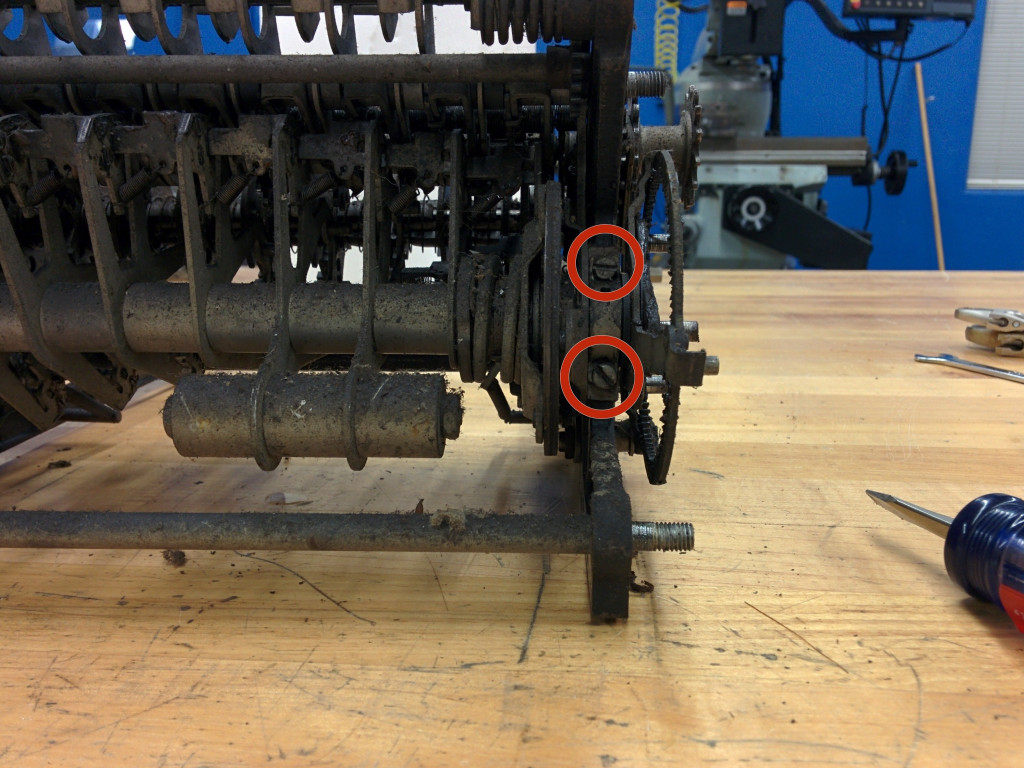
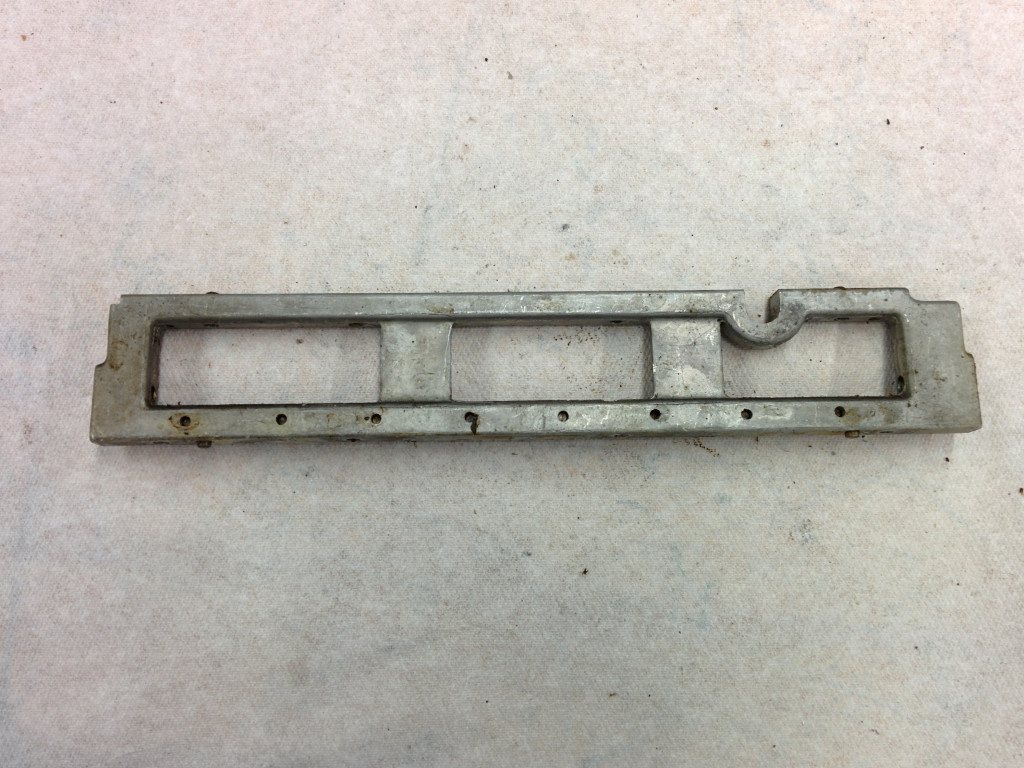
Шаг 5 Снимите правую боковую панель
С обратной стороны удалите эти два винта. Они также '' '# 6-40' '', но о '' '1/4 "' ''.
С передней стороны удалите эти два винта. Они также '' '# 6-40, 1/4 "' ''.
Сумка всех этих винтов в сумке № 1.
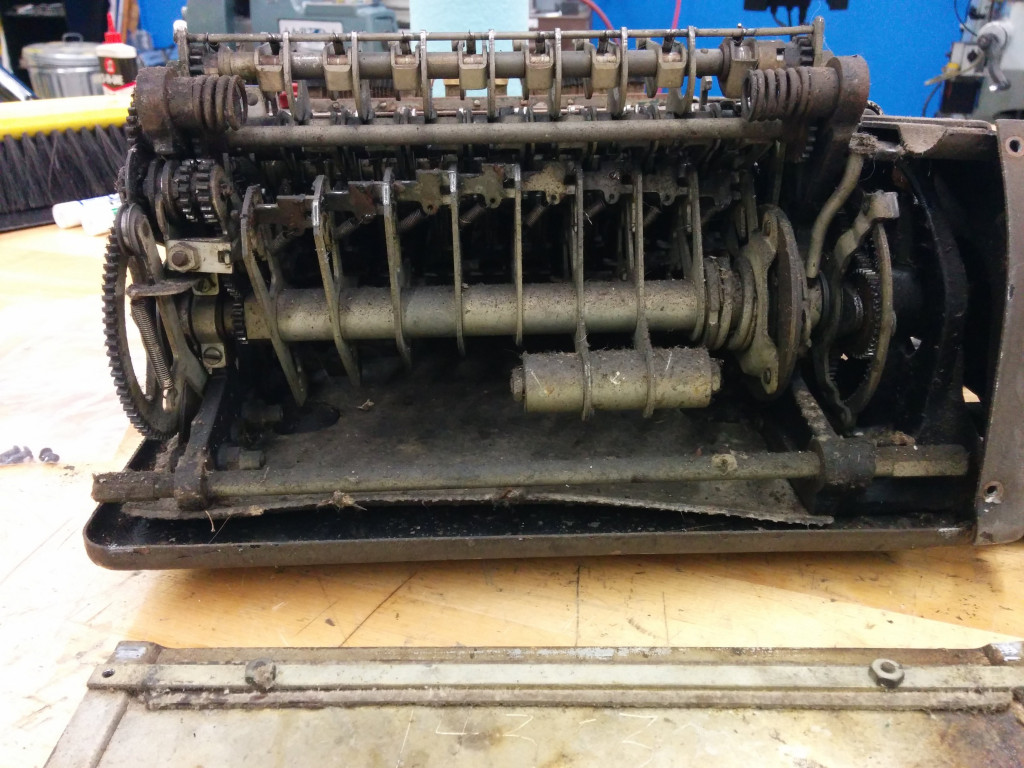
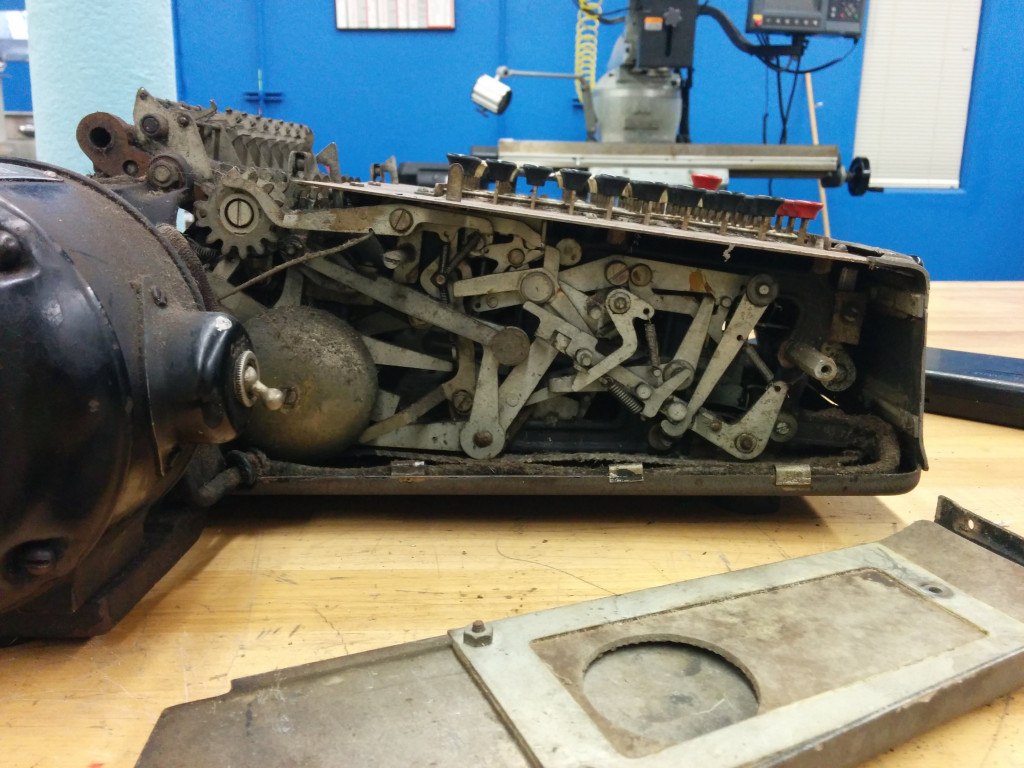
Шаг 6
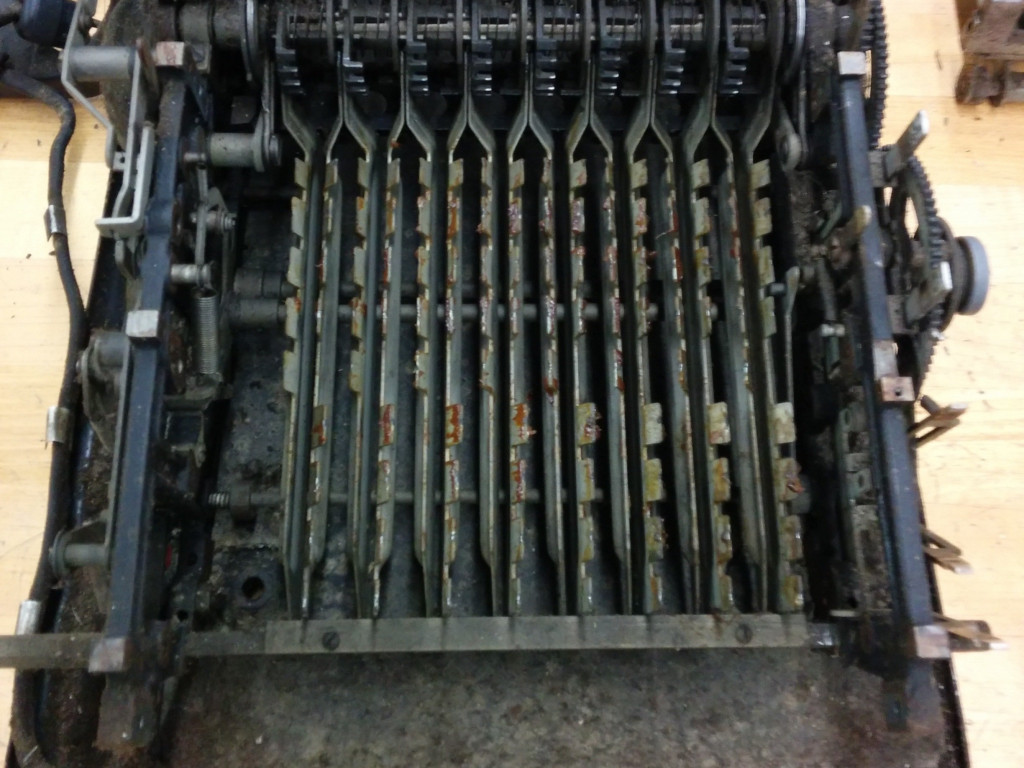
Посмотрите на эти внутренности!
Боже, там грязно и пыльно. Вау, гадость
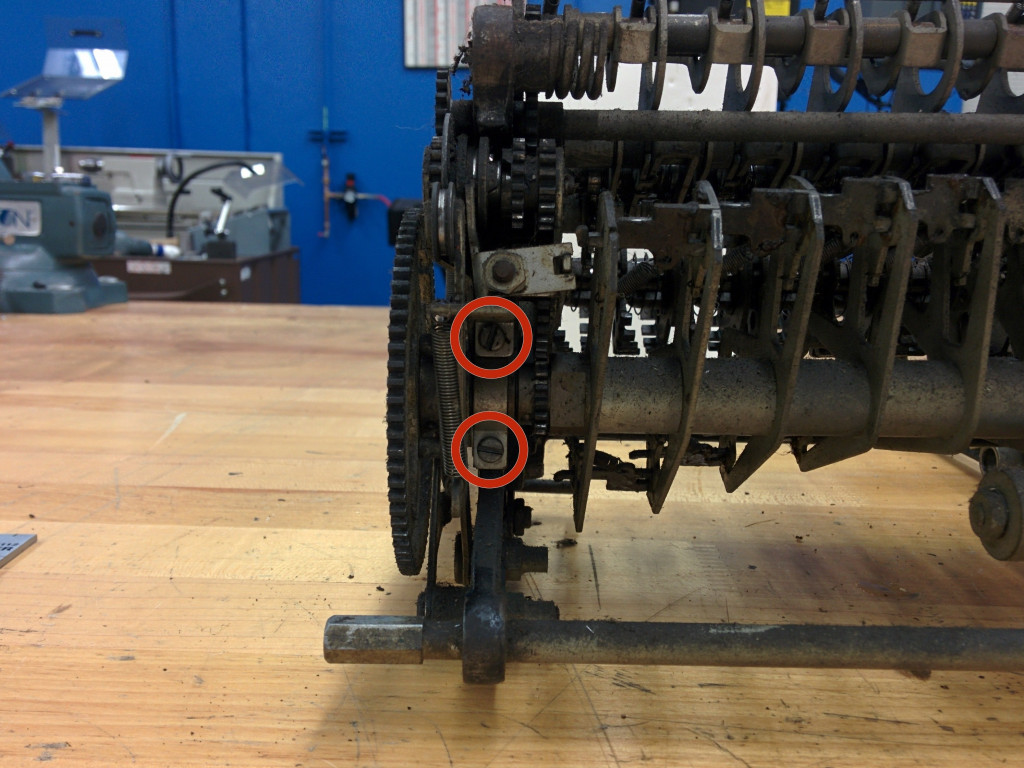
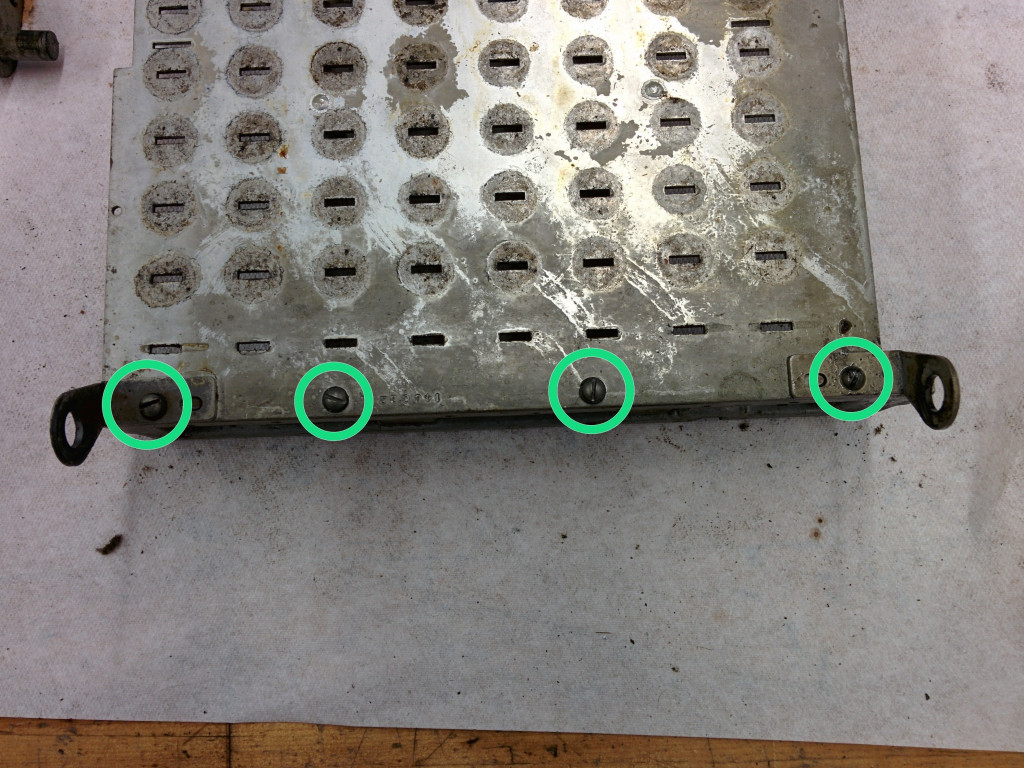
Шаг 7 Снимите заднюю панель
Они идут в сумку № 1.


Шаг 8 Запишите серийный номер
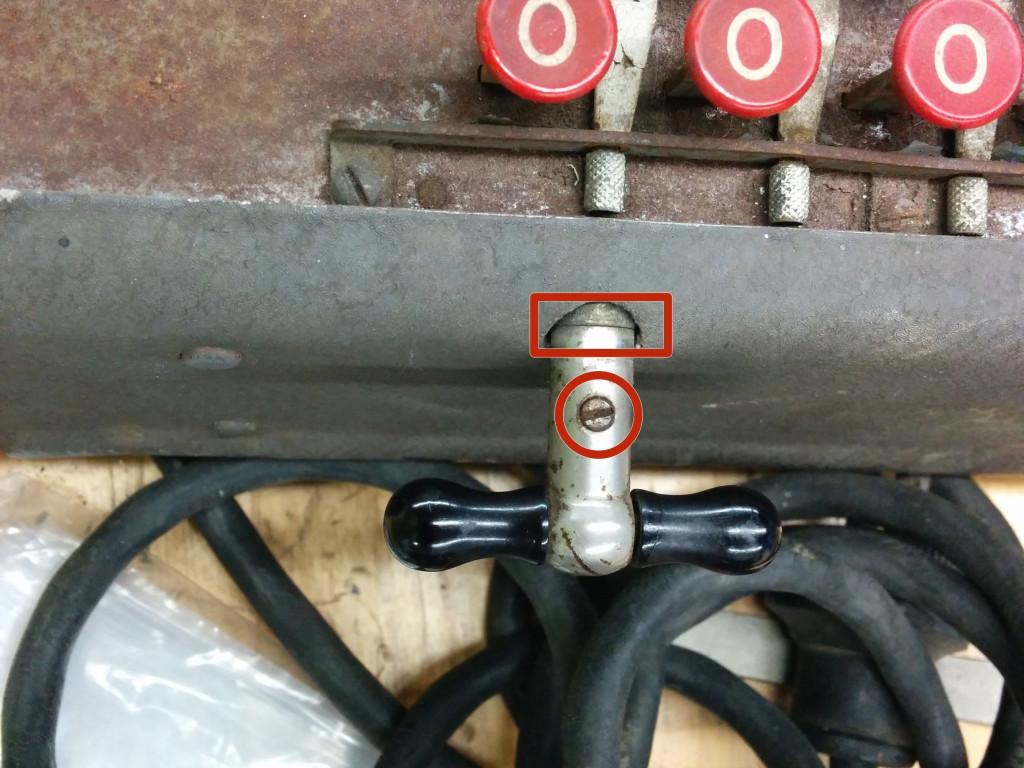
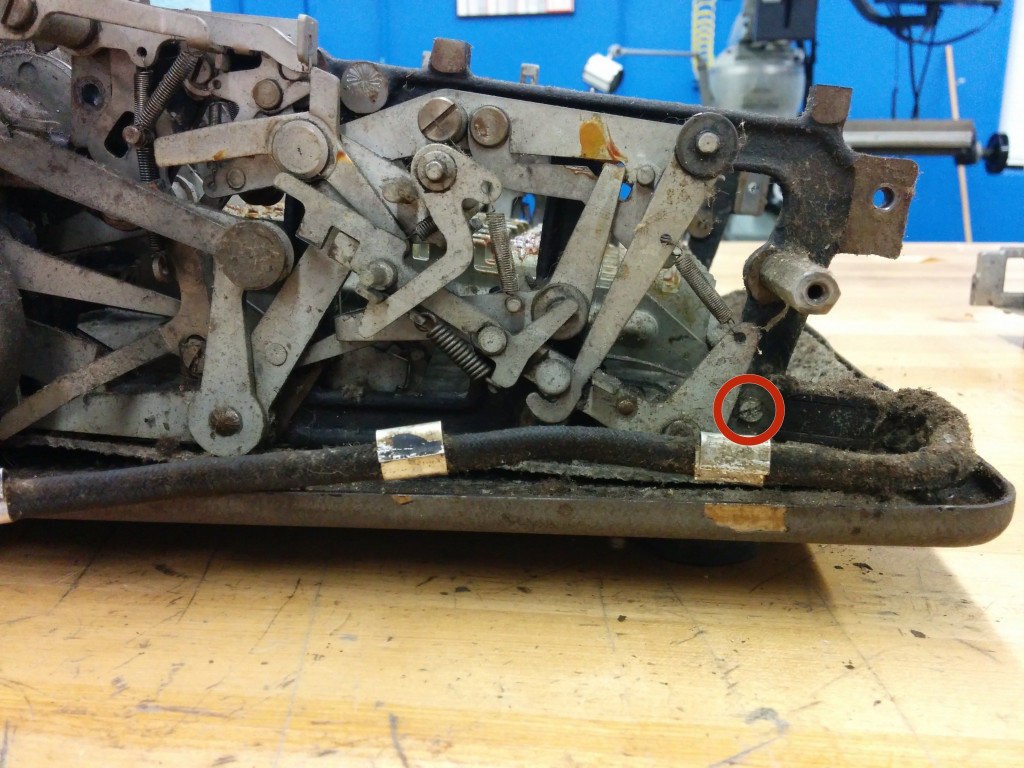
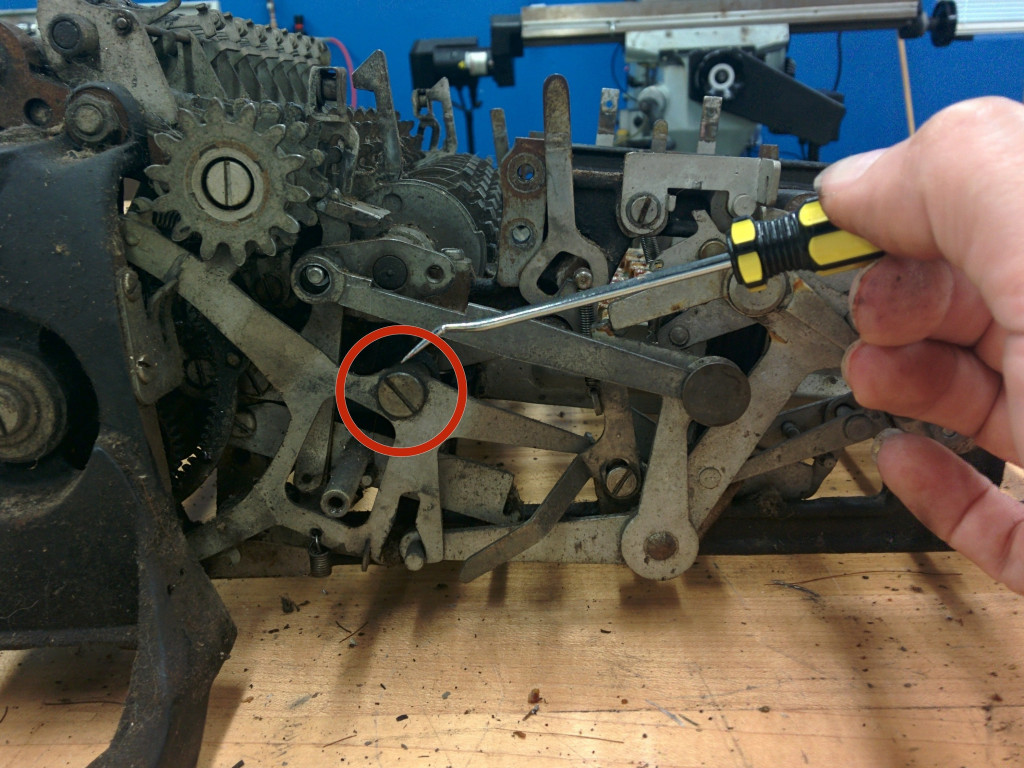
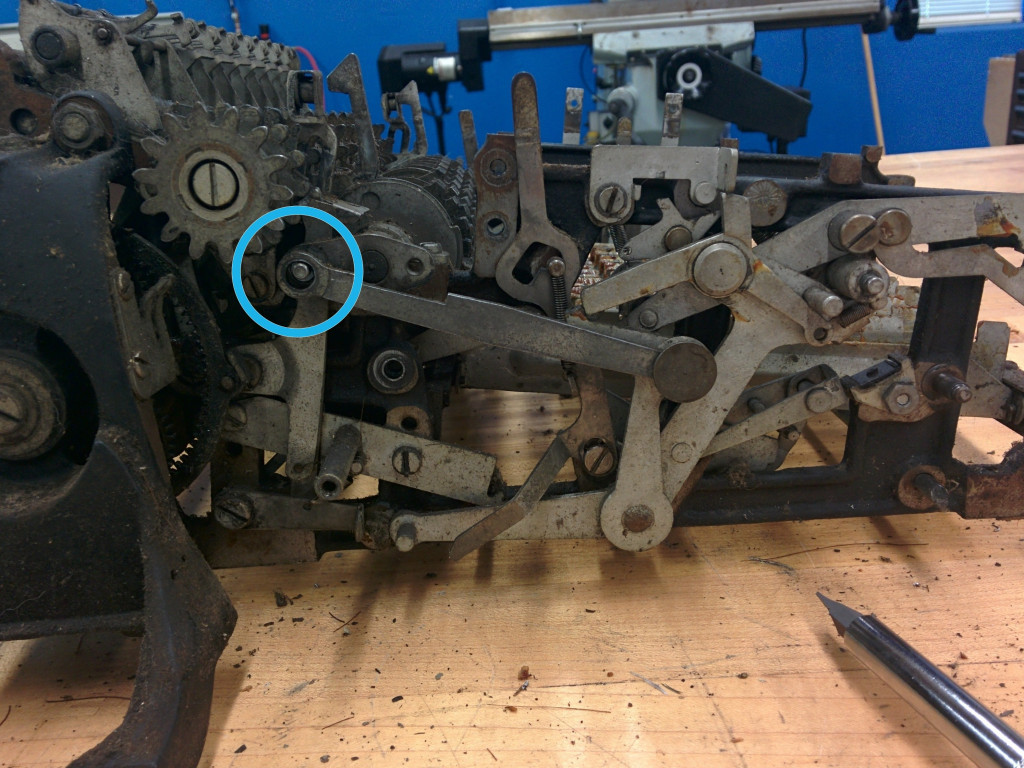
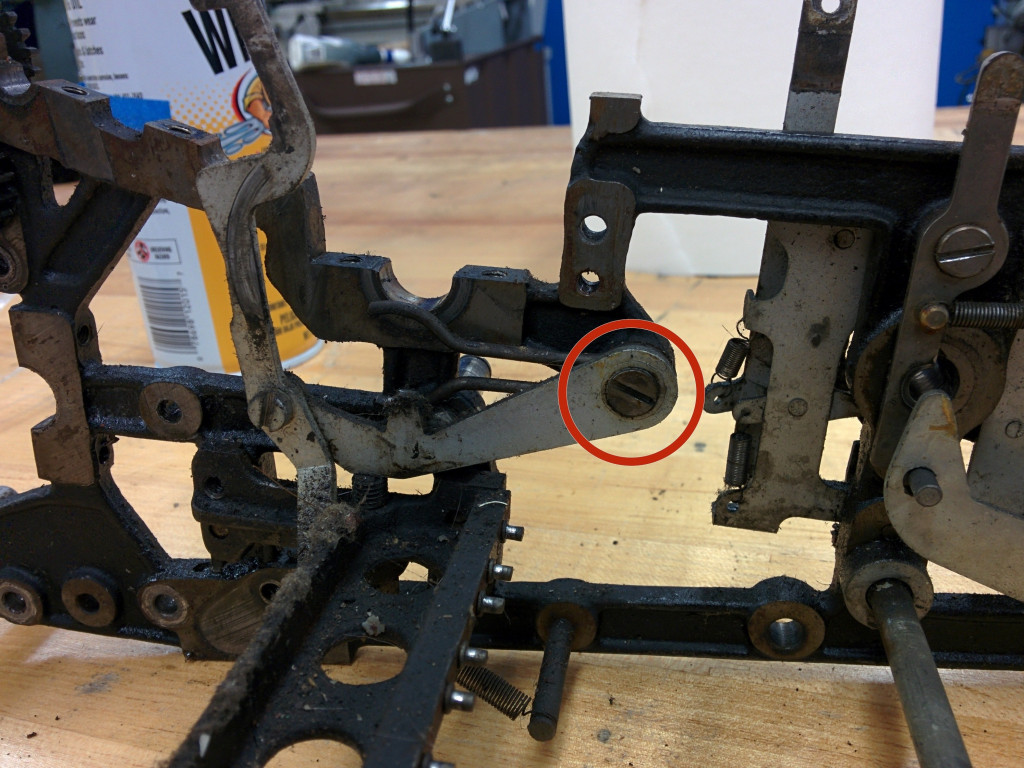
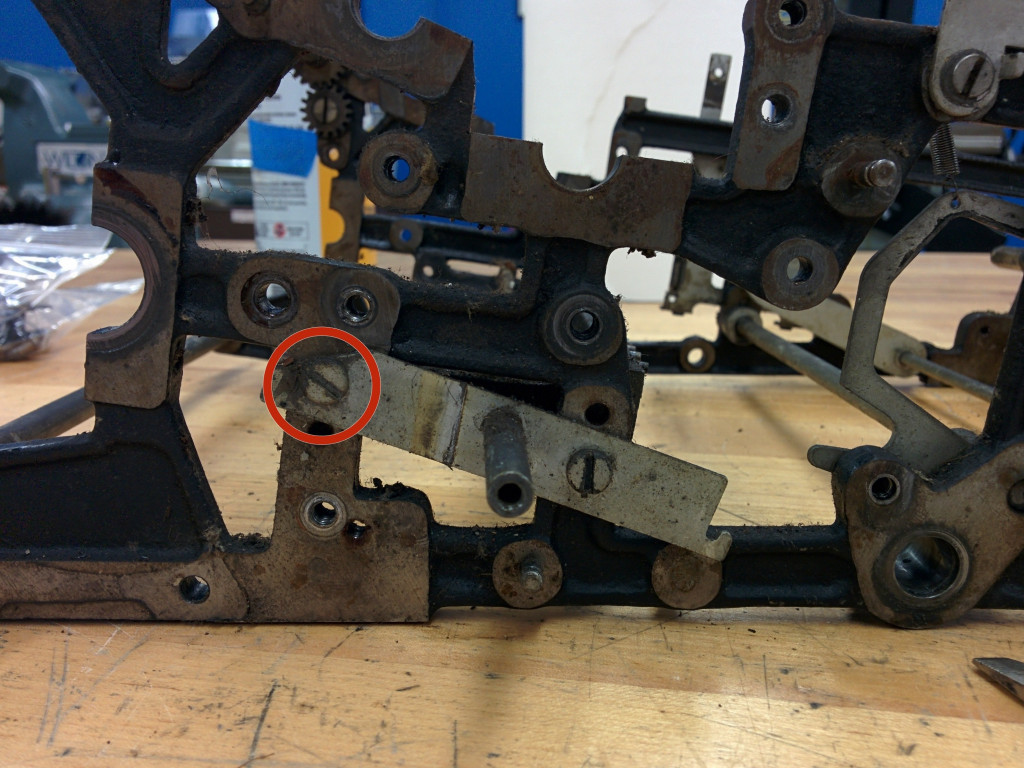
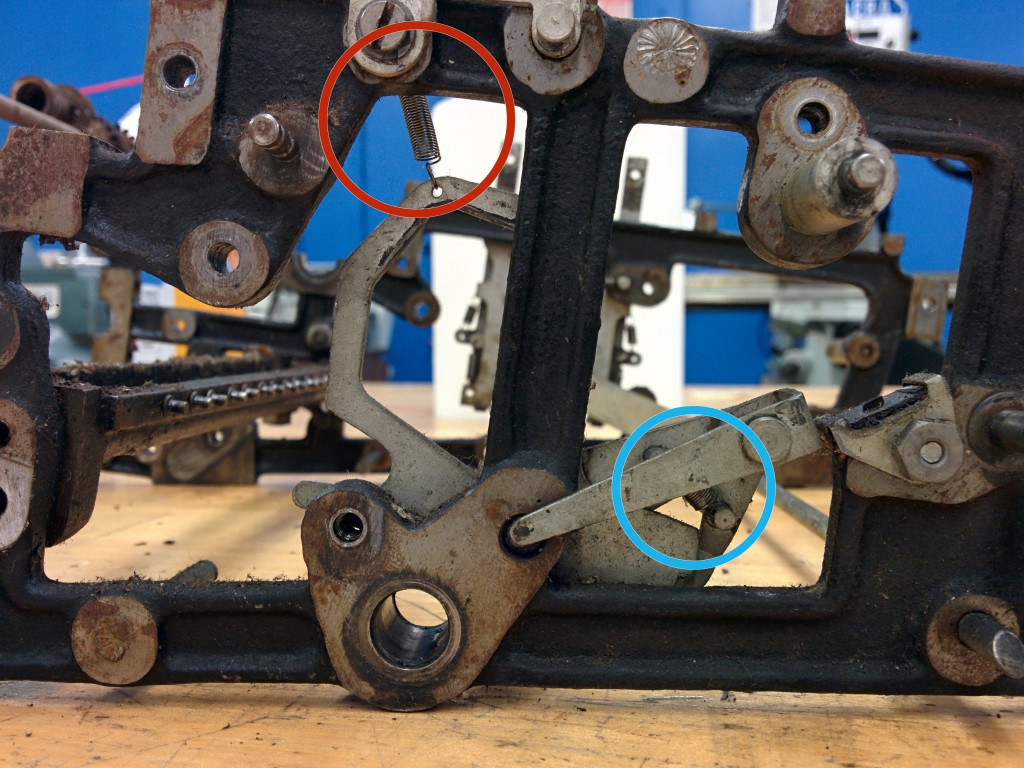
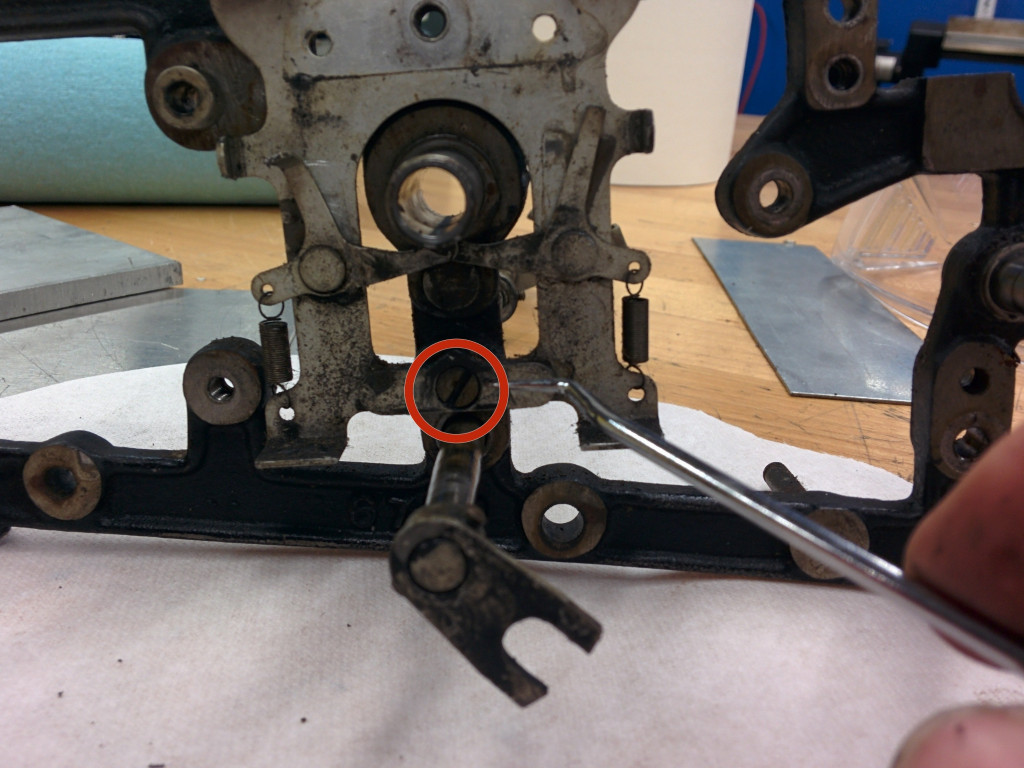
Шаг 9 Разрушить ручку переключения каретки
Обильно нанесите смазочный пенетрант на винт, отверстие на противоположной стороне и соединительную линию.
Шаг 10 Снимите левую боковую панель
Поднимите вверх и выключите.
Шаг 11
Я немного покачивал органы управления, пытался разобраться в этом около часа, и когда я не мог сделать из этого ни головы, ни хвоста, я взял молоток на вещь.
Частично, этот разрыв является извинением за этот момент насилия. Это были 70-е годы. Я уверен, что дискотека должна быть частично виновата.
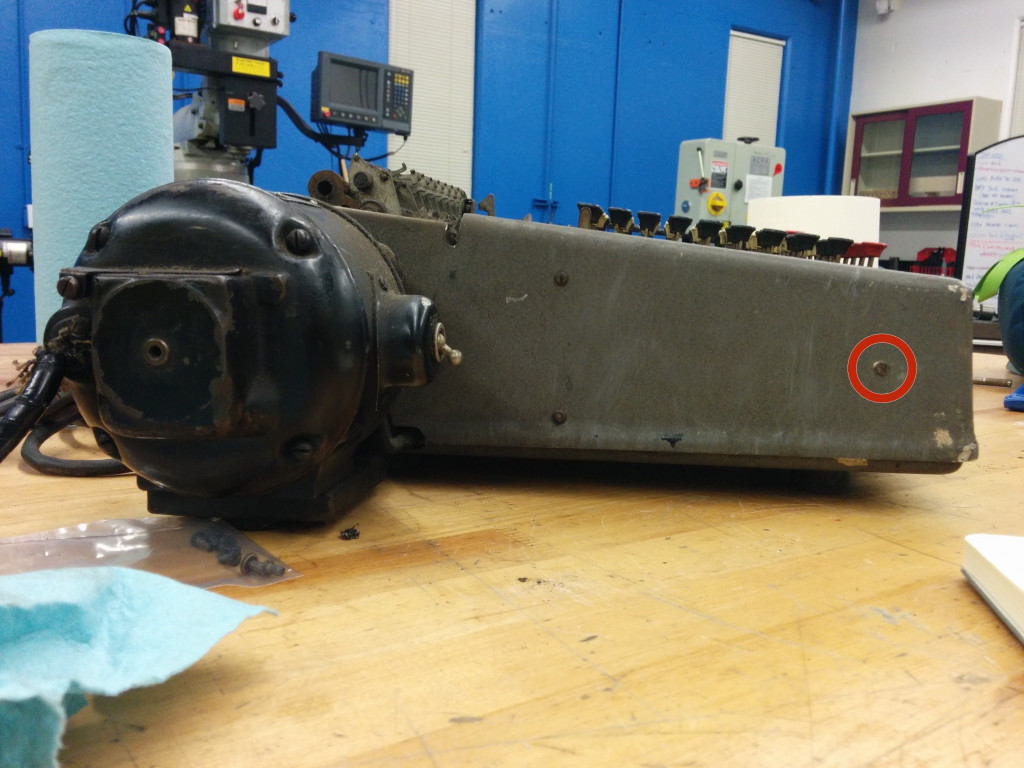
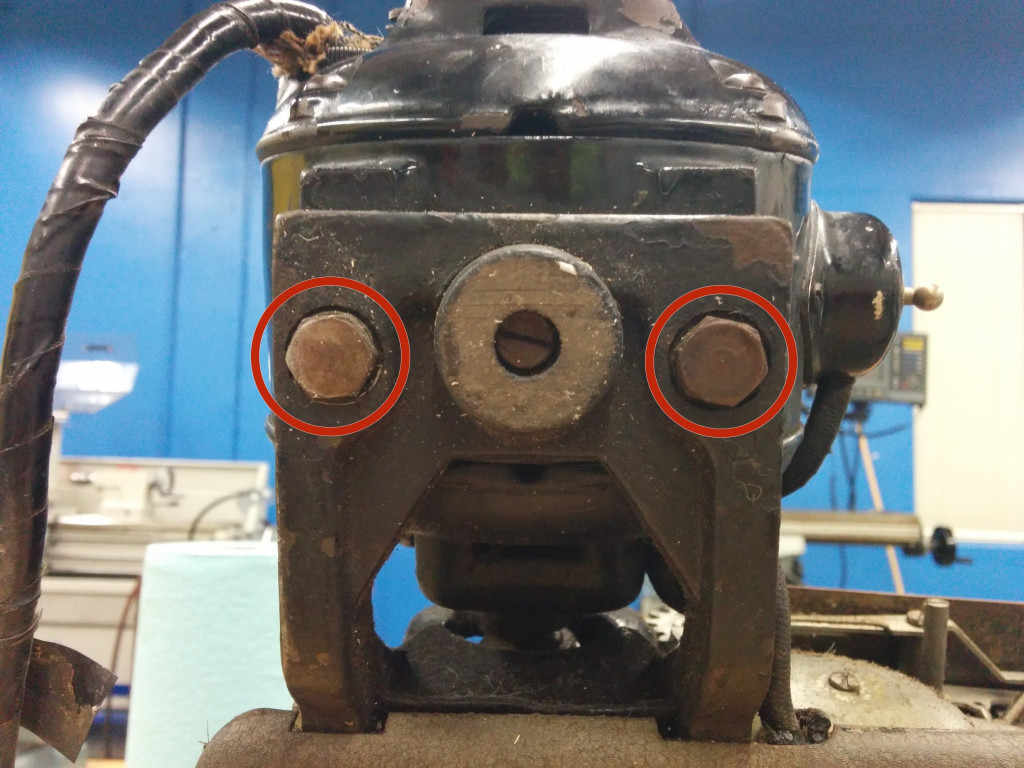
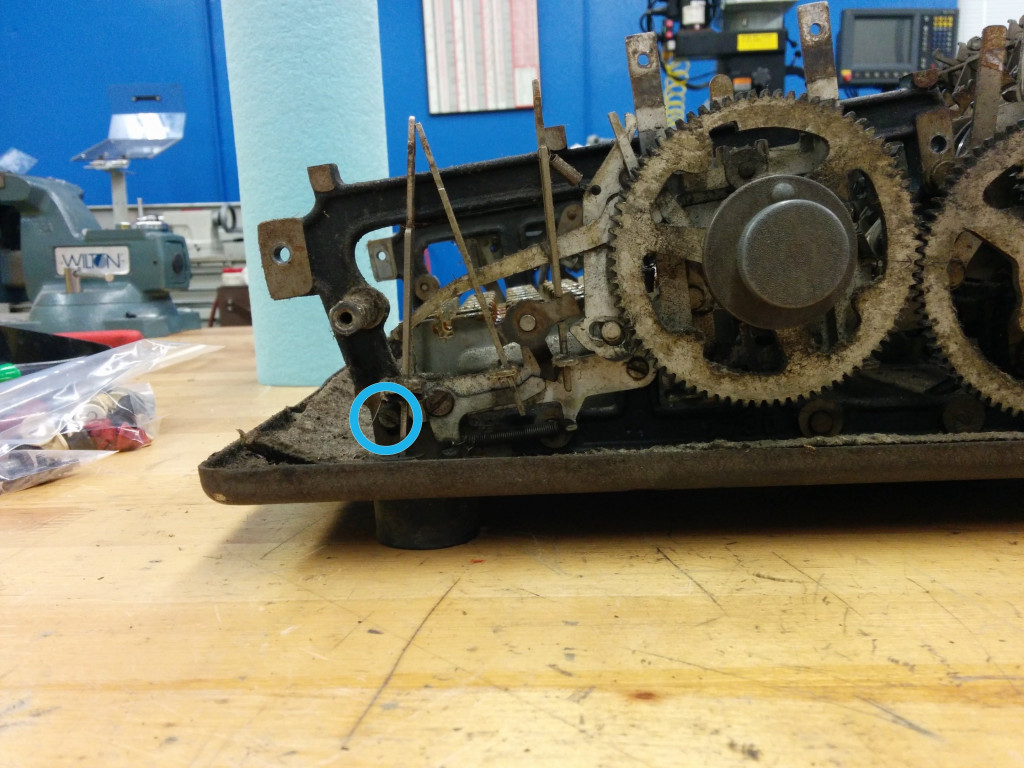
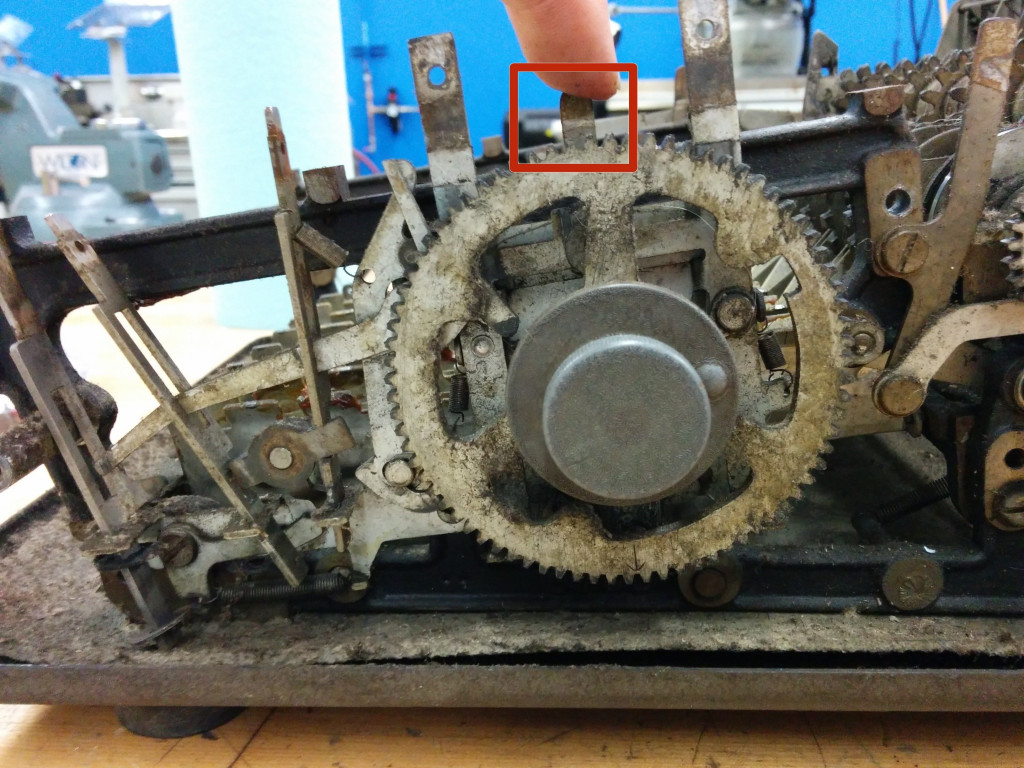
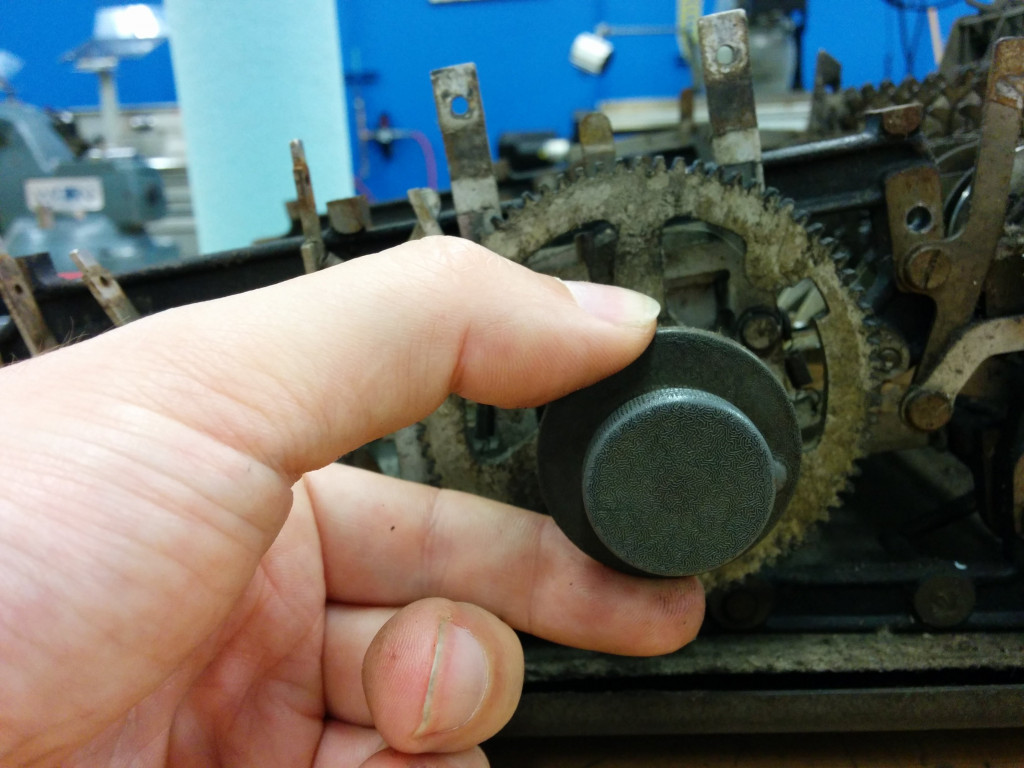
Шаг 12 Снимите мотор
Удалите эти два болта, поместив их в мешок 1.
Наклоните калькулятор обратно вниз.
Снимите мотор и отсоедините провод, соединяющий его с калькулятором.
Отложите это в сторону.
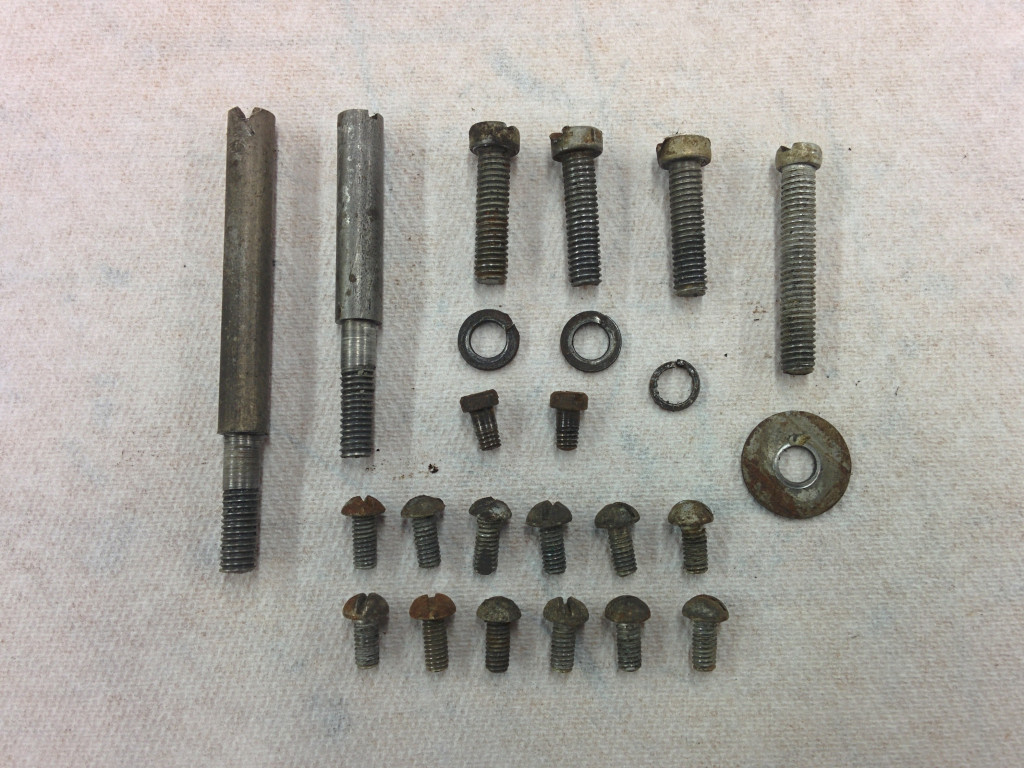
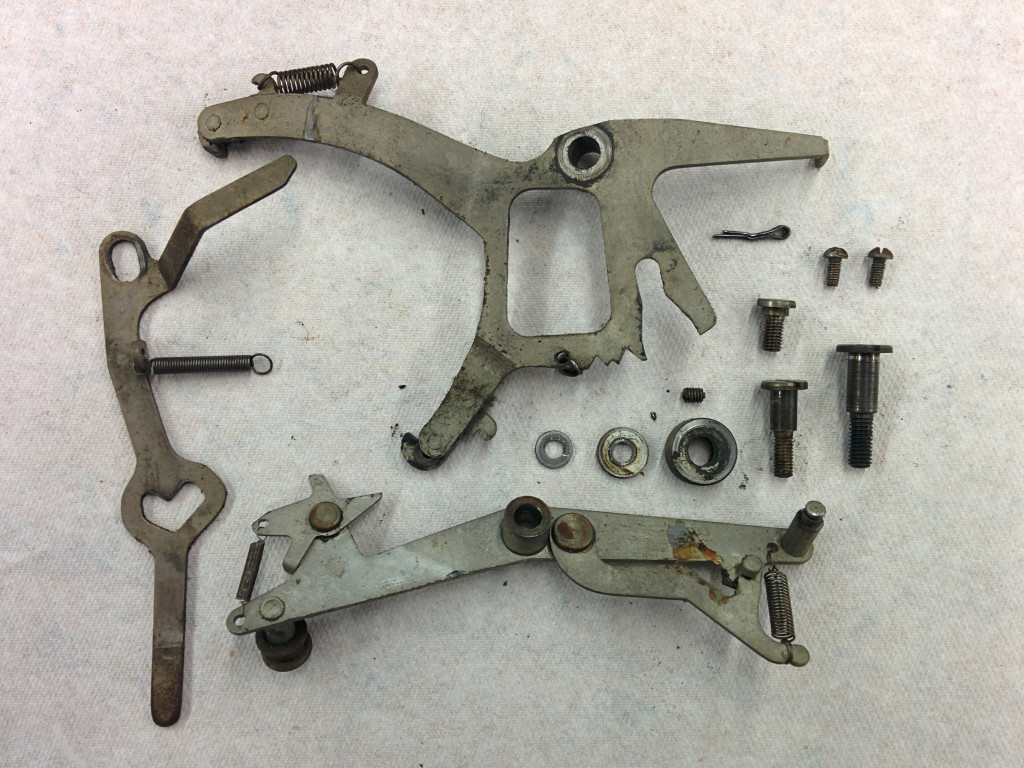
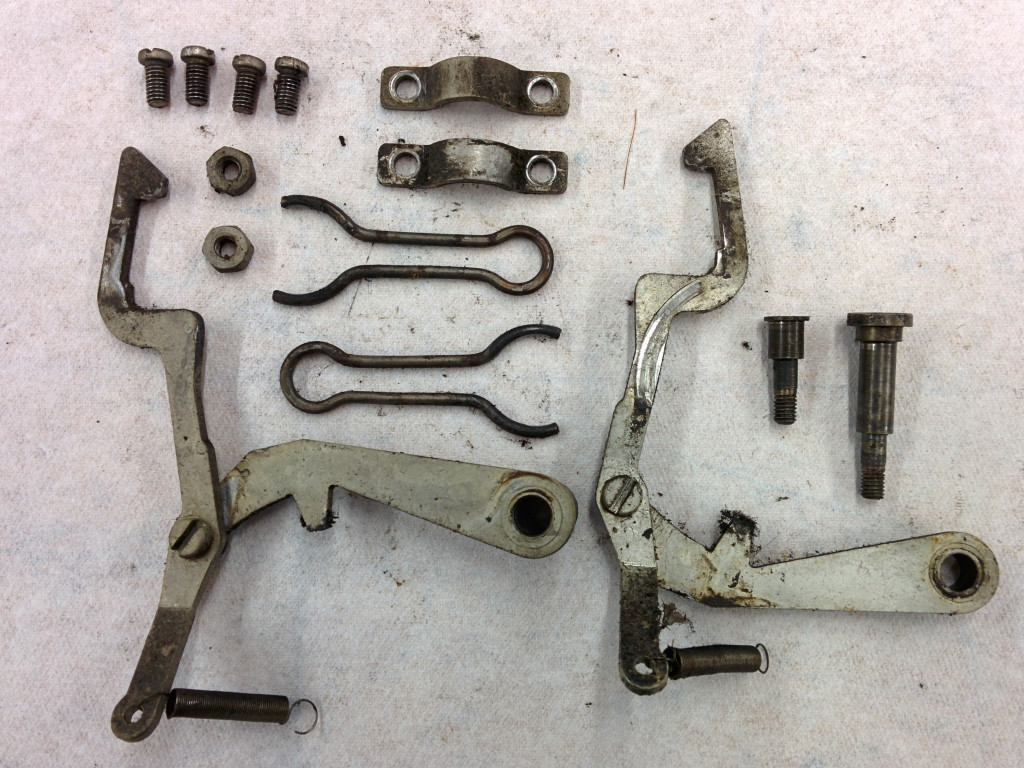
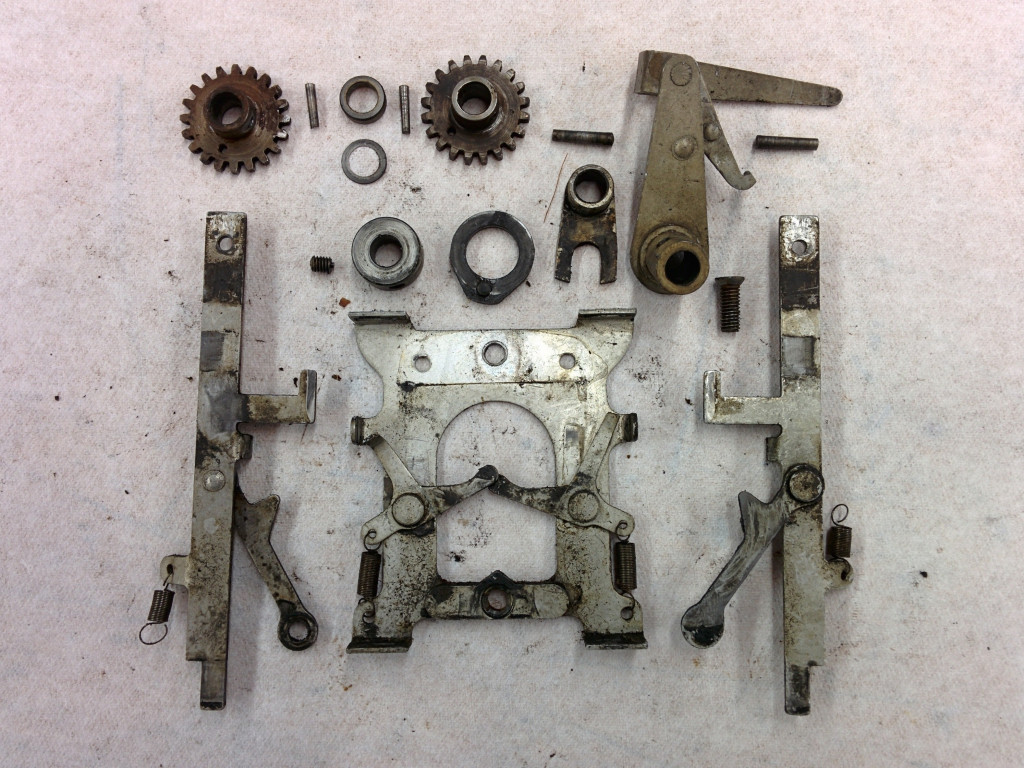
Шаг 13 Что в сумке 1?
8x крепежный винт, № 6-40, 1/4 "
3х крепежных винта, № 6-40, 3/8 "
1x крепежный винт, № 8-36, 5/16 "
2 болта с шестигранной головкой, 5/16-18, 7/8 "
2-х секционная стопорная шайба, 5/16 "
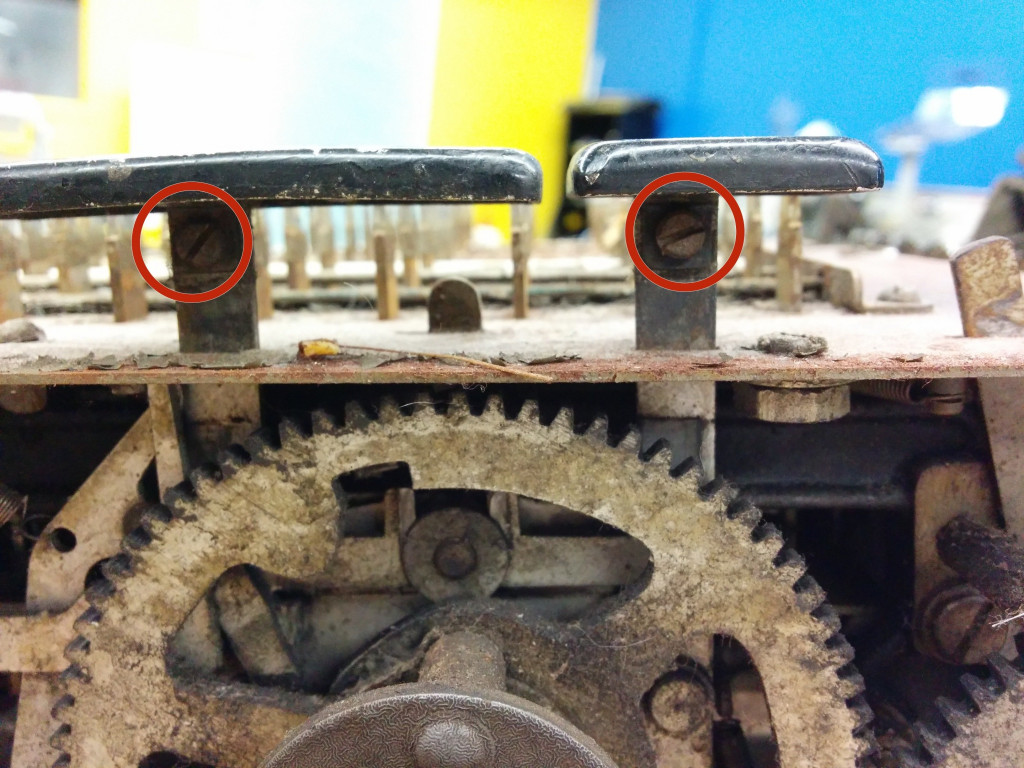
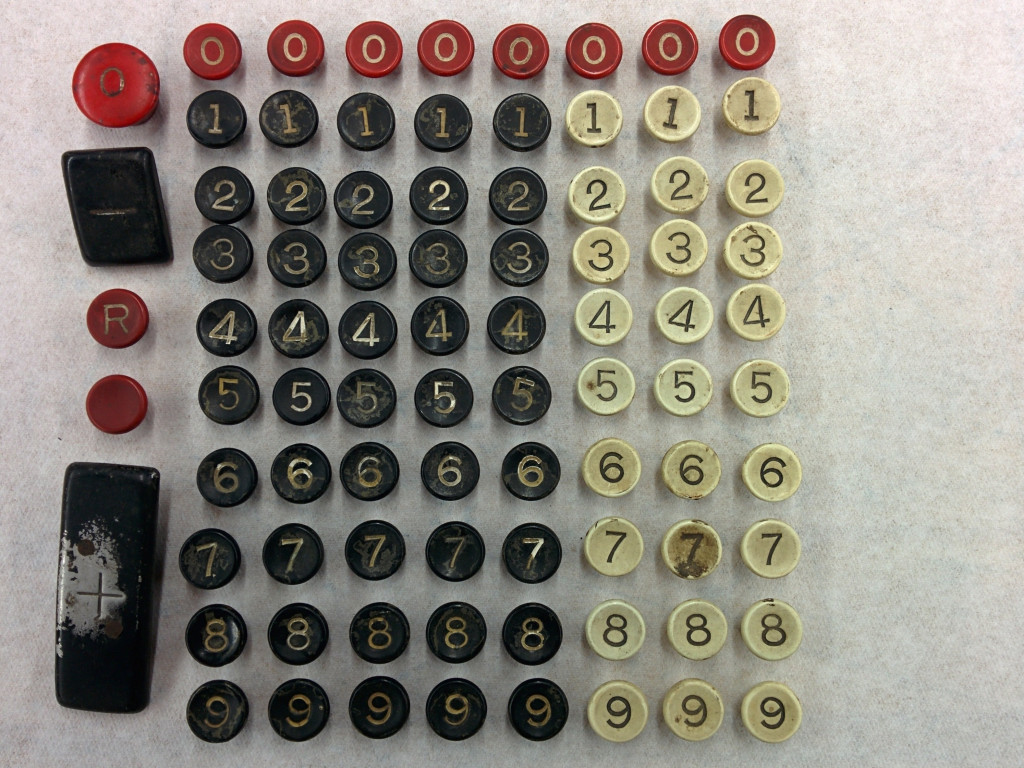
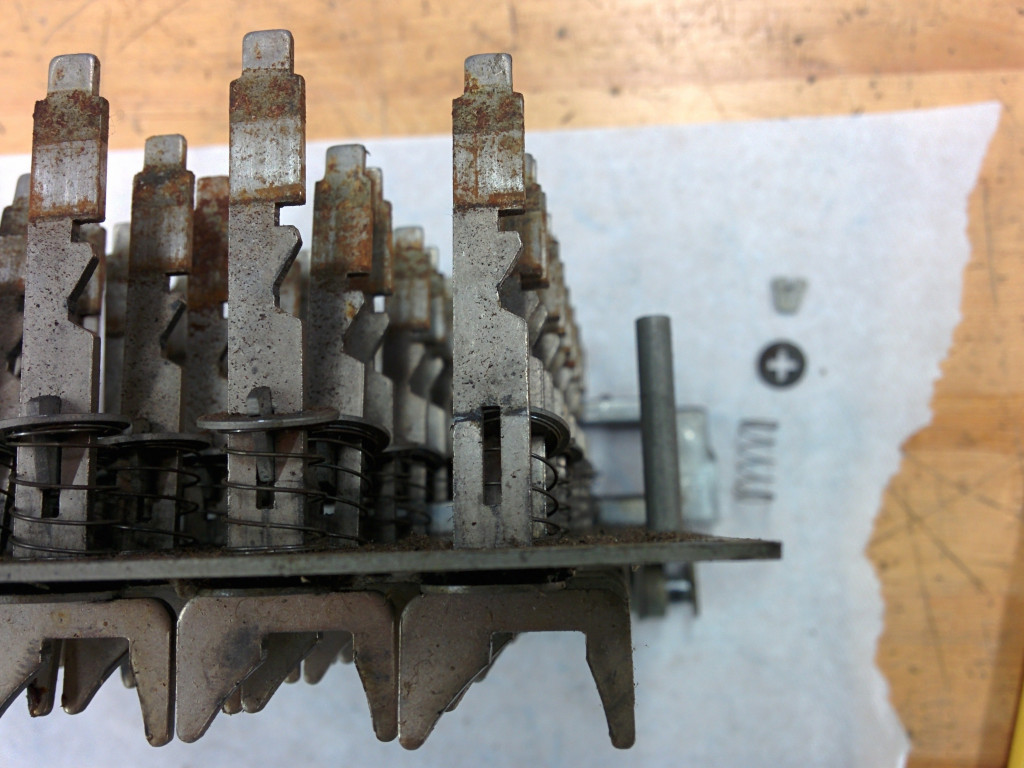
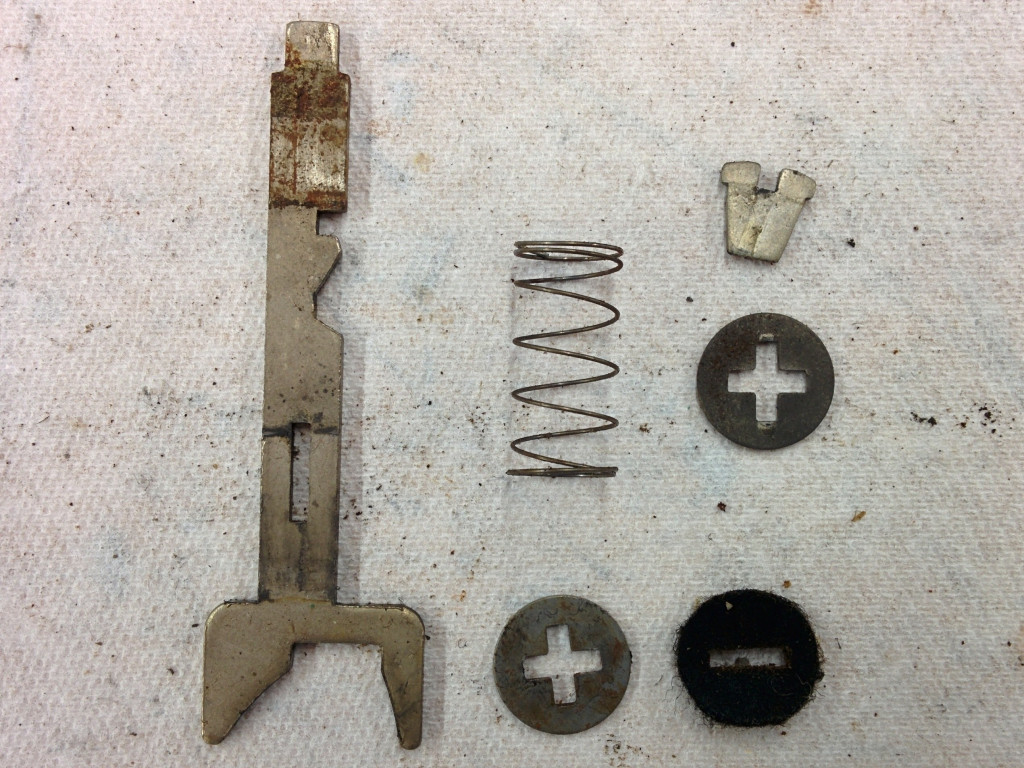
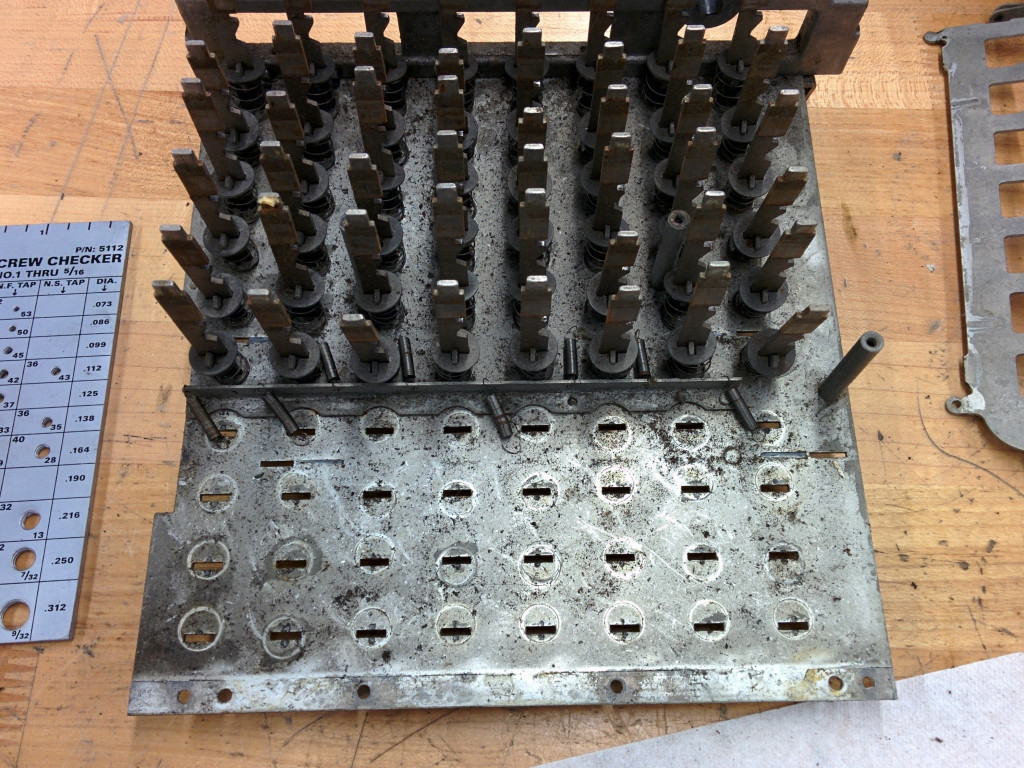
Шаг 14 Снять заглавные буквы
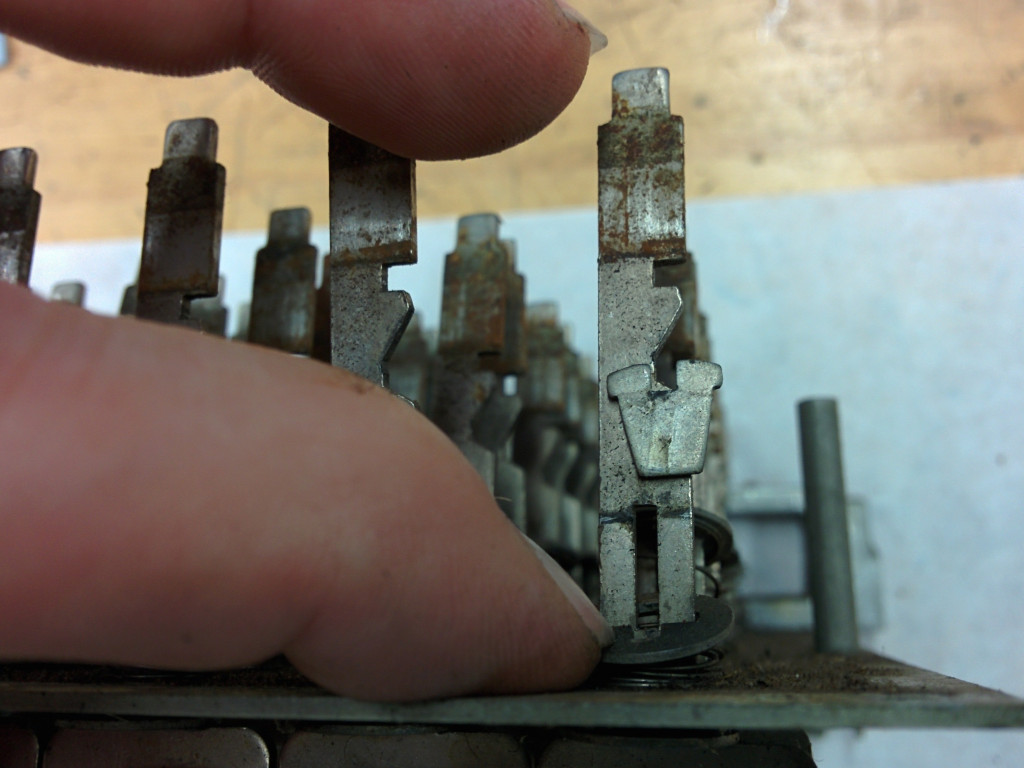
Потяните '' прямо вверх '' на 80 цифровых клавиш, нулевую клавишу, клавиши повтора и неповторения. Большинство должно оторваться от руки, но вам придется использовать плоскогубцы, чтобы подтянуть упрямые. Поместите челюсти под ключи и поднимите их. Используйте тряпку, чтобы защитить калькулятор от челюстей.
Положите все ключи в сумку № 2.

Шаг 15 Удалите ключи сложения и вычитания
Вытяните ключи сложения и вычитания.
Поместите ключи сложения и вычитания в сумку 2.
'' 'Начните новую сумку 3' '' и вставьте в нее винты.
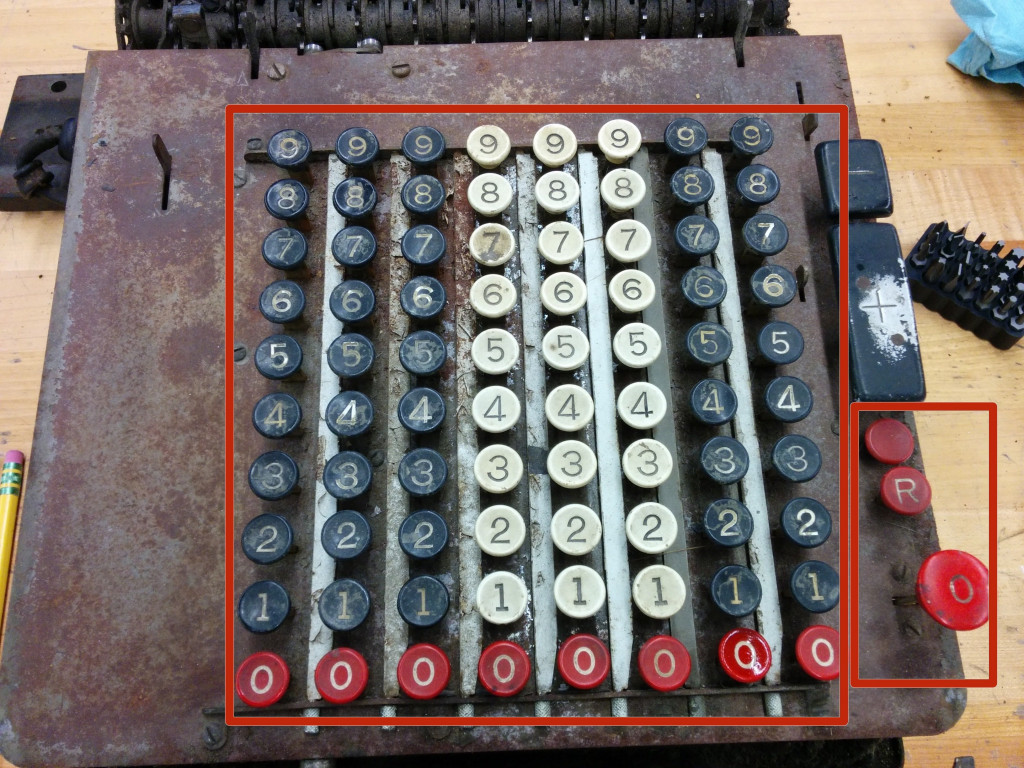
Шаг 16 Что в сумке 2?
1x ключ обнуления
1x повтор (R) ключ
1x неповторяющийся (пустой) ключ
1x добавить ключ
1x ключ вычитания
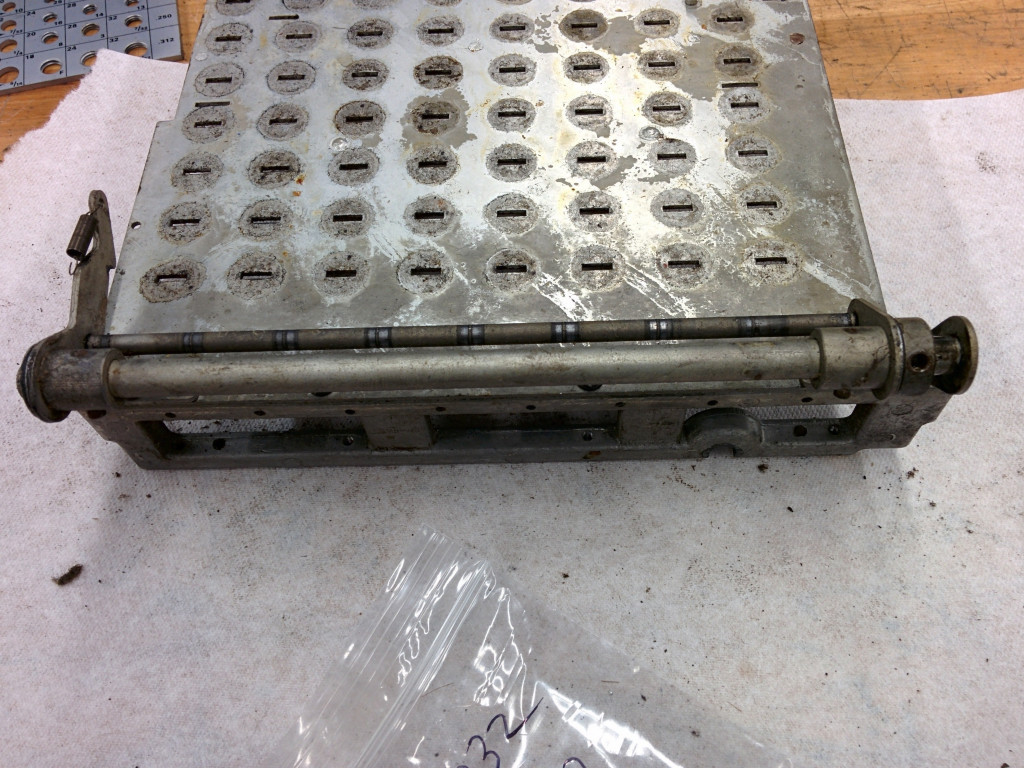
Шаг 17 Удалить десятичные показатели
Поместите винты в сумку 3.
Снимите целую сборку десятичных индикаторов и отложите их в сторону.
Похоже, они были окрашены в белый цвет с одной стороны и зеленый с другой. Но кто может сказать, под всей этой грязью.
Шаг 18
Поднимите верхнюю панель, потянув одну сторону, затем другую, пока все не оторвется. Он оторвется от передней панели.
Отложите верхнюю / переднюю панели в сторону.
По ржавому верху это невозможно отличить, но верх изначально был темно-зеленого цвета.

Шаг 19 Перерыв!
Может подружиться с жабой.

Шаг 20 Убрать клавиатуру
Этот стержневой винт по существу представляет собой винт 8-36, 5/8 "'", прикрепленный к головке "1", диаметром "7/32" ".
С левой стороны удалите этот винт спереди ('' '# 8-36, 5/8 "' ') и винт, который выглядит как вал посередине. Этот также является' '' # 8- 36, 5/8 "'' ', но с головкой' '' 1-1 / 2" x 7/32 "'' '.
Все это входит в сумку 3.
Шаг 21
Отложите всю эту сборку в сторону.
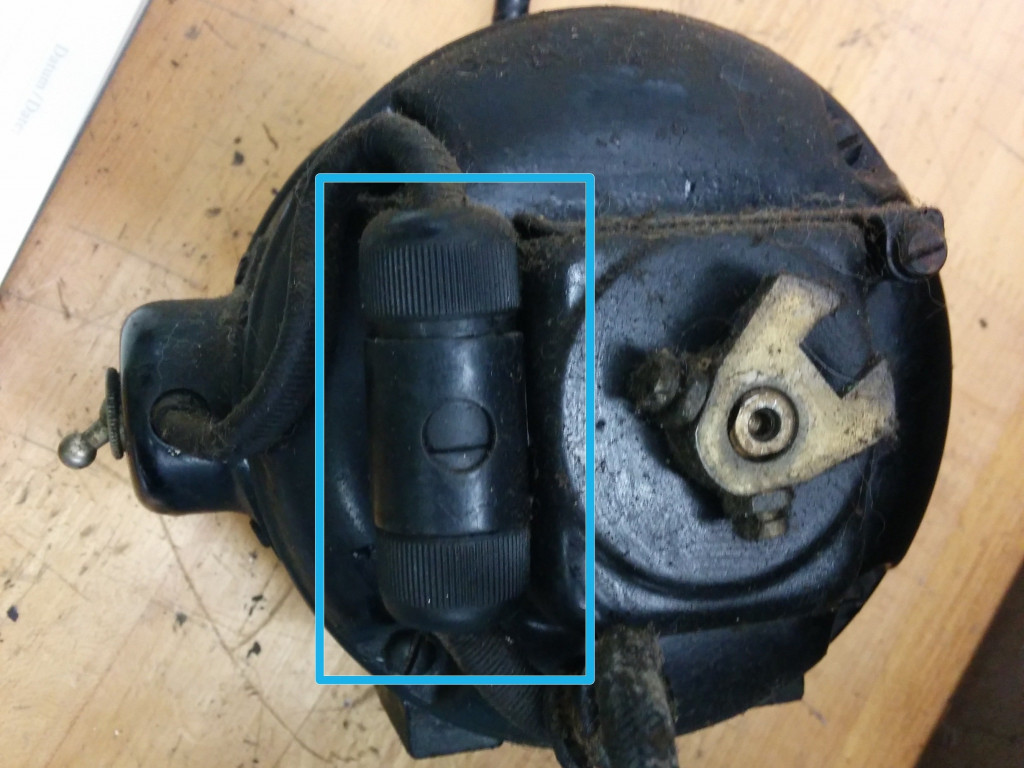
Шаг 22 Снимите выключатель двигателя и провод
Поместите их в сумку 3.
Снимите выключатель и провод и отложите его в сторону.
С левой стороны, удалите соответствующий винт, '' '# 8-36, 5/8 "' ''.
Положите его в сумку 3.
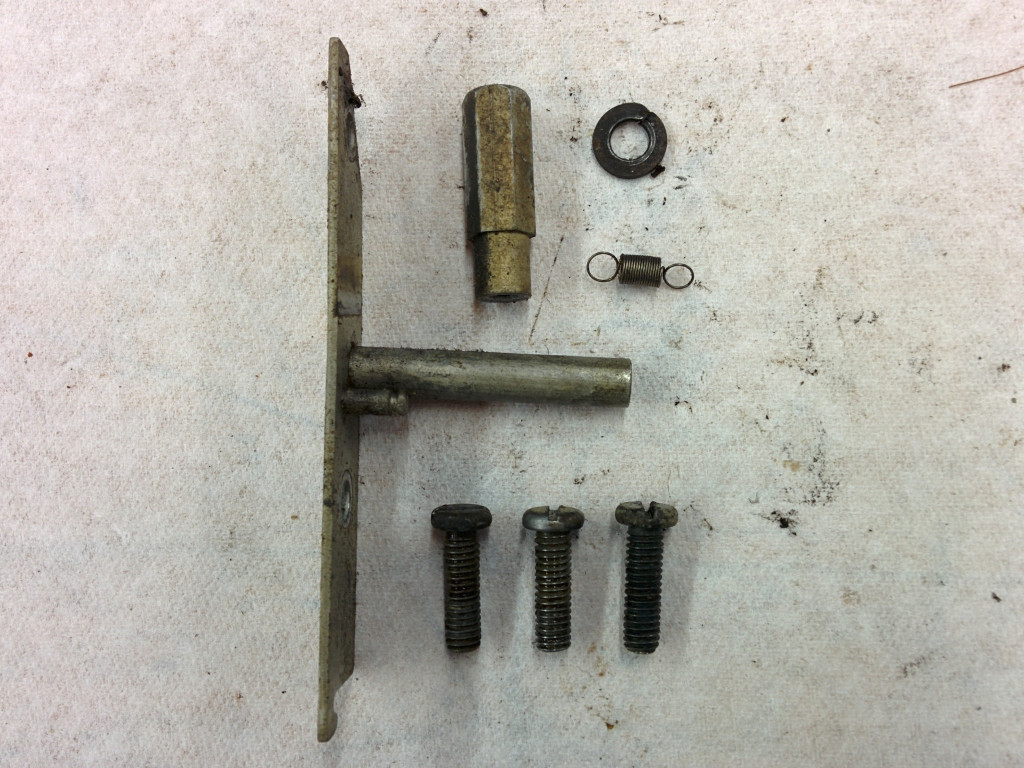
Шаг 23 Что в сумке 3?
2x крепежный винт, № 4-48, 3/16 "
3х крепежных винта, № 8-36, 5/8 "
1x крепежный винт, № 8-36, 1 "
3-х секционная стопорная шайба, № 8
1x плоская шайба, # 8
Шаг 24 Что в сумке 3, продолжение
1x вал с резьбовым концом, диаметр 7/32 ", общая длина 2 1/8", длина хода 1 17/32 ", # 8-36
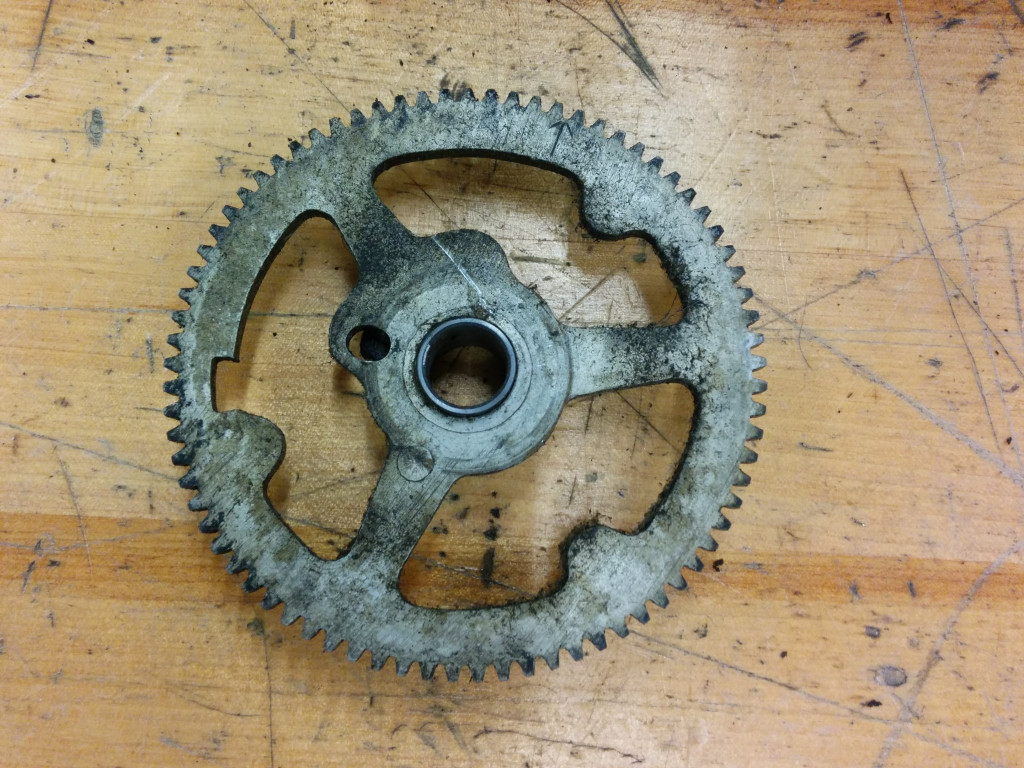
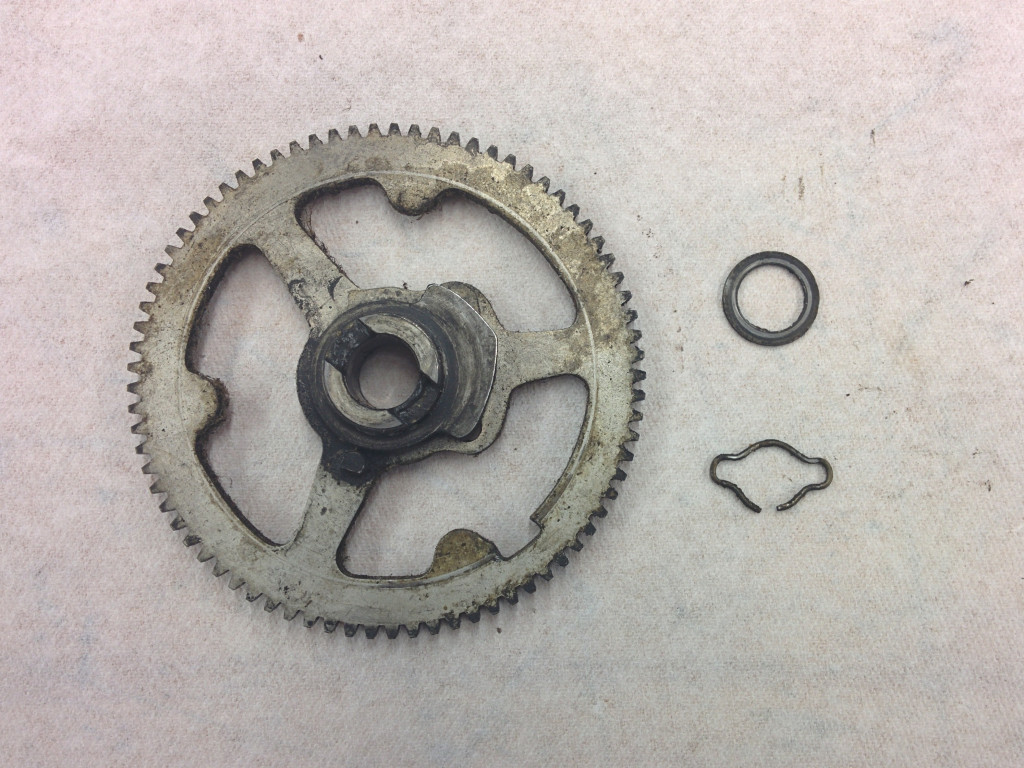
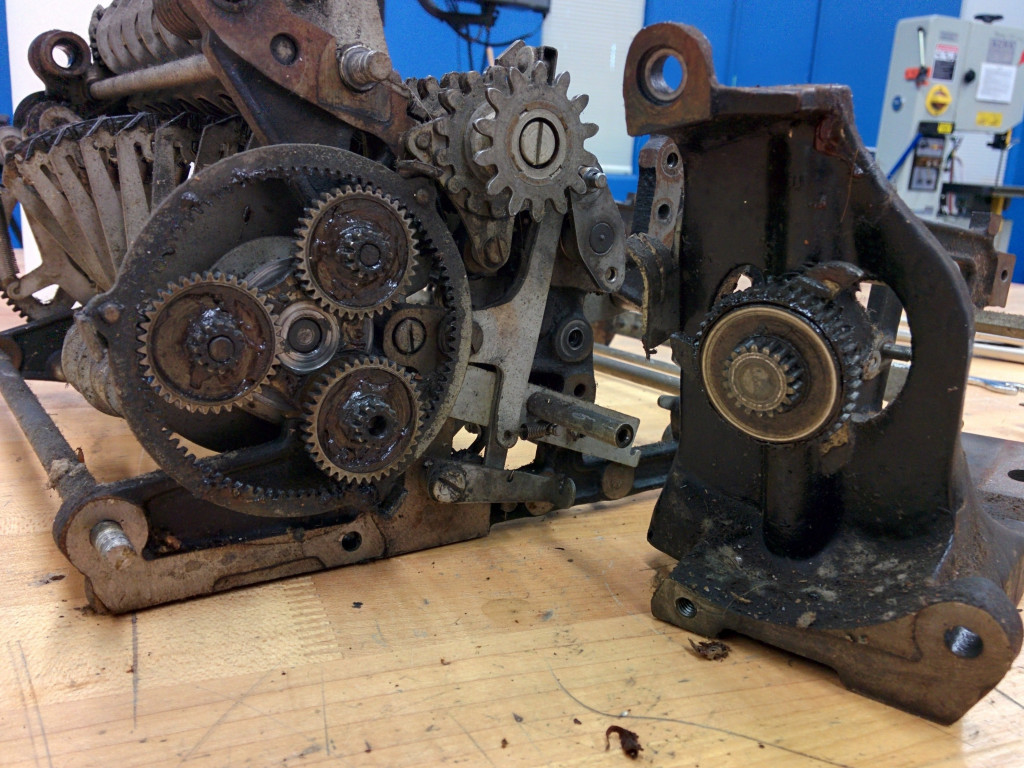
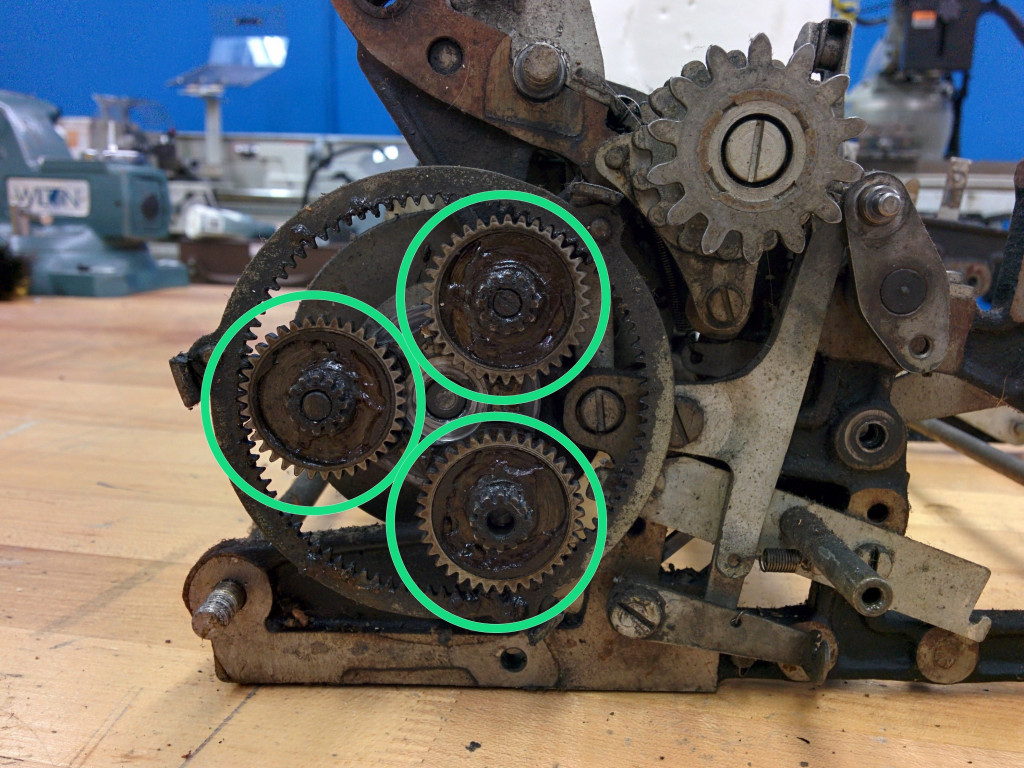
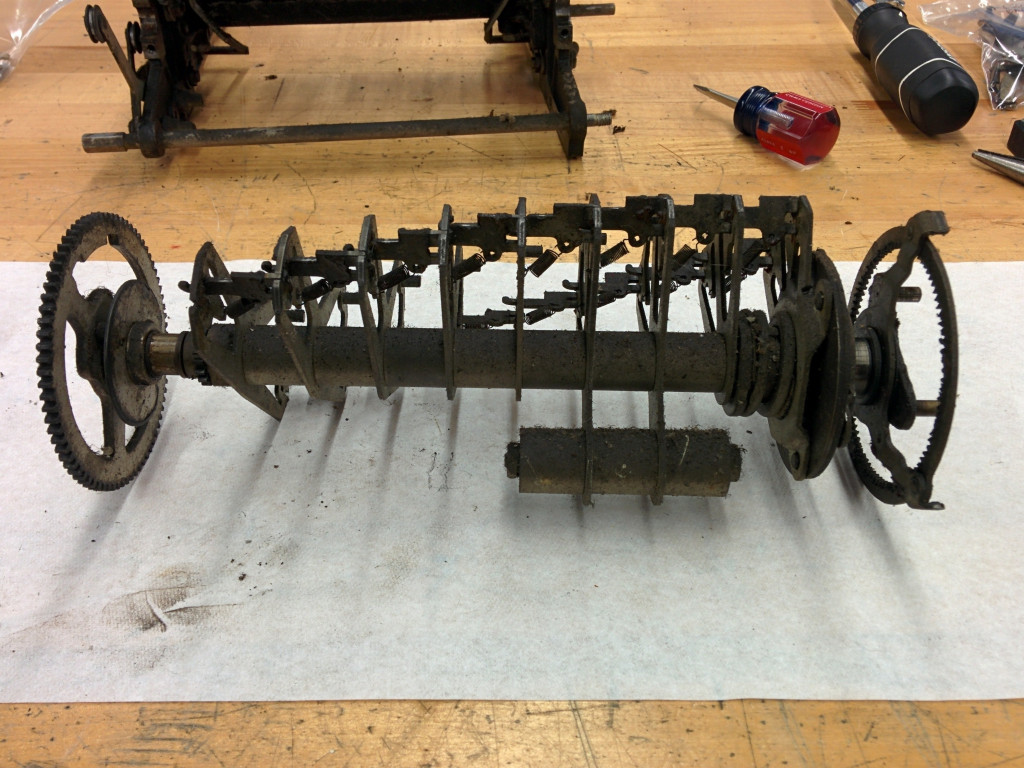
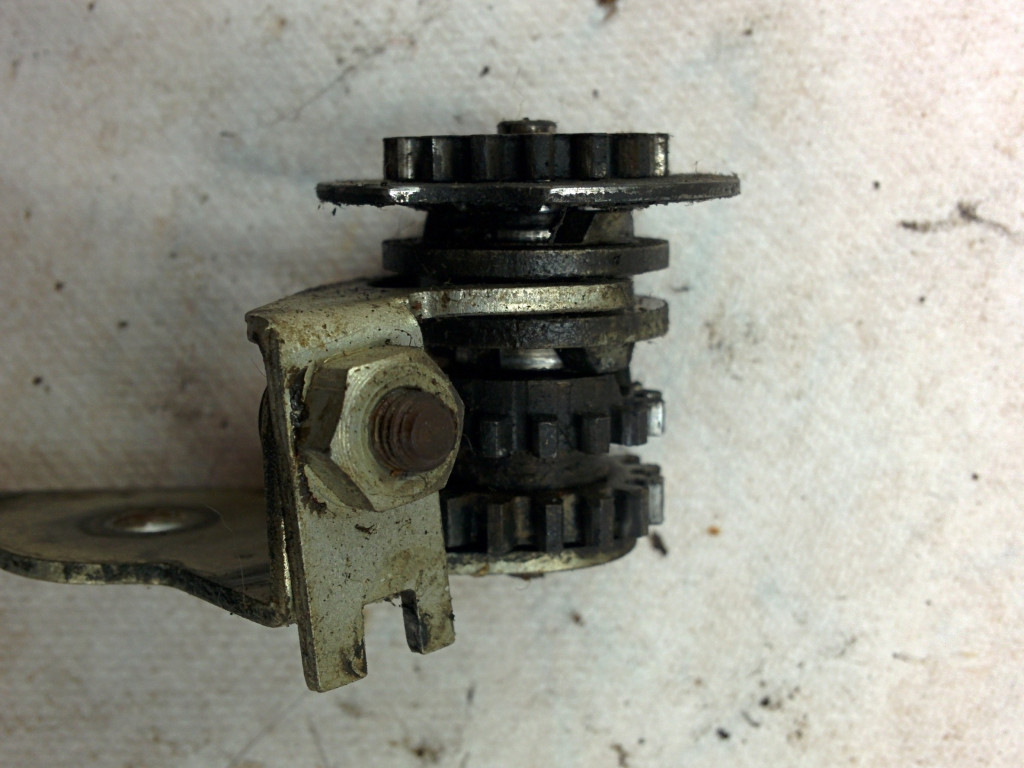
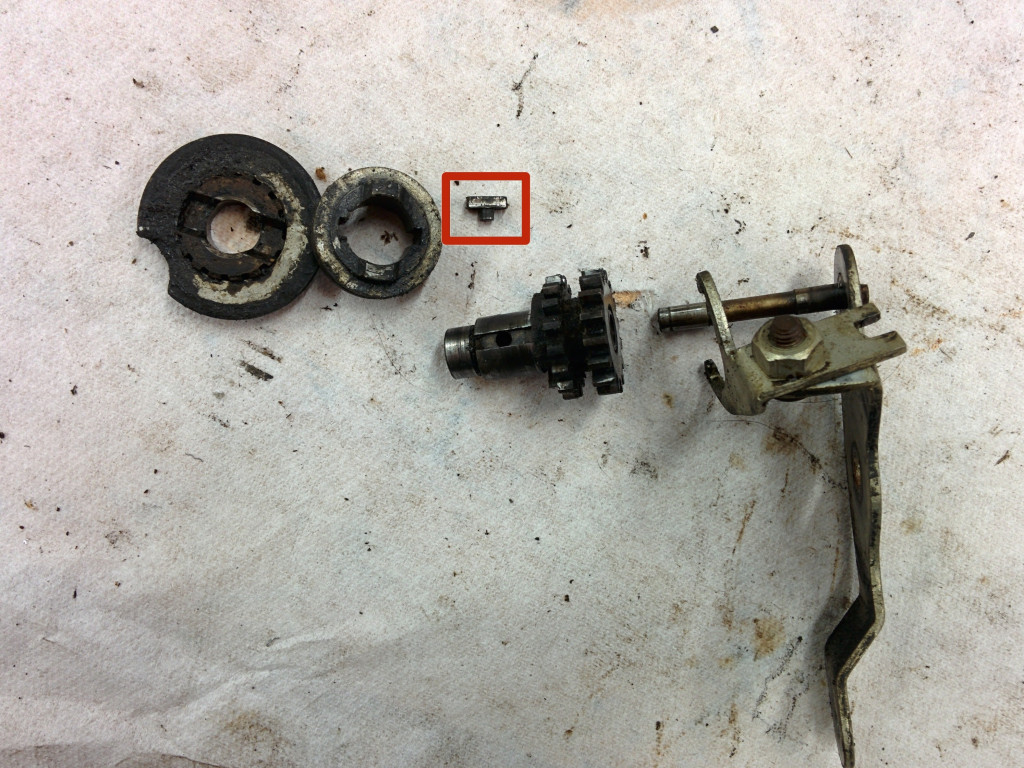
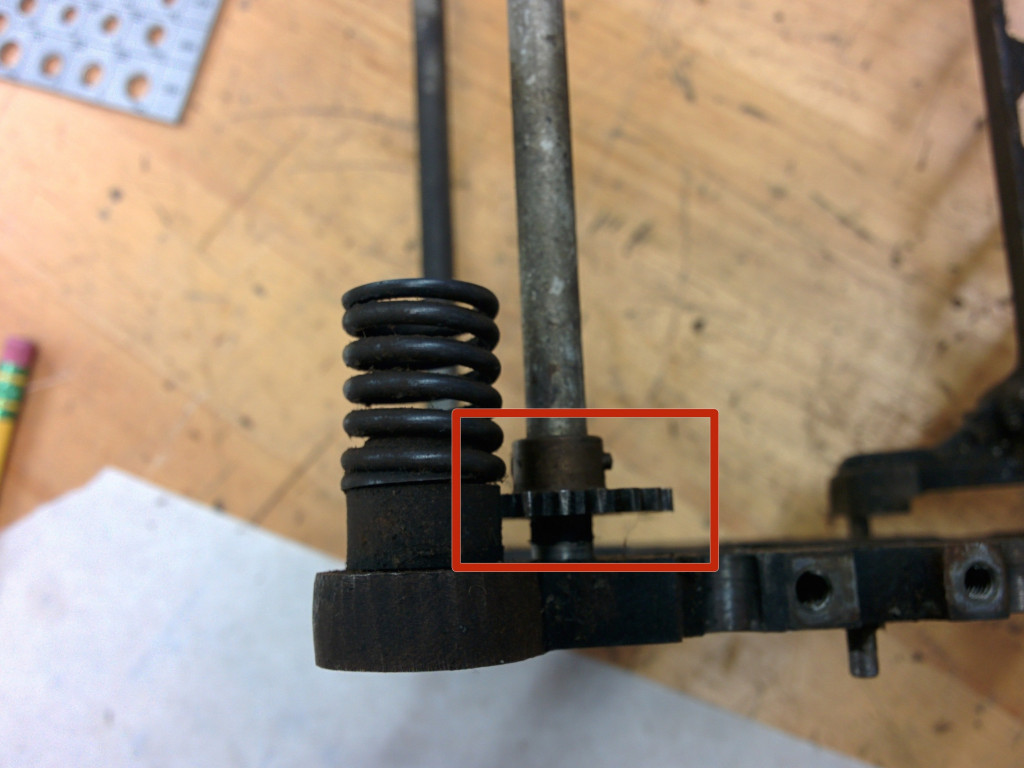
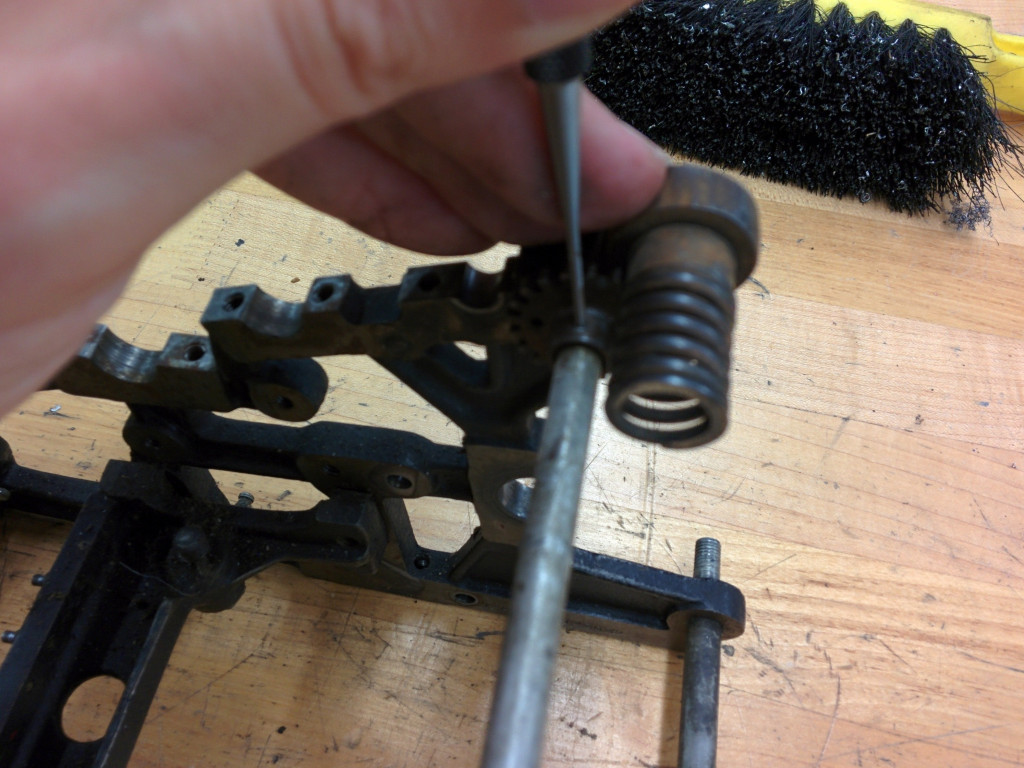
Шаг 25 Снимите среднюю большую передачу
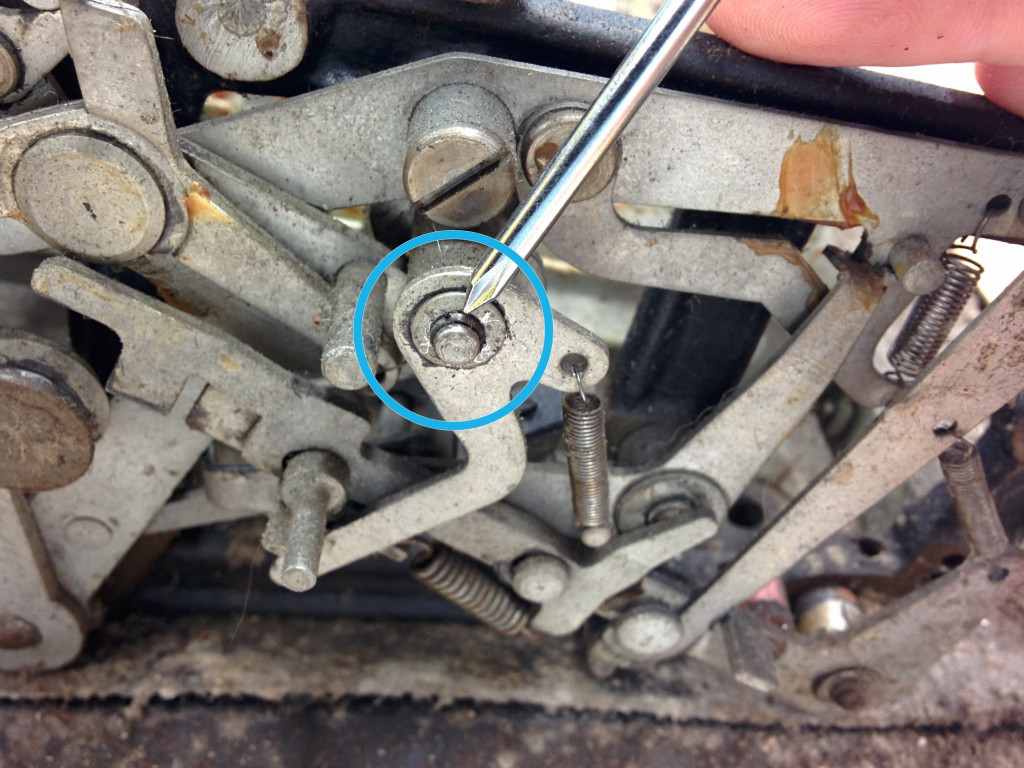
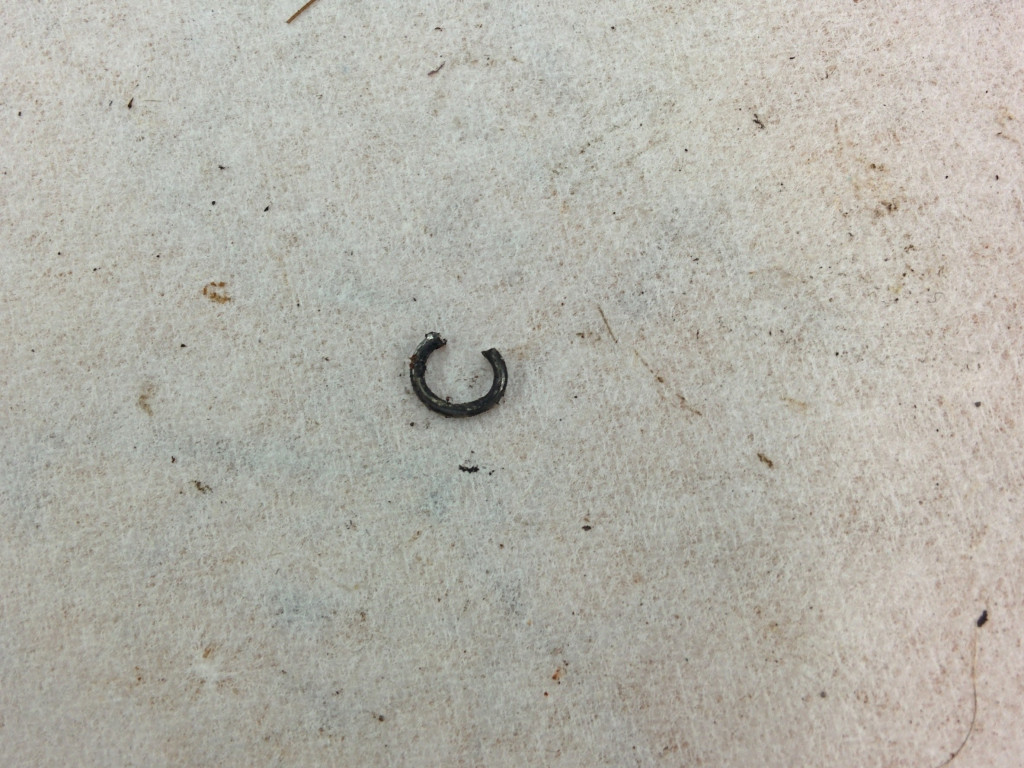
Снимите удерживающий зажим. Поверните зажим так, чтобы зазор был направлен вверх. Теперь зацепите свои иголочки в уши и медленно, но крепко потяните вниз. Надеюсь, клипса останется на челюстях плоскогубцев, но он может решить сбежать. В таком случае, иди и найди это.
Снимите шайбу.
Снимите среднюю передачу.
Поместите все это в сумку 4.

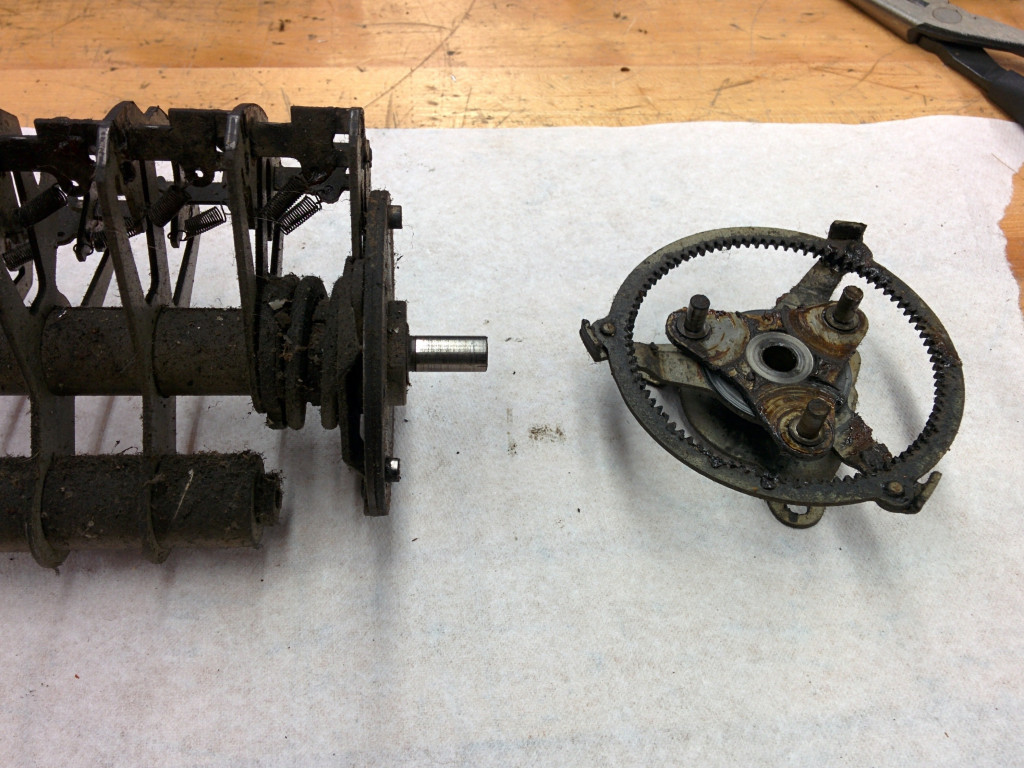
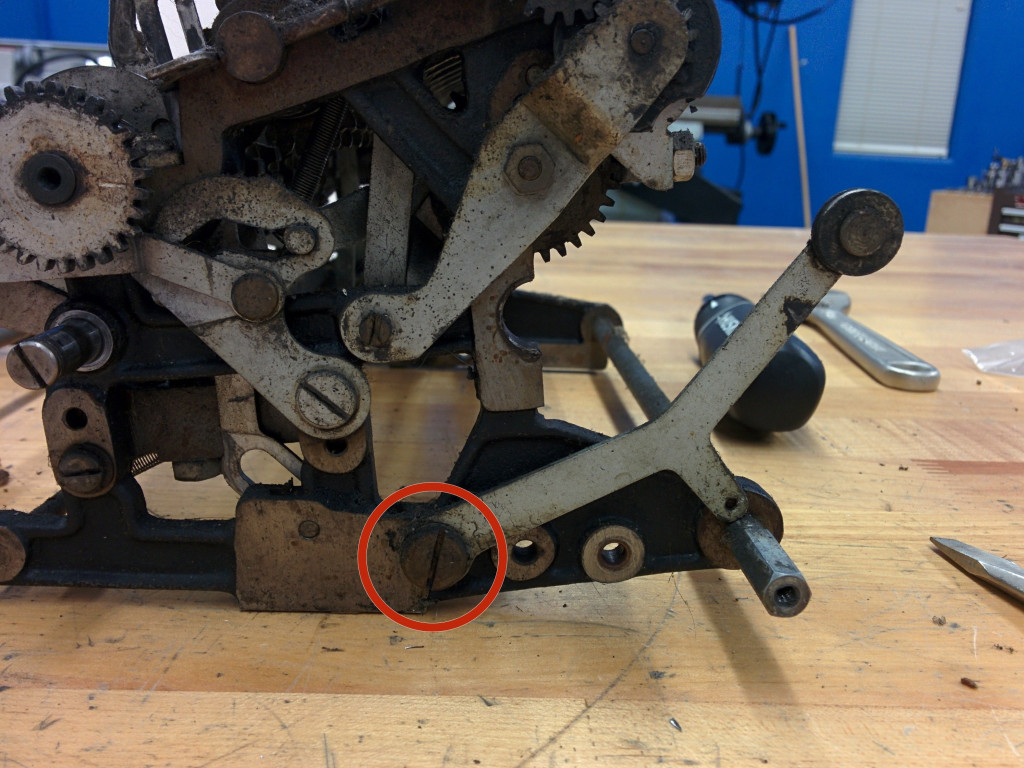
Шаг 26 Снять заглушку
Удерживая рычаг, снимите заглушку с вала.
Поместите заглушку в пакет 4.

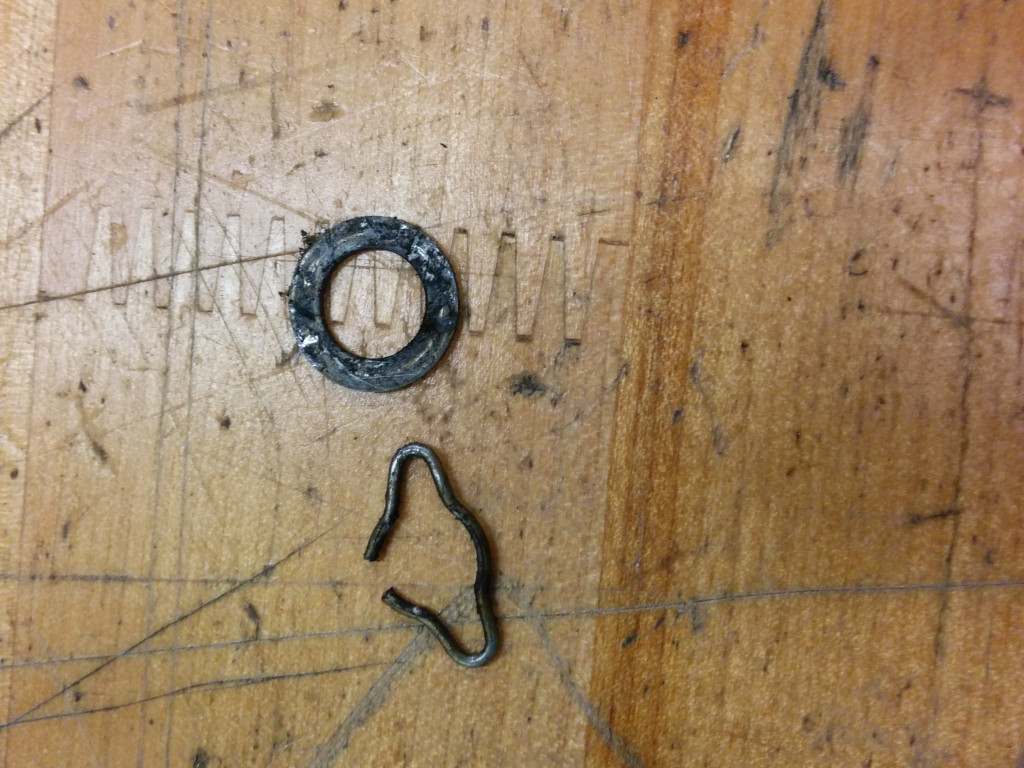

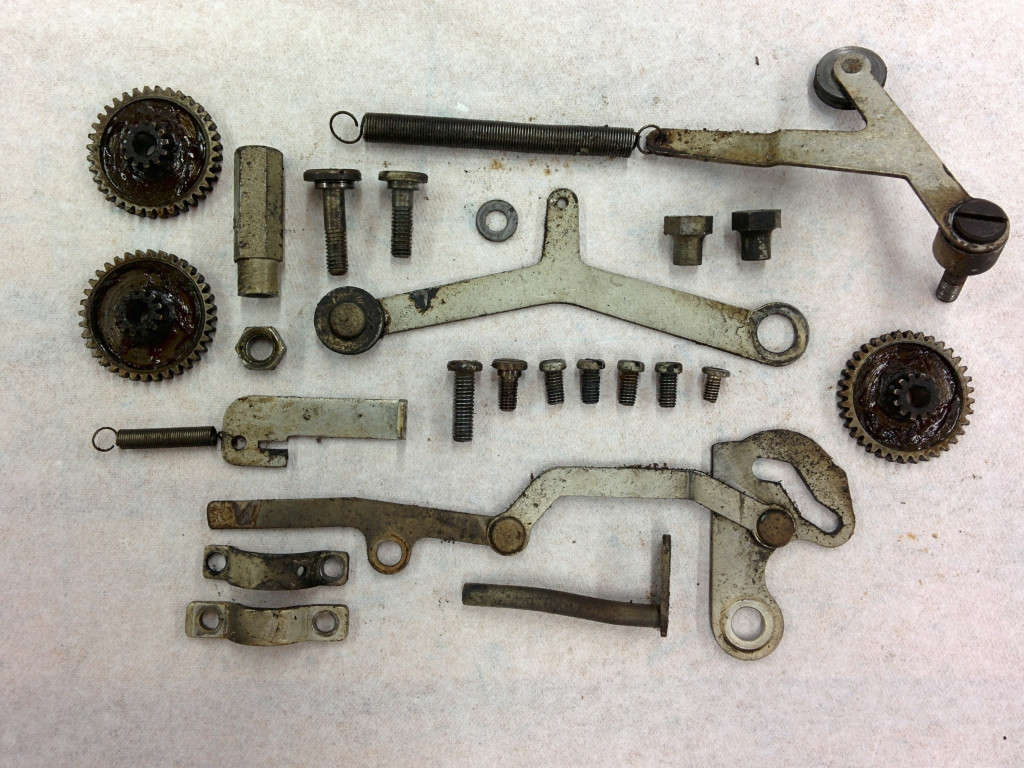
Шаг 27 Что в сумке 4?
Плоская шайба, 1/2 ", 5/16" ID
Стопорный зажим, 0,040 "провод
Заглушка
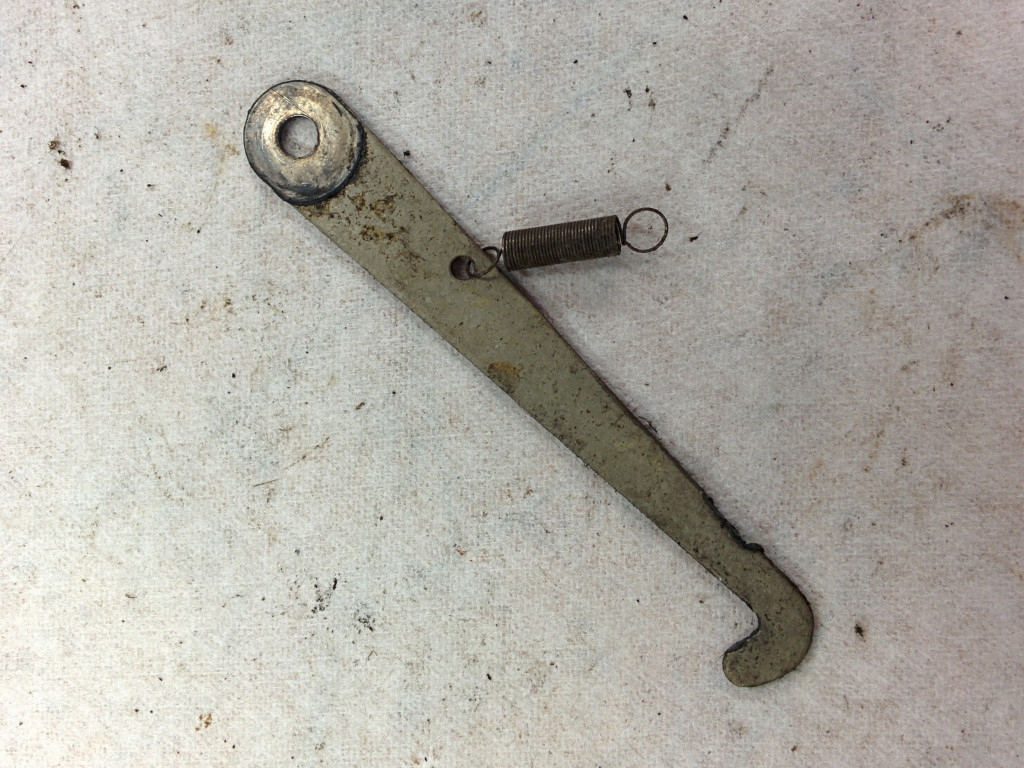
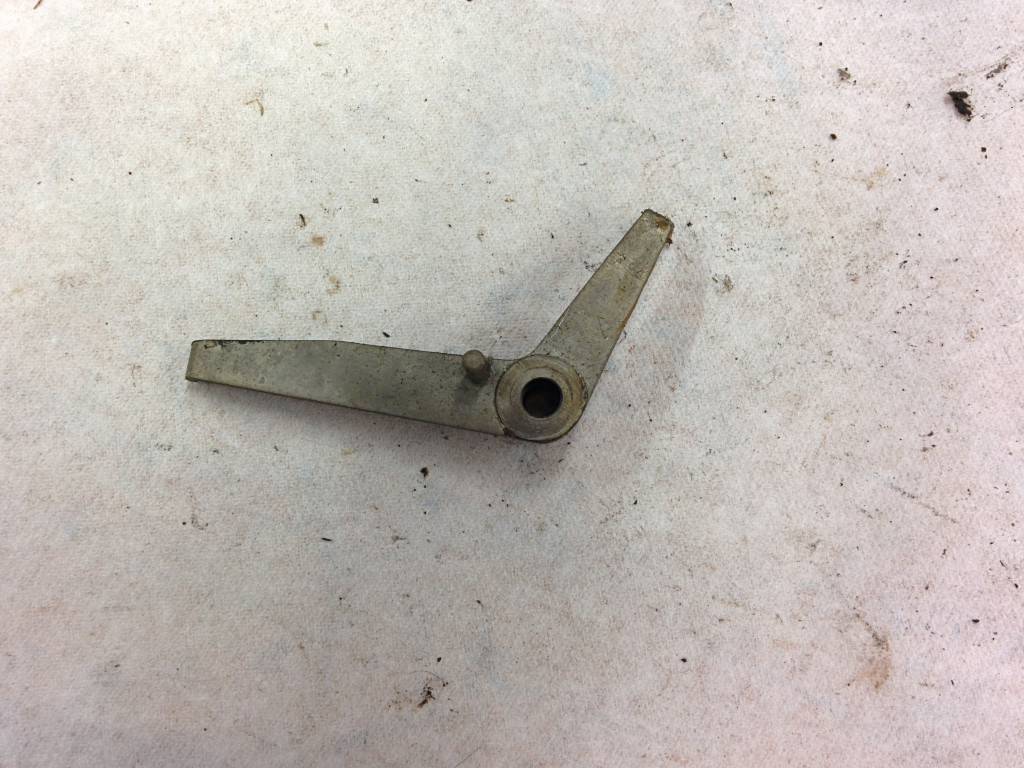
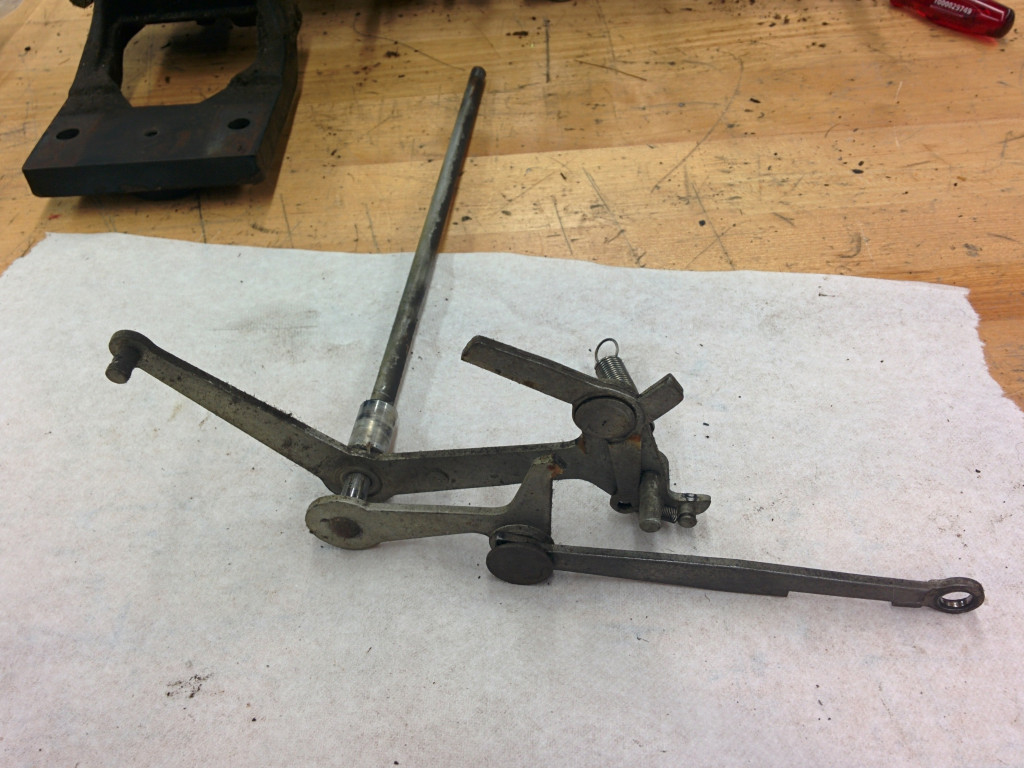
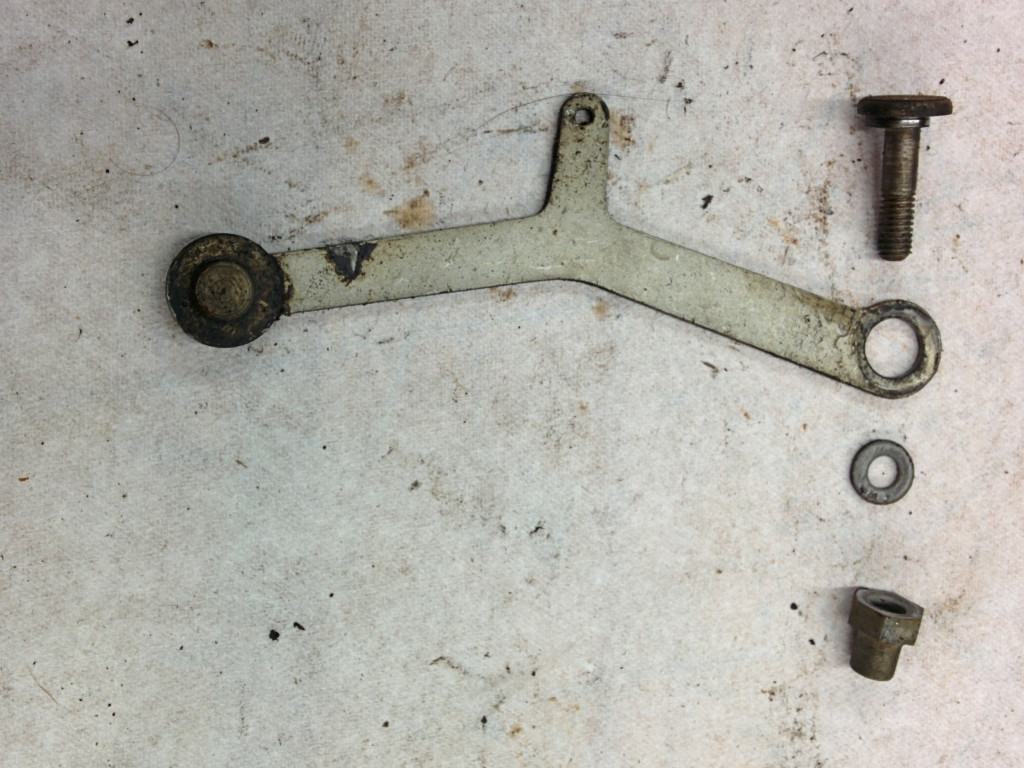
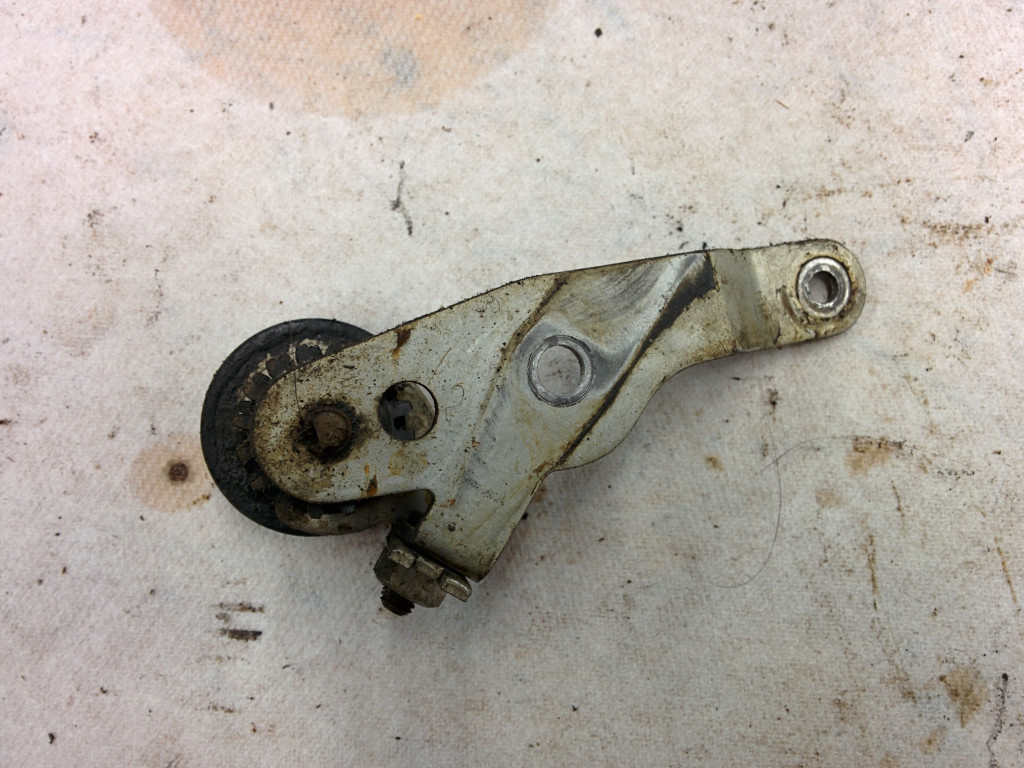
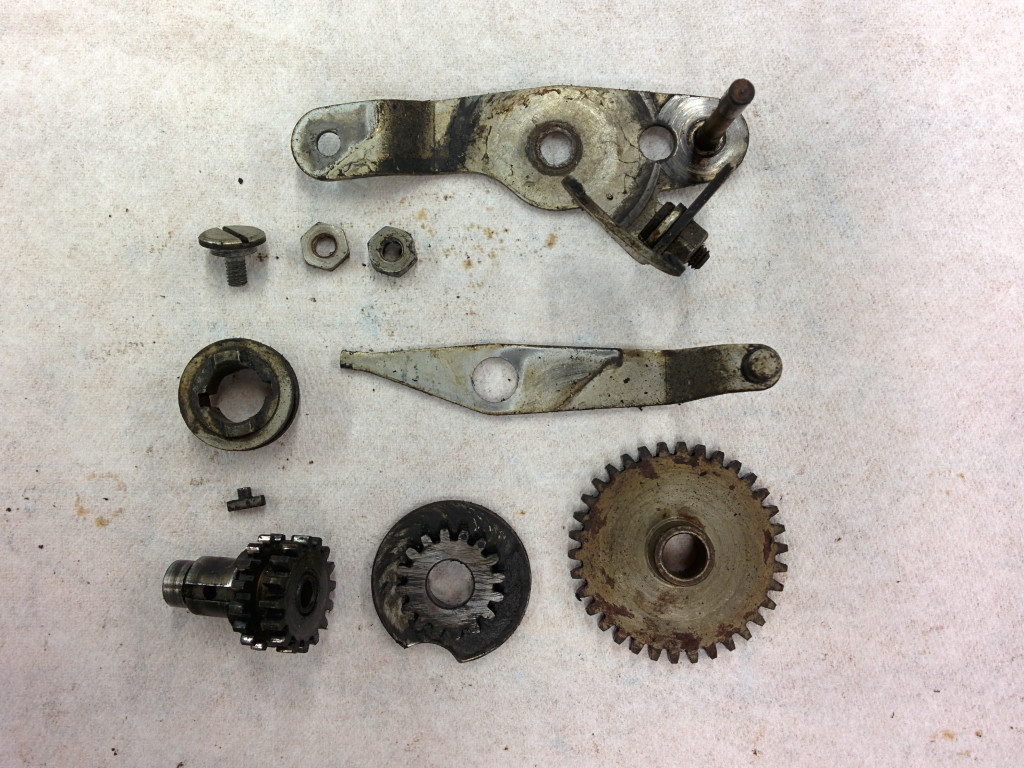
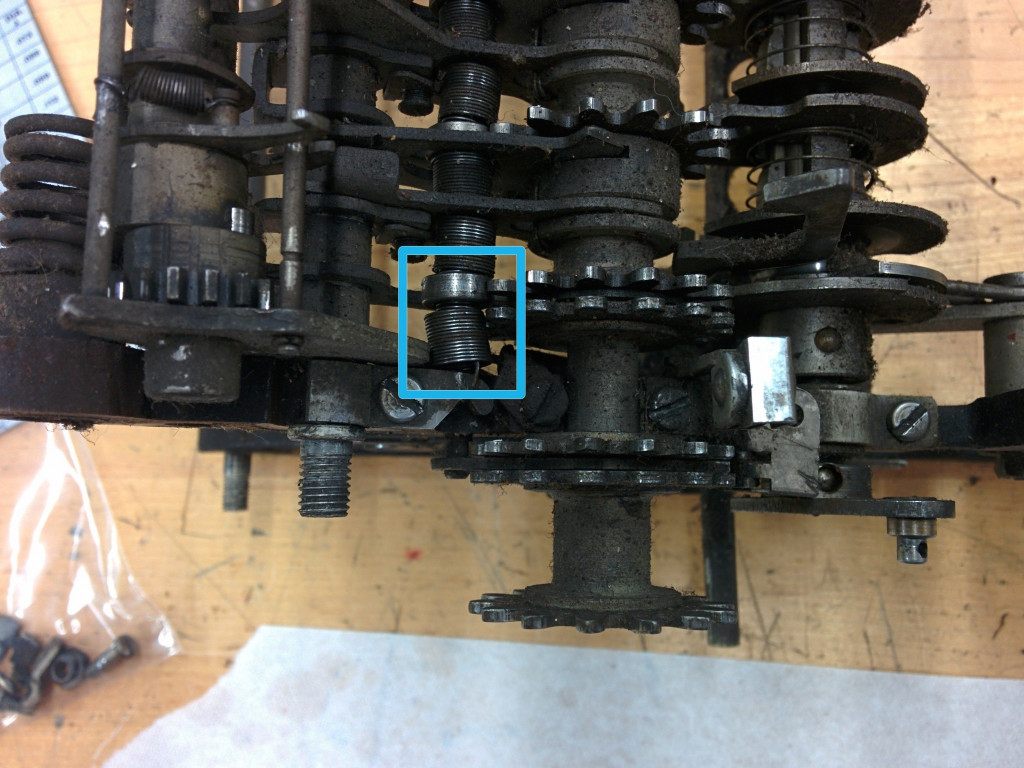
Шаг 28 Снимите большой кривошипный механизм
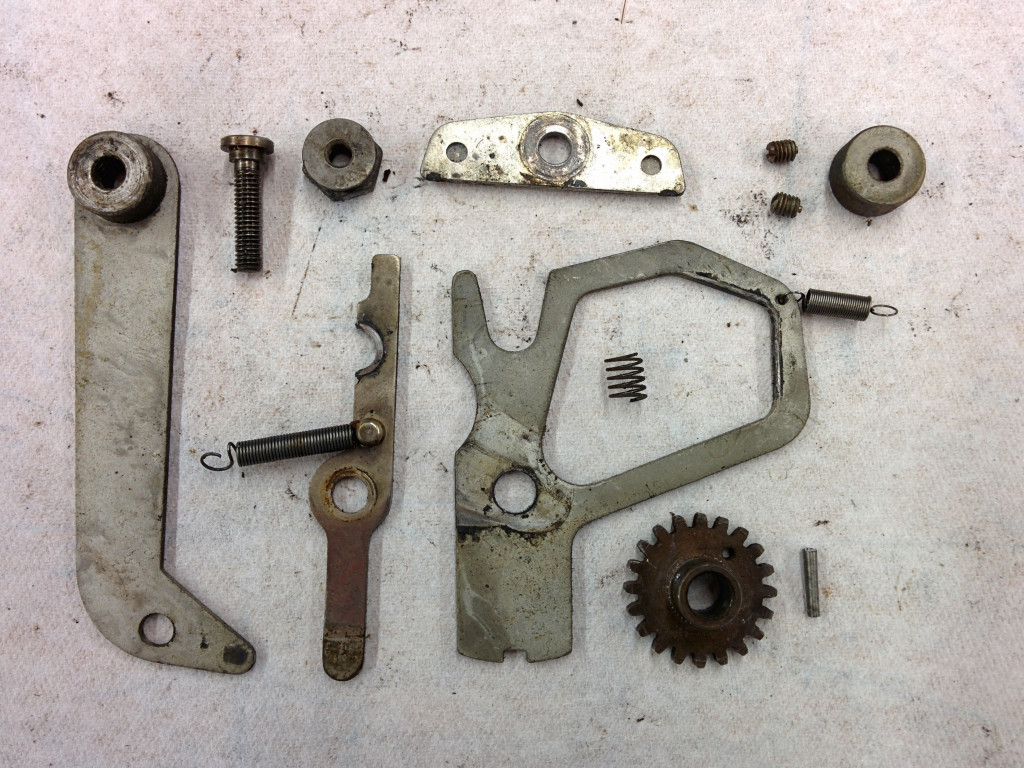
Таким же образом вы сняли среднюю передачу, снимите фиксирующий зажим и шайбу с кривошипно-шатунного механизма.
Поместите зажим, шайбу и снаряжение в сумку 5.

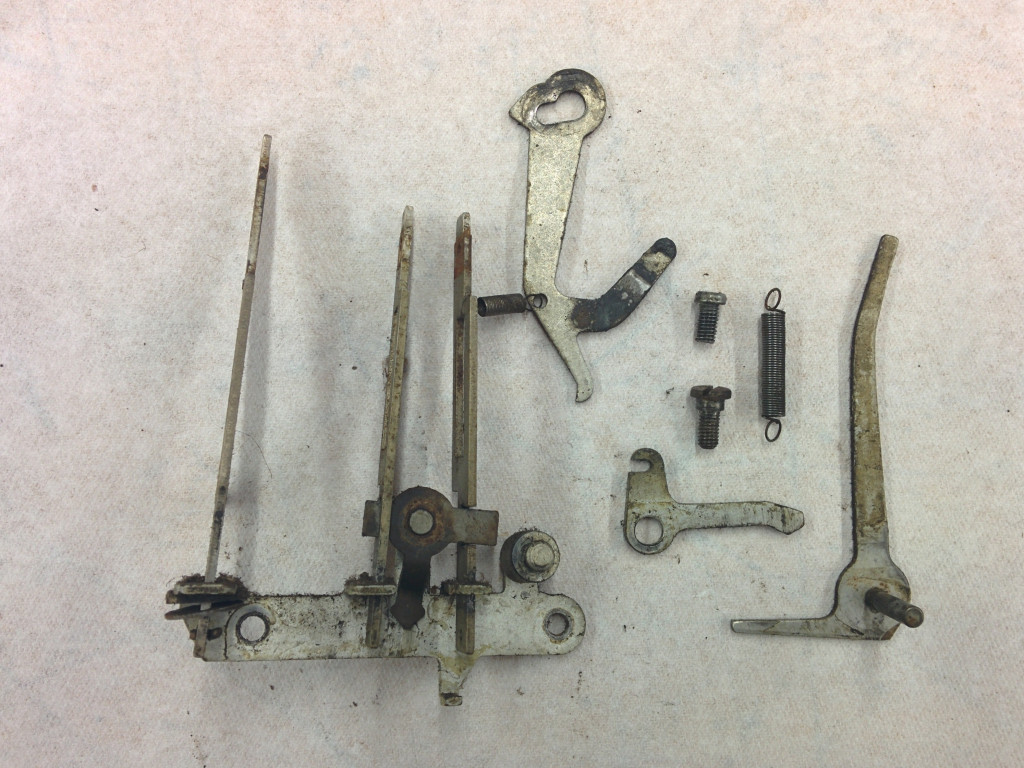
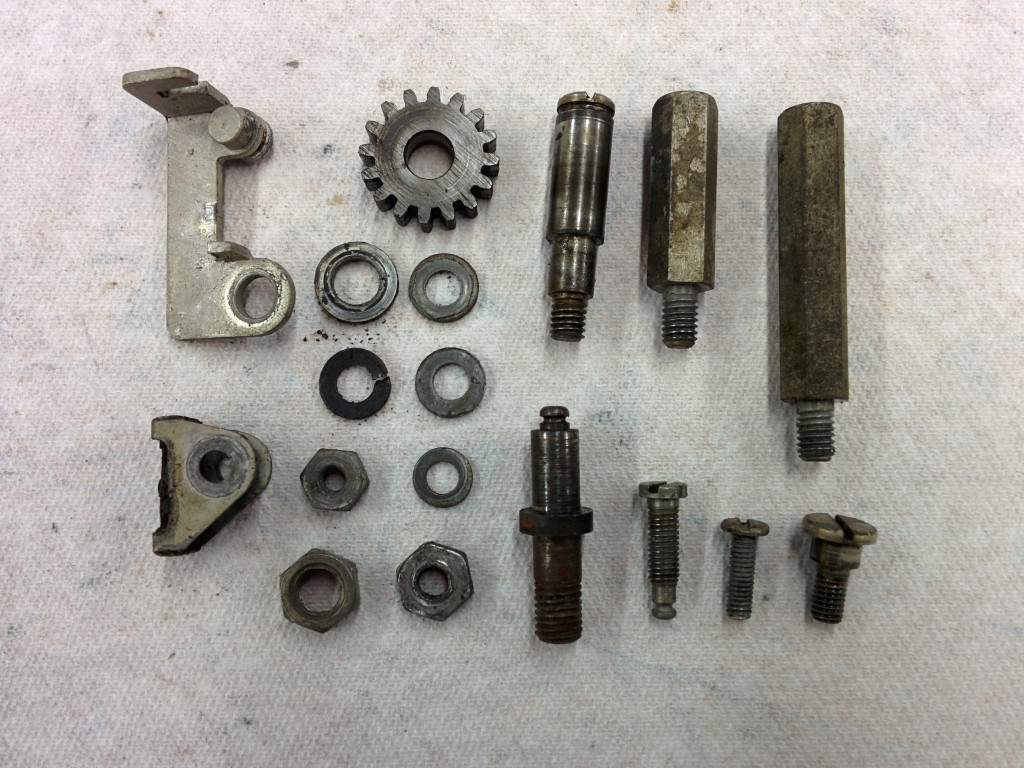
Шаг 29 Что в сумке 5?
Стиральная машина, 5/8 "od, 7/16" id
Стопорный зажим, 0,040 "провод

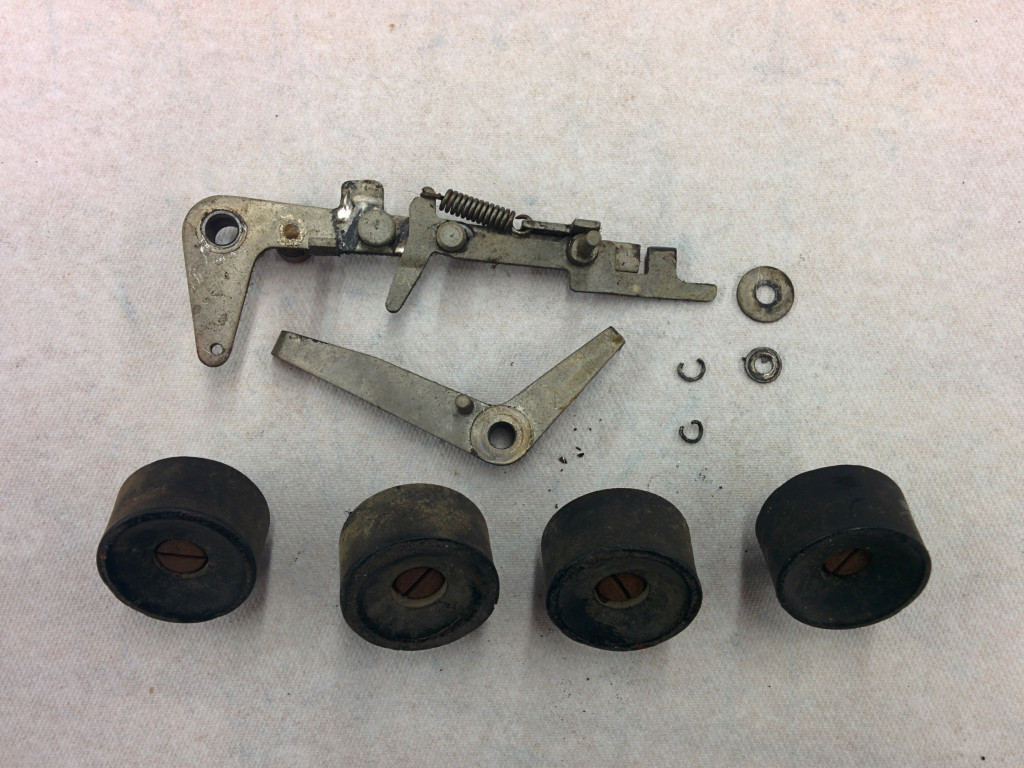
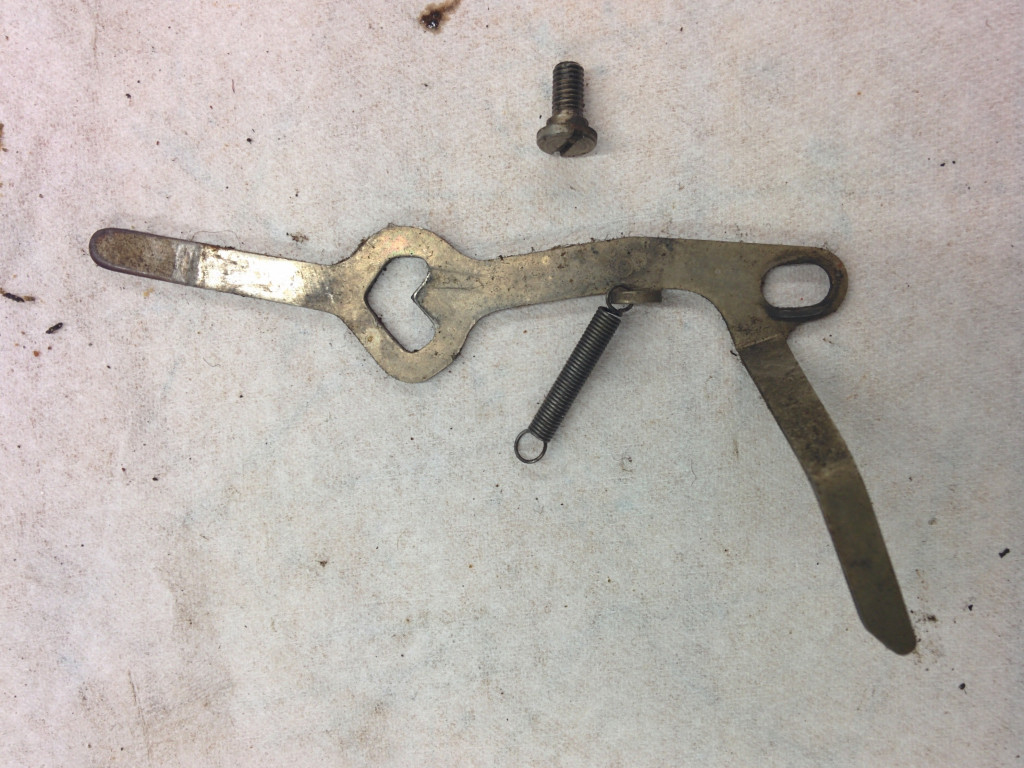
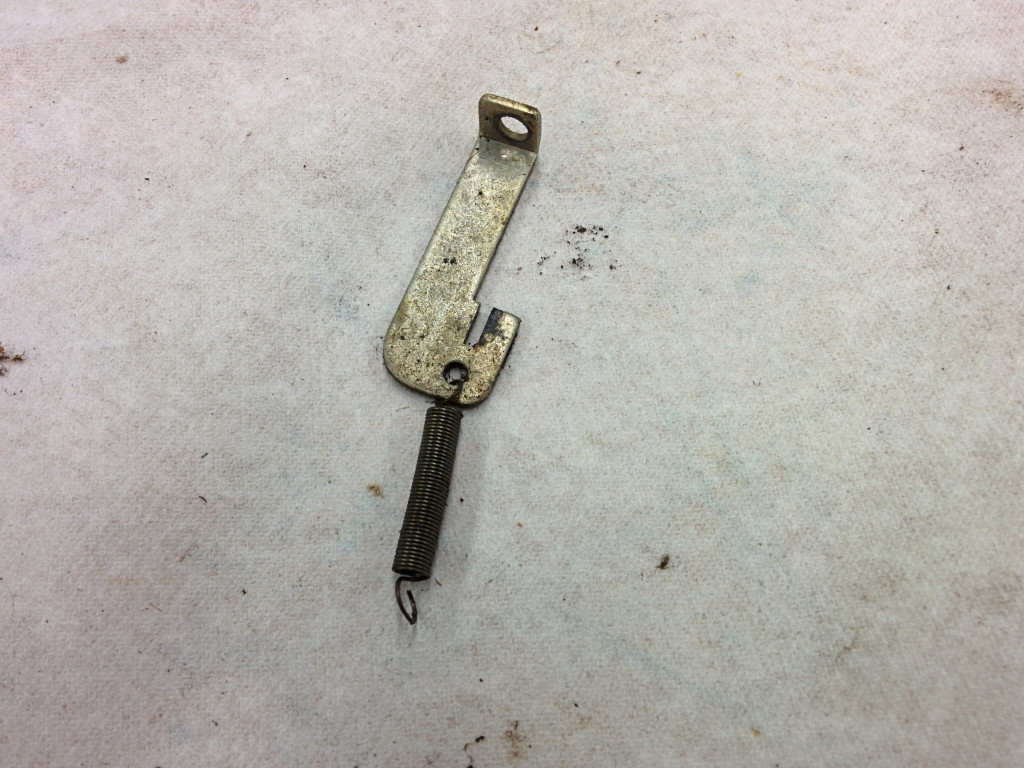
Шаг 30 Удалите нулевой / повторный / неповторяющийся ключ в сборе
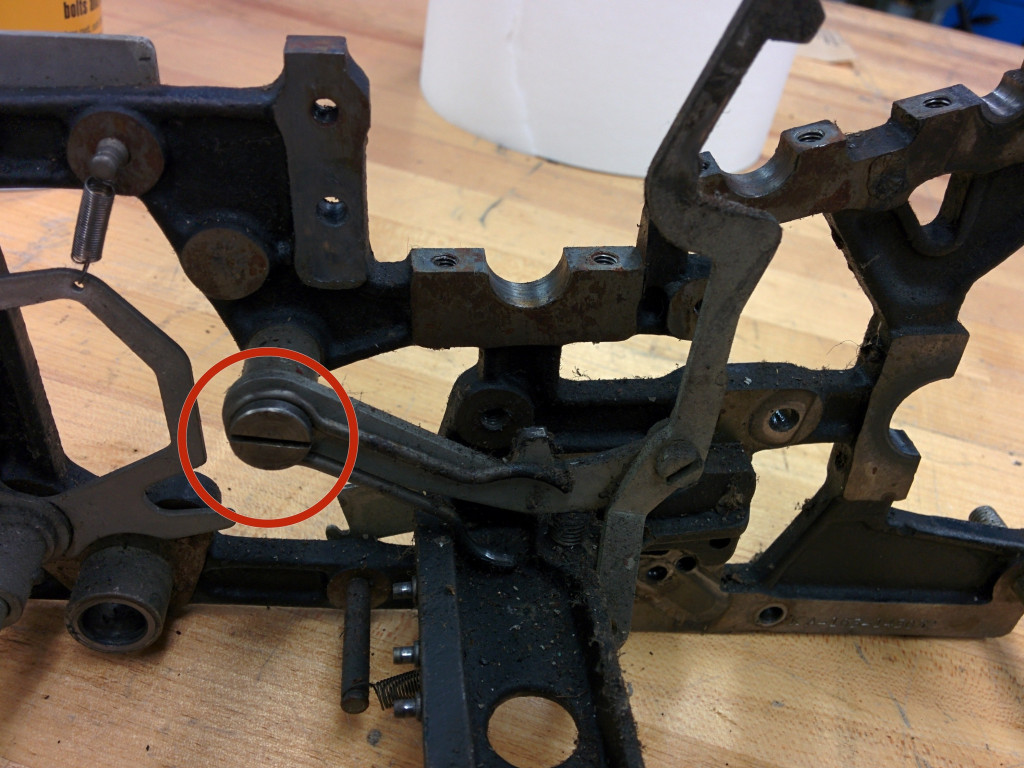
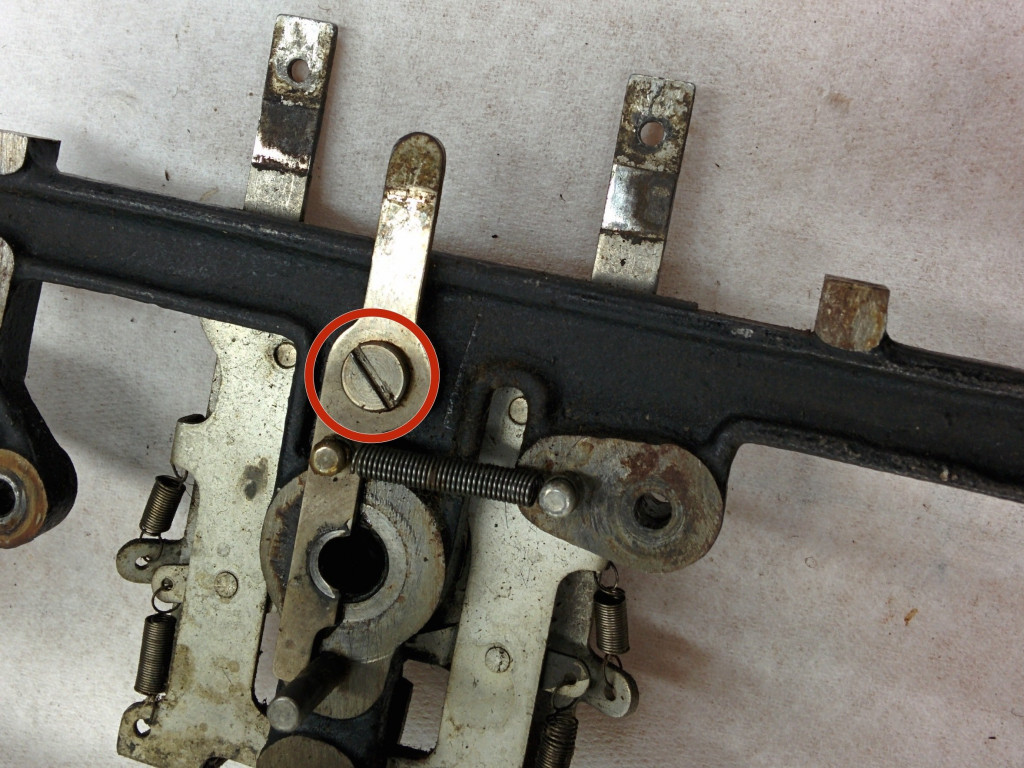
С правой стороны машины отсоедините стопорную пружину для повторения / повторения с обеих сторон.
Отвинтите этот винт, '' '# 8-36, 5/16 "' 'с плечом диаметром 0,1", диаметром 7/32 ".
Снимите рычаг защелки и положите его с пружиной и вверните в пакет 6.
Открутите этот винт, '' '# 8-36, 5/16 "' '' и положите его в пакет 6.
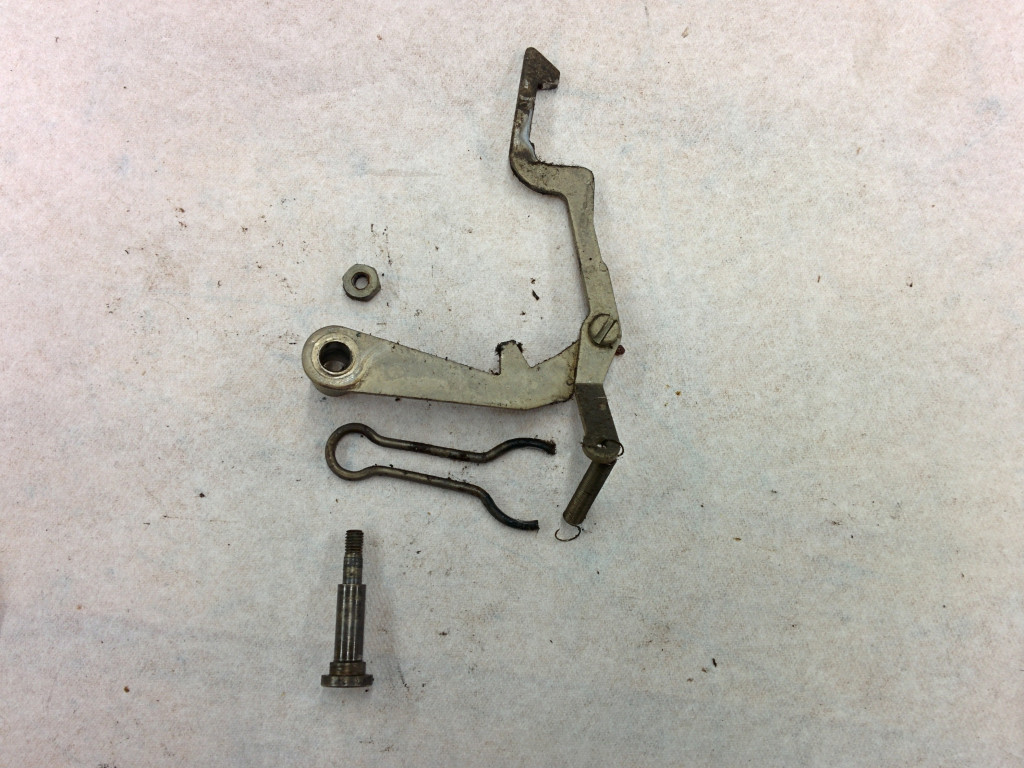
Снимите нулевой / повторный / неповторяющийся ключ в сборе. Положите его в сумку 6.
Шаг 31 Что в сумке 6?
1 крепежный винт, # 8-36, 5/16 "с буртиком диаметром 0,1", 7/32 "
1x пружина растяжения, проволока 0,020 ", длина 3/16", длина 13/16 "
Повторение / повторение / нулевая сборка (2 части)
Рычаг защелки

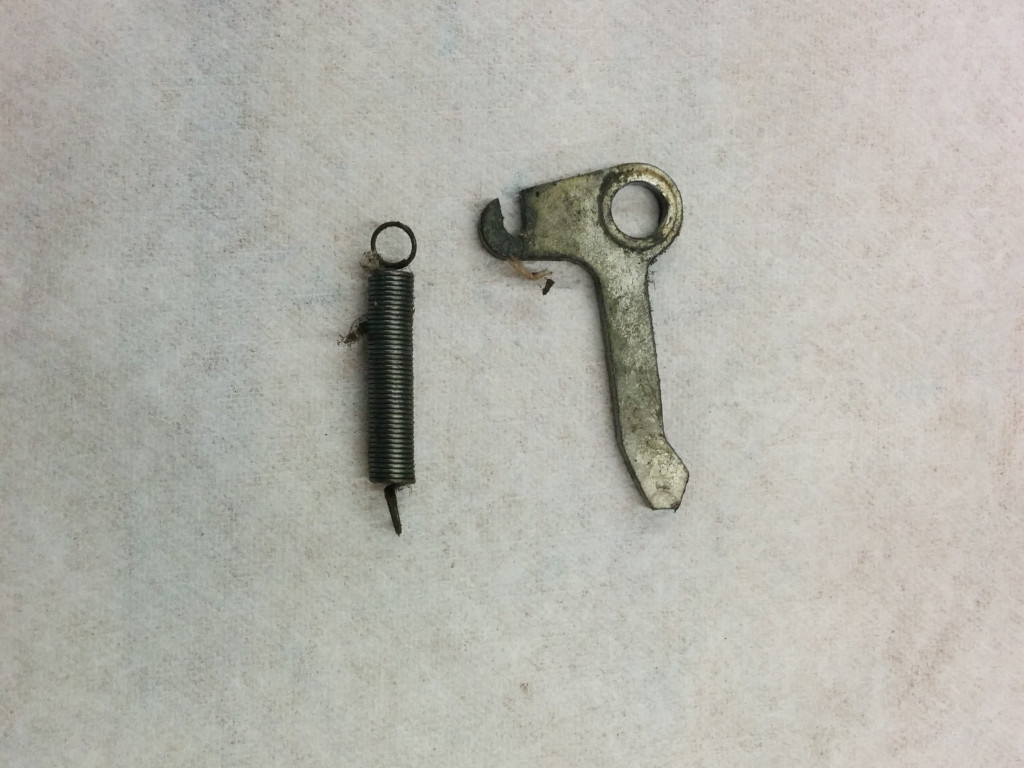
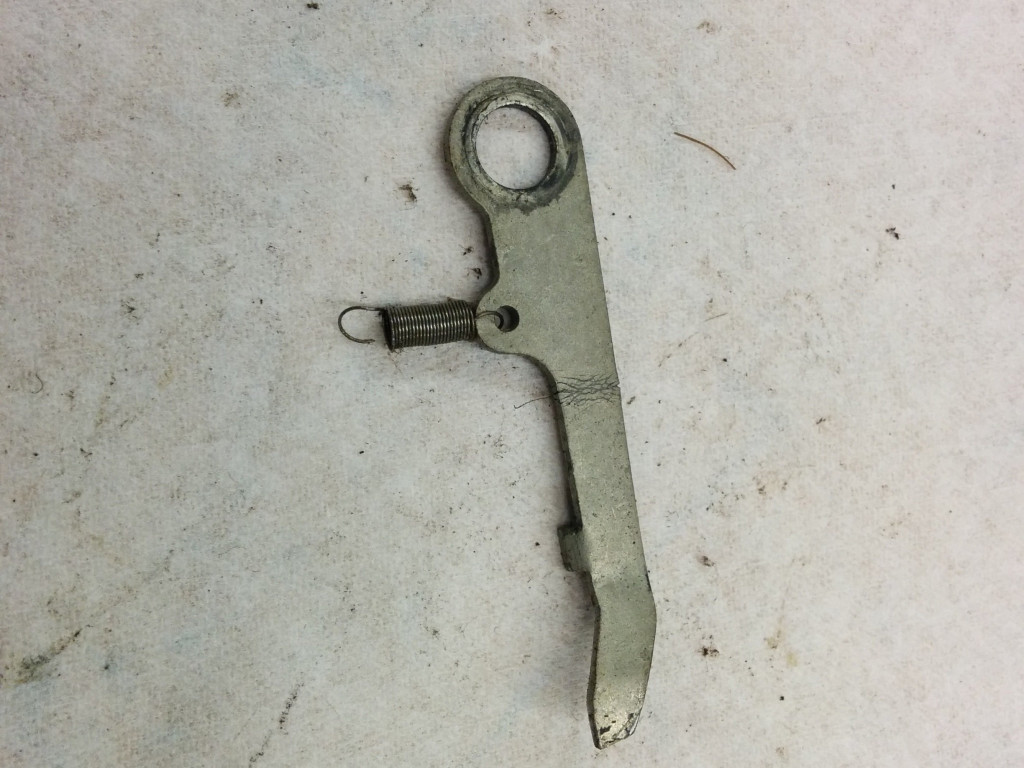
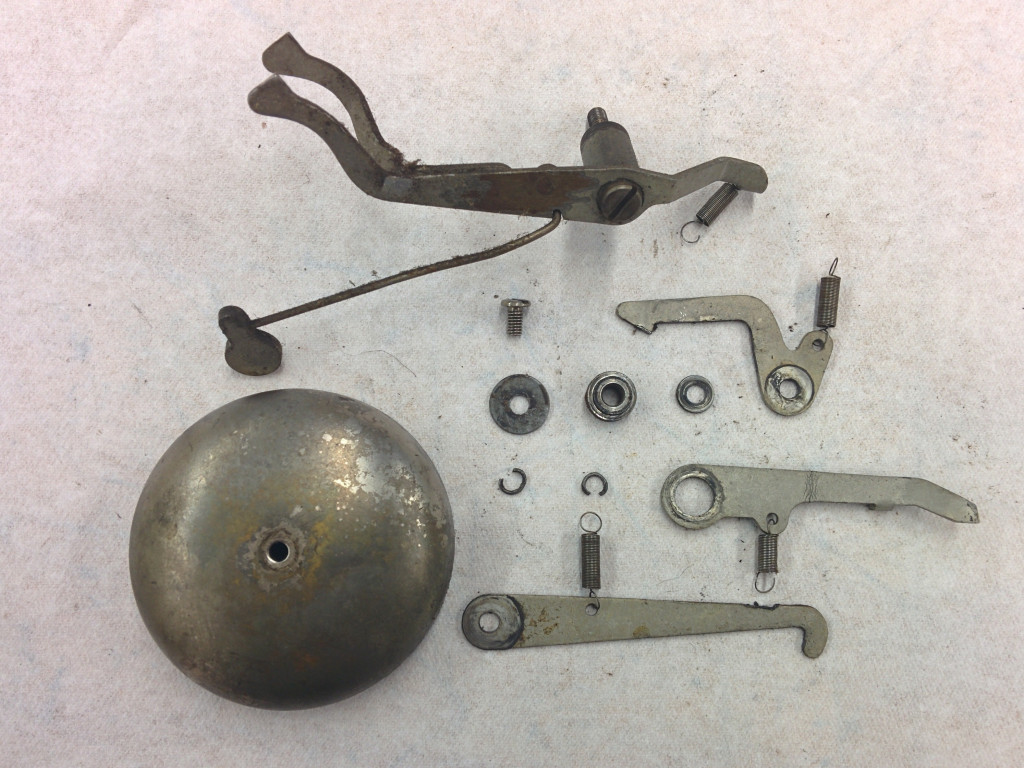
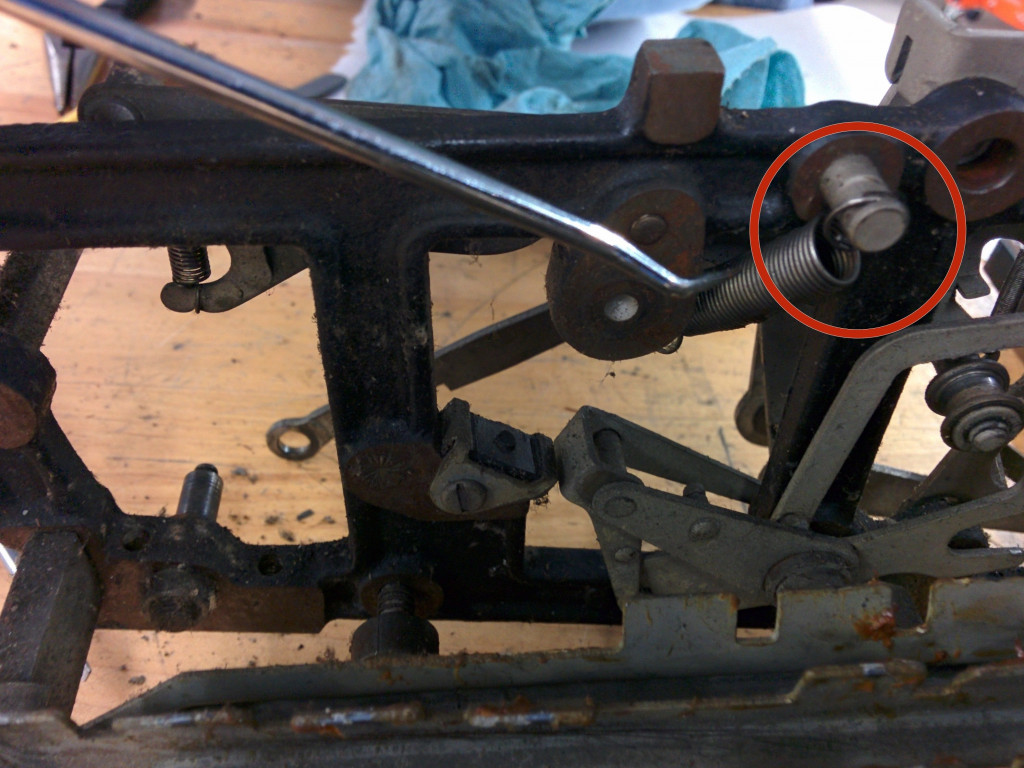
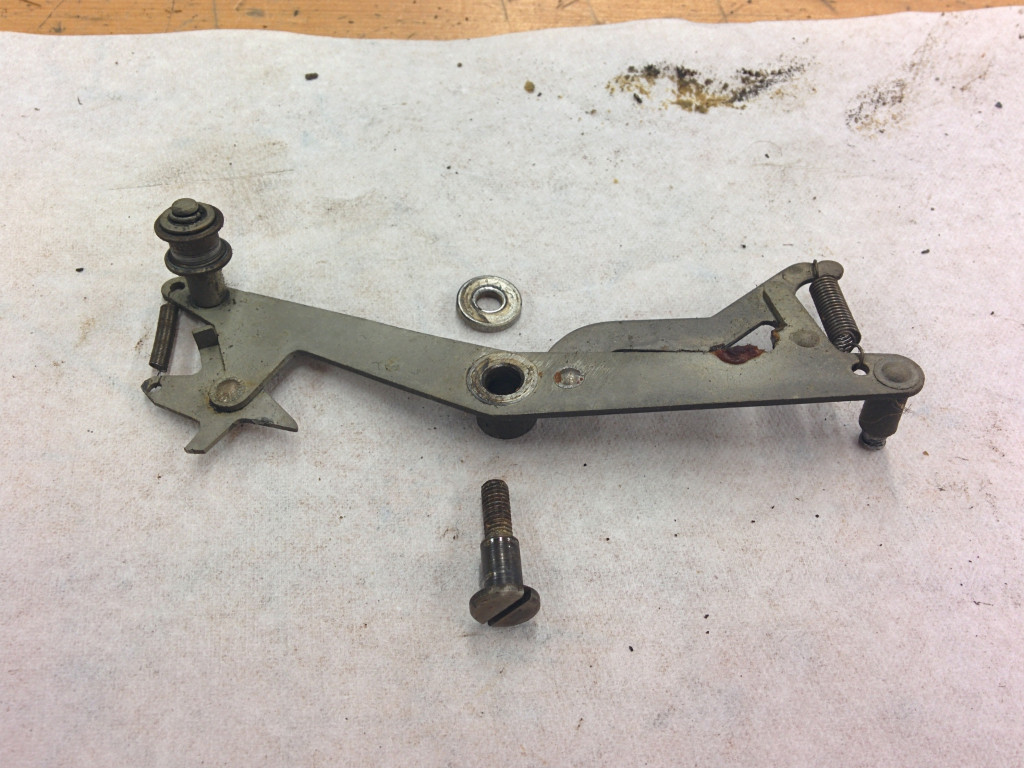
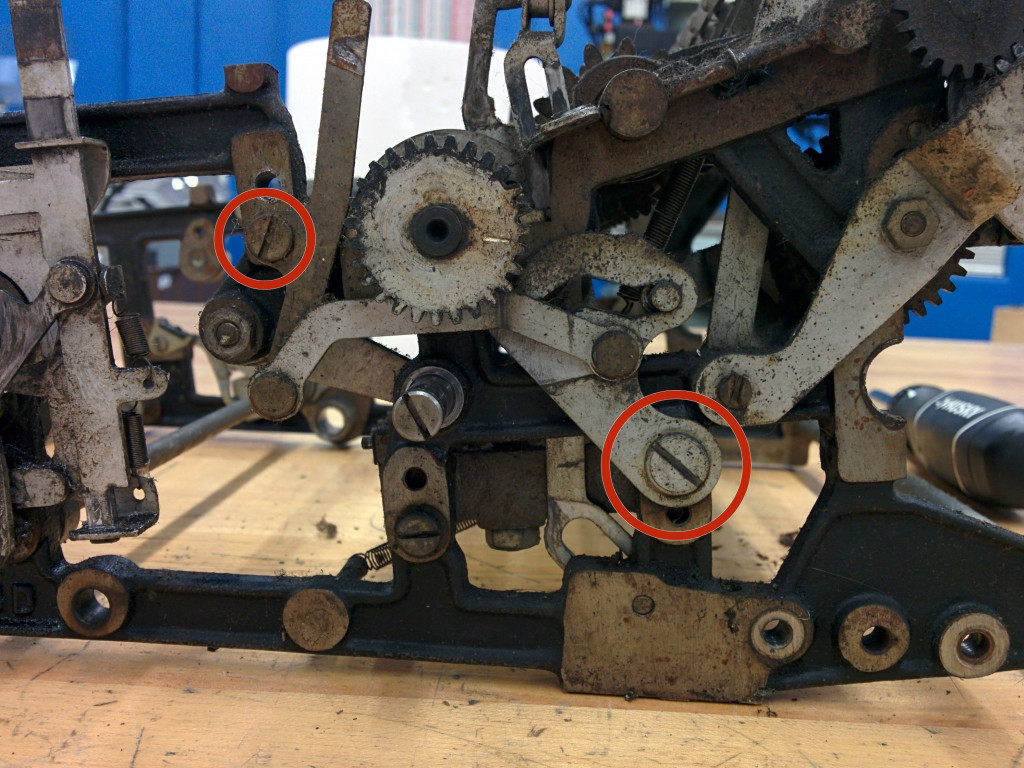
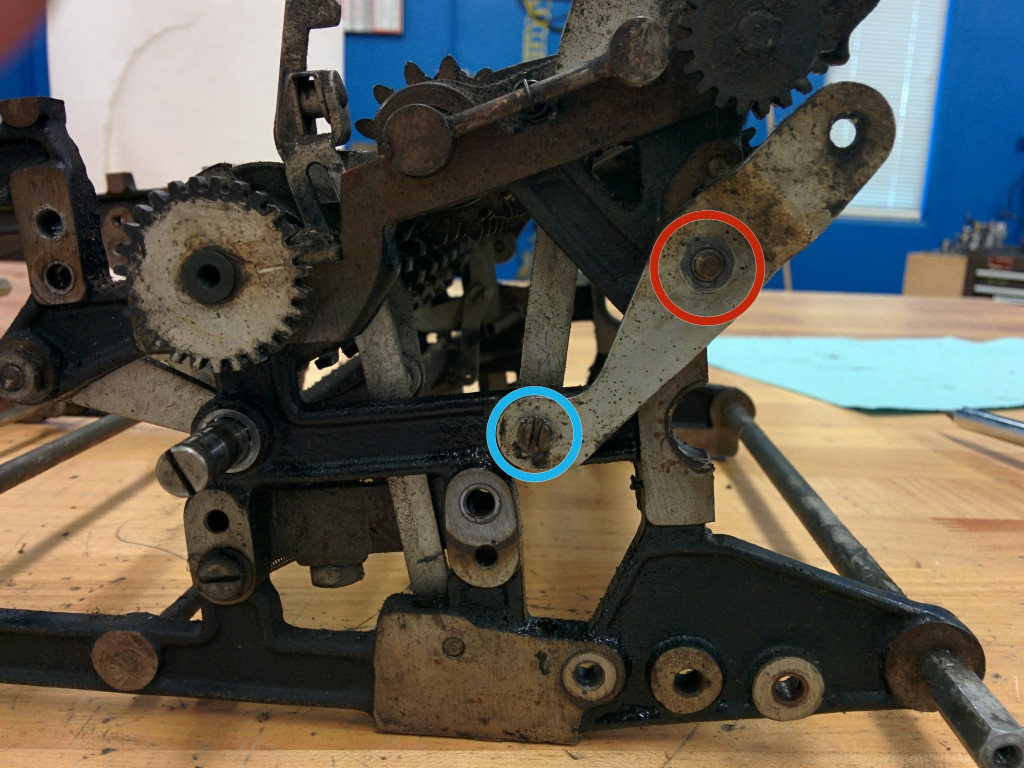
Шаг 32 Снять колокольный механизм
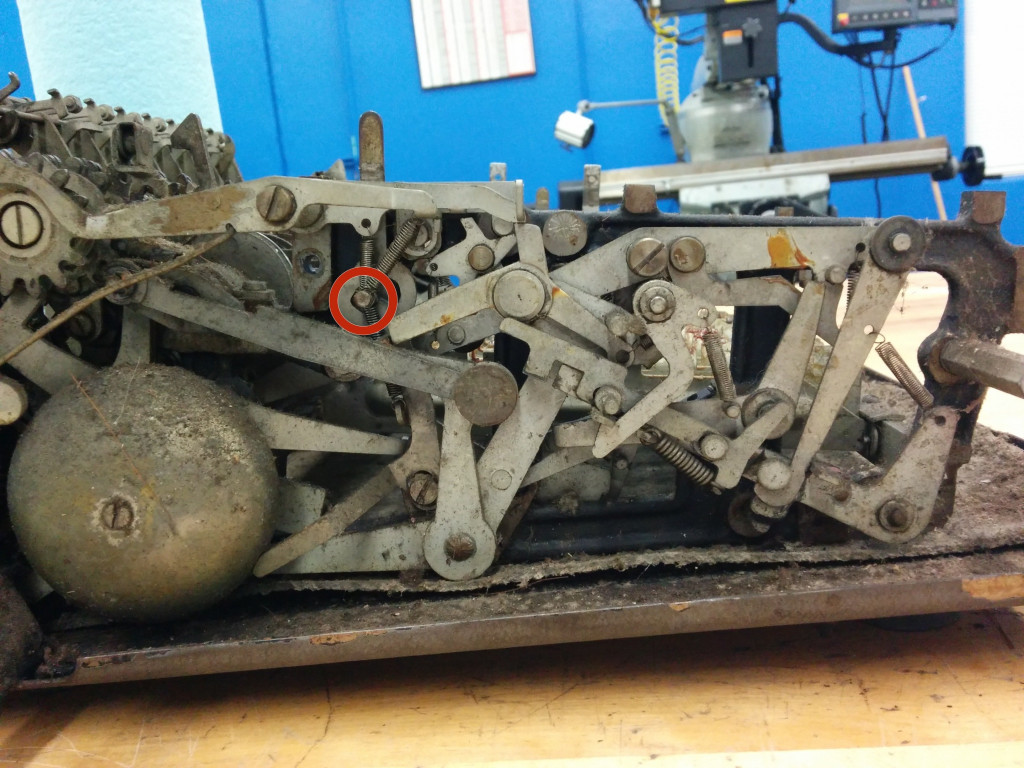
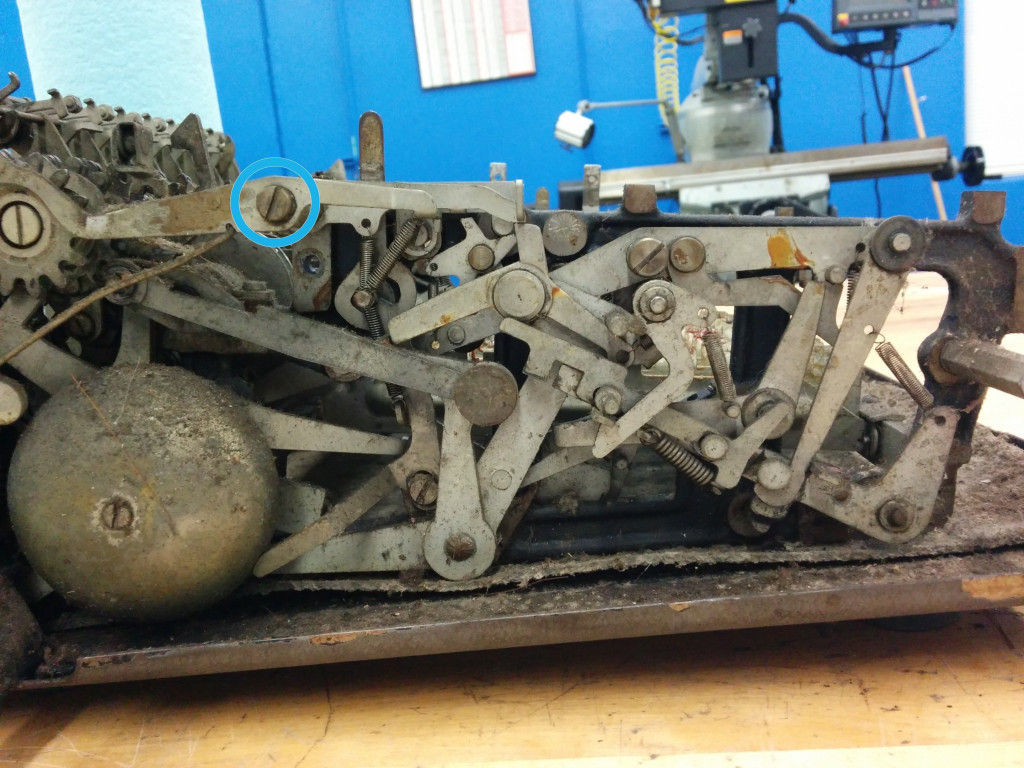
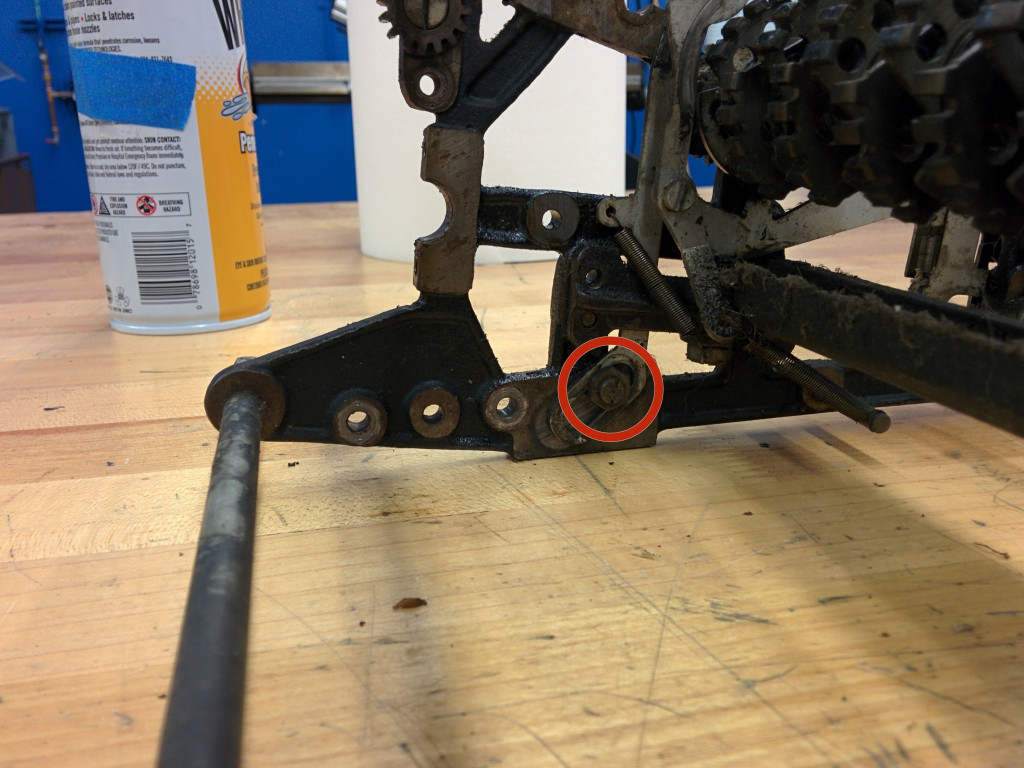
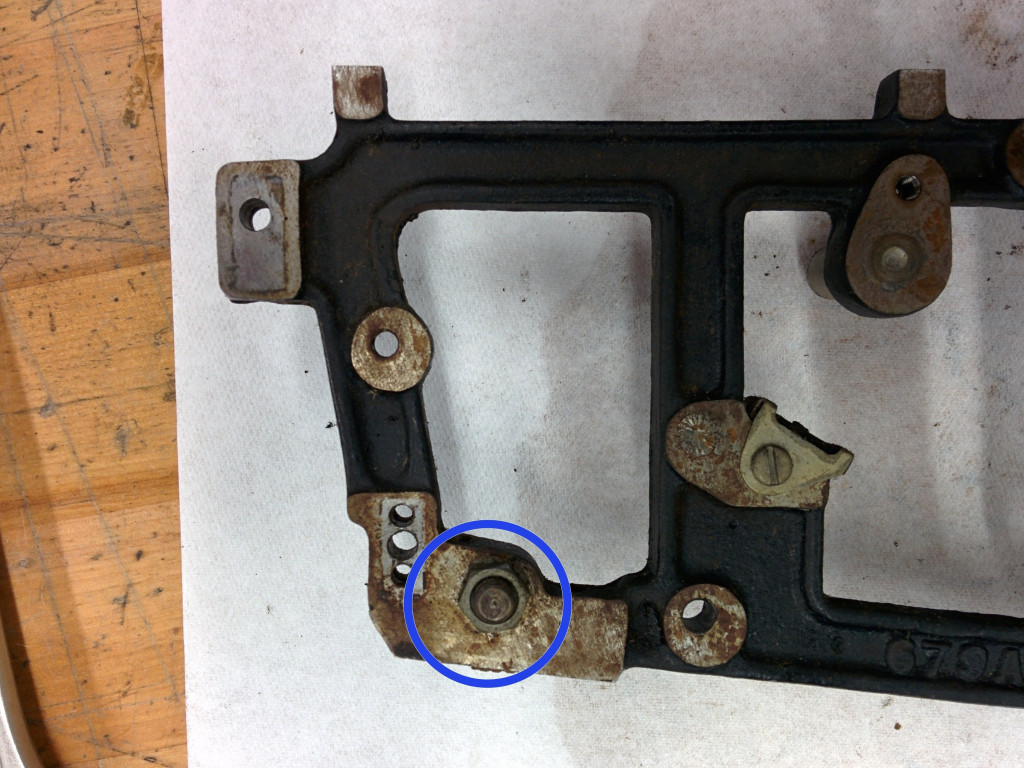
С левой стороны задней части машины отсоедините две верхние пружины от указанной стойки.
Открутите этот винт. На другой стороне рамы есть гайка, поэтому обязательно поймайте ее.
Снять колокольный механизм. Поместите все детали в сумку 7.
Шаг 33
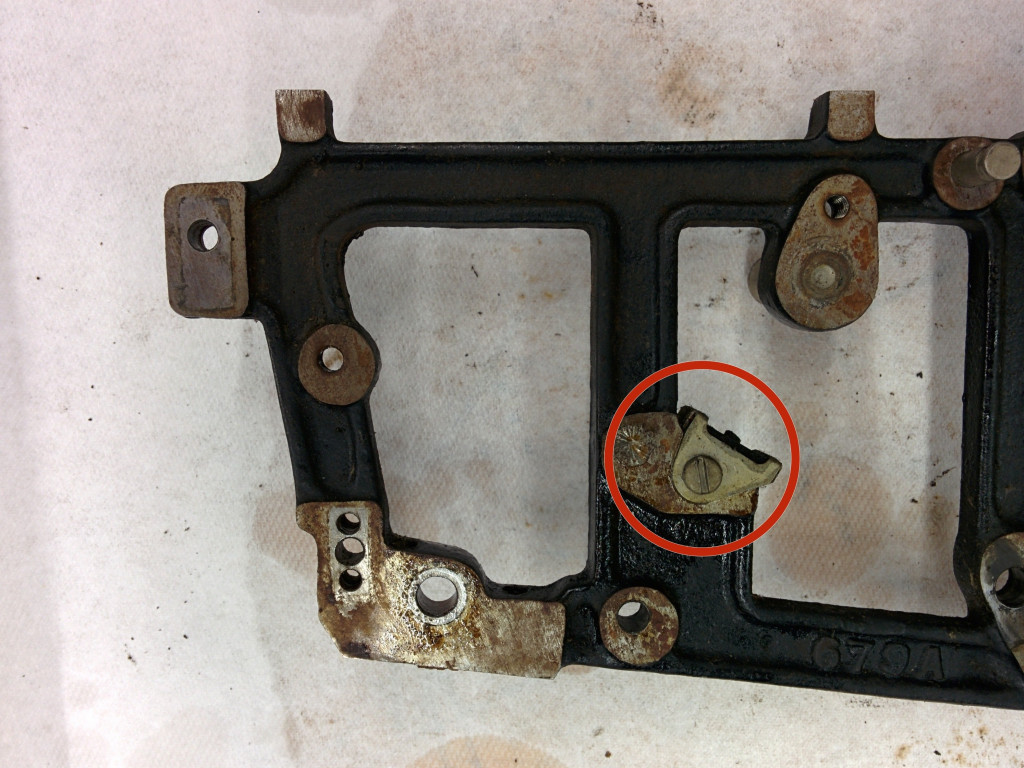
Открутите звонок. Это винт # 6-40, 1/4 "'' '.
Поместите колокол и вверните в пакет 7.

Шаг 34 Снять рычаг
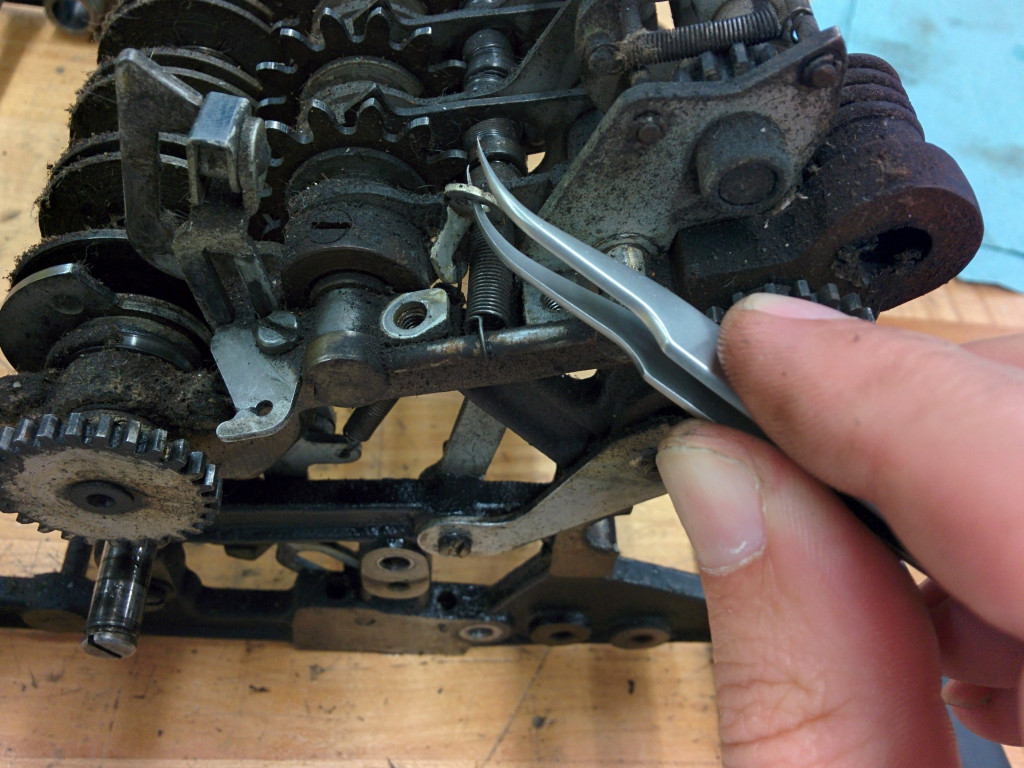
Он удерживается на валу с помощью фиксирующего зажима и шайбы. Клип на самом деле просто то, что кажется одной петлей толстой пружины. Найдите зазор в проволоке, затем используйте зубочистку и очень маленькую отвертку, чтобы отодвинуть зазор достаточно, чтобы вы могли удалить его с помощью плоскогубцев.
Снимите шайбу (внешний диаметр 5/16 дюйма).
Также отцепите конец весны от своего поста.
Поместите фиксирующий зажим, шайбу и рычаг в мешок 7.

Шаг 35 Снимите другой рычаг с левой стороны
Как и в случае с предыдущим рычагом, снимите удерживающую проволоку и шайбу (внешний диаметр 1/2 дюйма) вместе с рычагом.
Положите все в сумку 7.
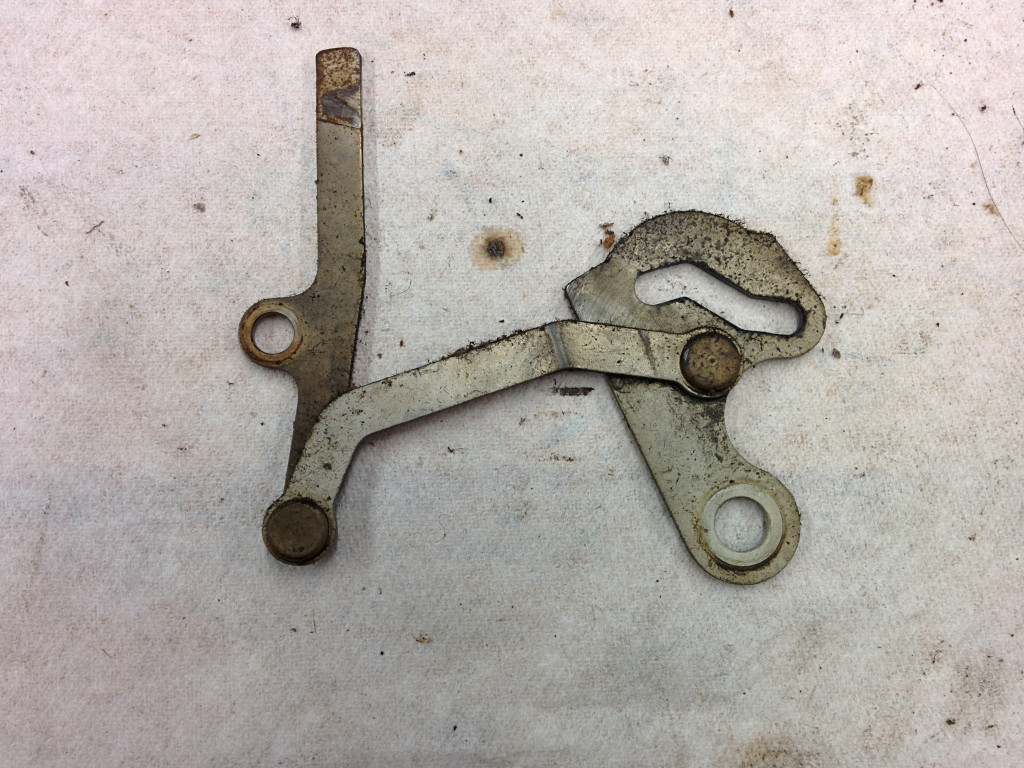
Шаг 36 Снимите двухсекционный рычаг с левой стороны.
Как и раньше, снимите фиксирующий провод, шайбу и рычаг. Шайба '' '5/16 "o.d.' ''
Положите эти детали в мешок 8.

Шаг 37 Снимите еще один рычаг слева
Место в сумке 8.
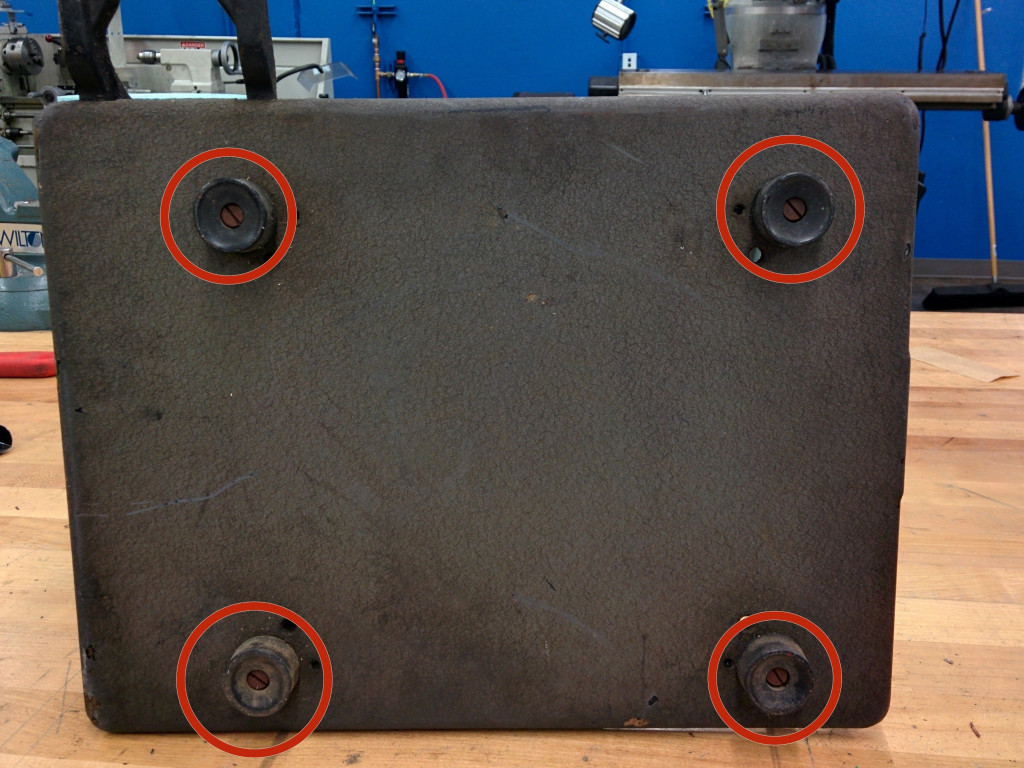
Шаг 38 Удалить ноги
Возможно, вам не придется использовать отвертку. Я мог просто повернуть ноги, и они открутились.
Поместите ноги в сумку 8.
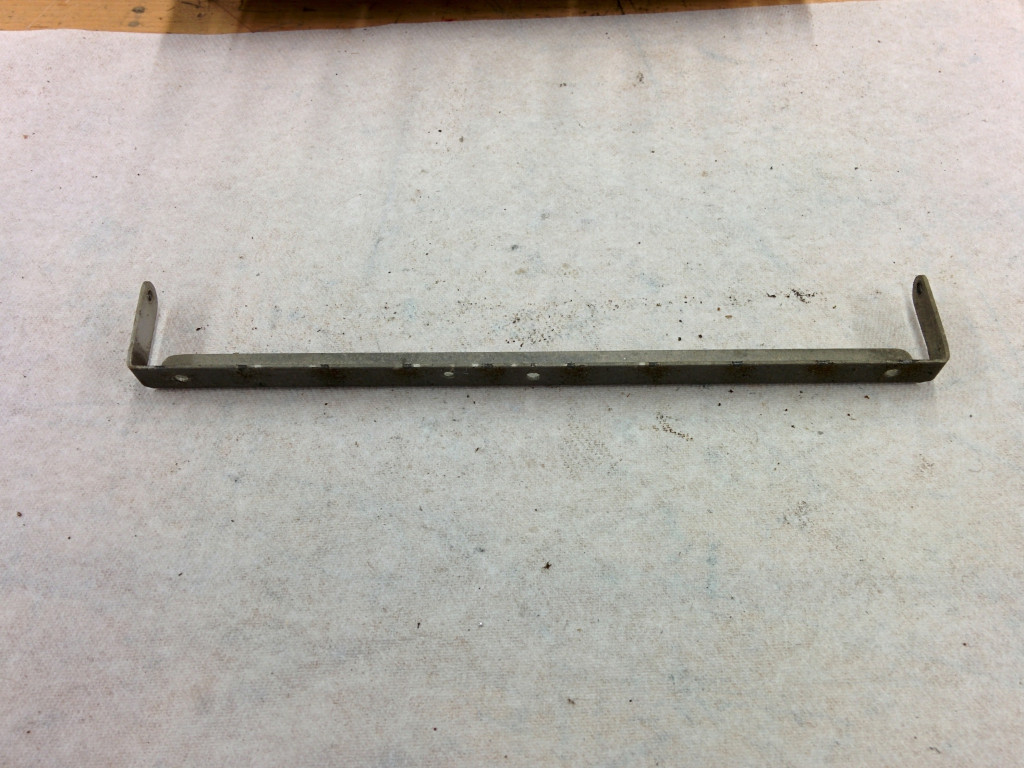
Шаг 39 Снимите нижнюю панель
Переверните калькулятор, чтобы он был вверх ногами.
Шаг 40 Ослабьте хомут вала
С левой стороны (которая теперь справа, так как вы перевернули вещь, но мы все равно будем называть ее левой стороной), открутите установочный винт, '' '# 6-40, 3/16 "' '', из воротника.
Я бы открутил это полностью. Положите его в сумку 9.
Поверните воротник и немного опустите его вниз по стволу. Это чтобы ослабить это. Вам, вероятно, не придется использовать проникающую смазку или смазочный пенетрант.
Шаг 41 Удалить другой рычаг
С левой стороны удалите этот винт. Это плечо диаметром 3 / 16-32, 1 ", 1/4" ". Положите его в сумку 9.
Снимите рычаг. Возможно, вам придется немного маневрировать, чтобы получить его бесплатно. Положите его в сумку 9.


Шаг 42 Снять рычаг / вал в сборе
Вернитесь к внешней стороне левой рамы, согните этот шплинт и вытяните его из отверстия. Положите его в сумку 9. Не беспокойтесь, если он сломается, потому что его легко заменить.
Pull the entire lever assembly with shaft straight out. Pull it smoothly along the direction of the shaft, possibly using another hand to push the shaft collar off the other end.
Put the collar in bag 9, and set the lever/shaft assembly aside.
Шаг 43 Remove a lever assembly
Remove the lever. Put all parts in bag 9.
Шаг 44 Remove the bell mute lever
Remove the screw, '''#8-36, 3/8", 7/32" shoulder'''.
Remove lever and place it with screw in bag 9.
Шаг 45 Break time
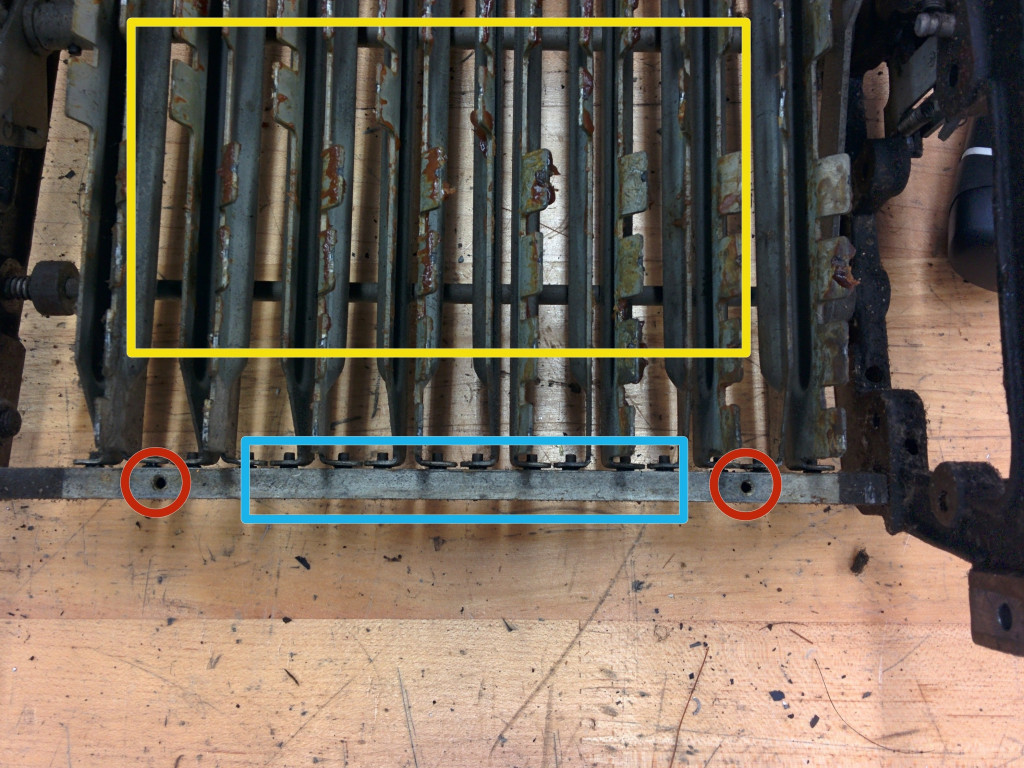
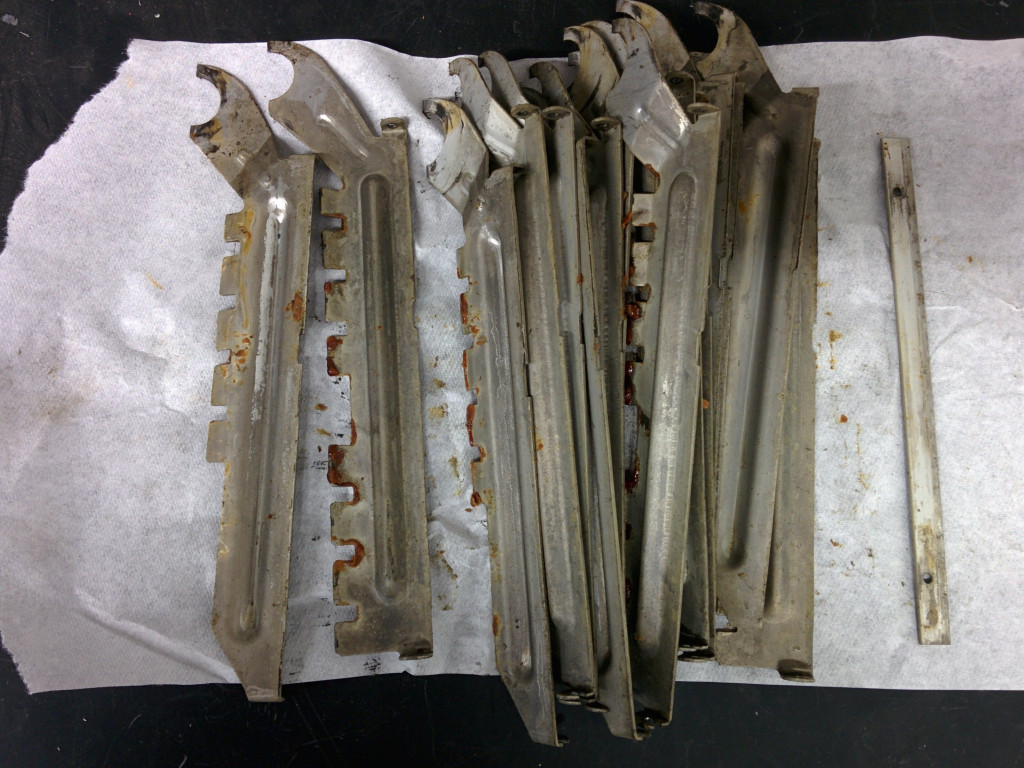
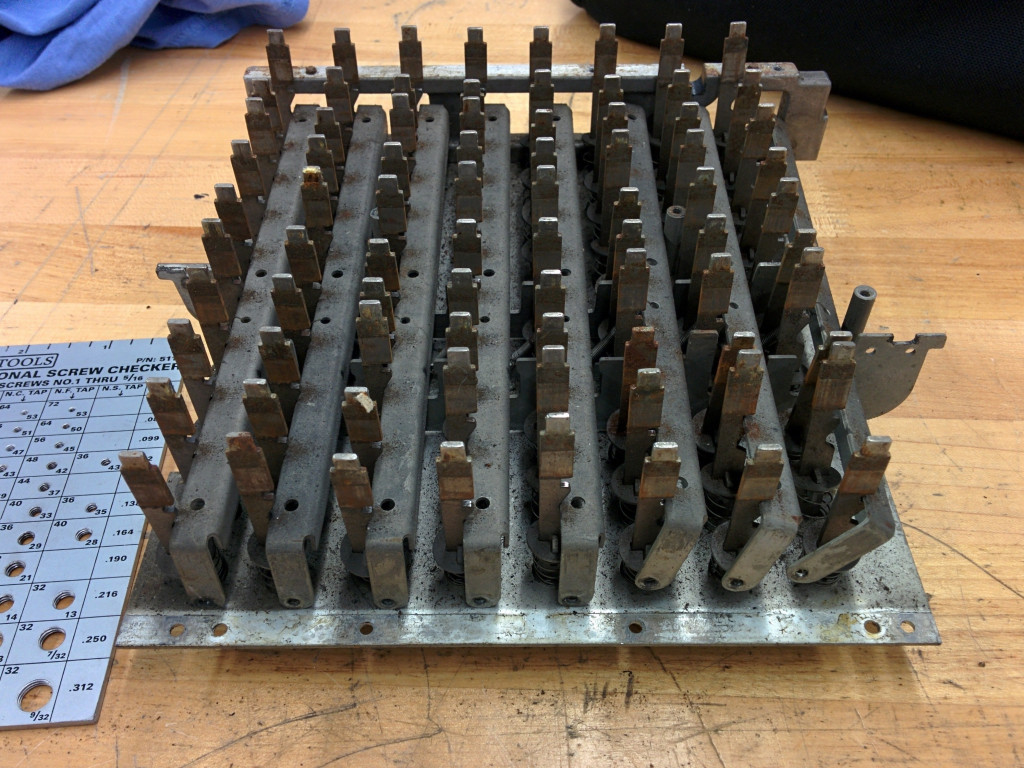
Шаг 46 Remove the key rock bars
Remove the retaining bar.
Get a few paper towels, because the rock bars will be very greasy.
Remove the rock bars, wrapping them in the paper towels. We can clean them later.
Also put the retaining bar in with them.

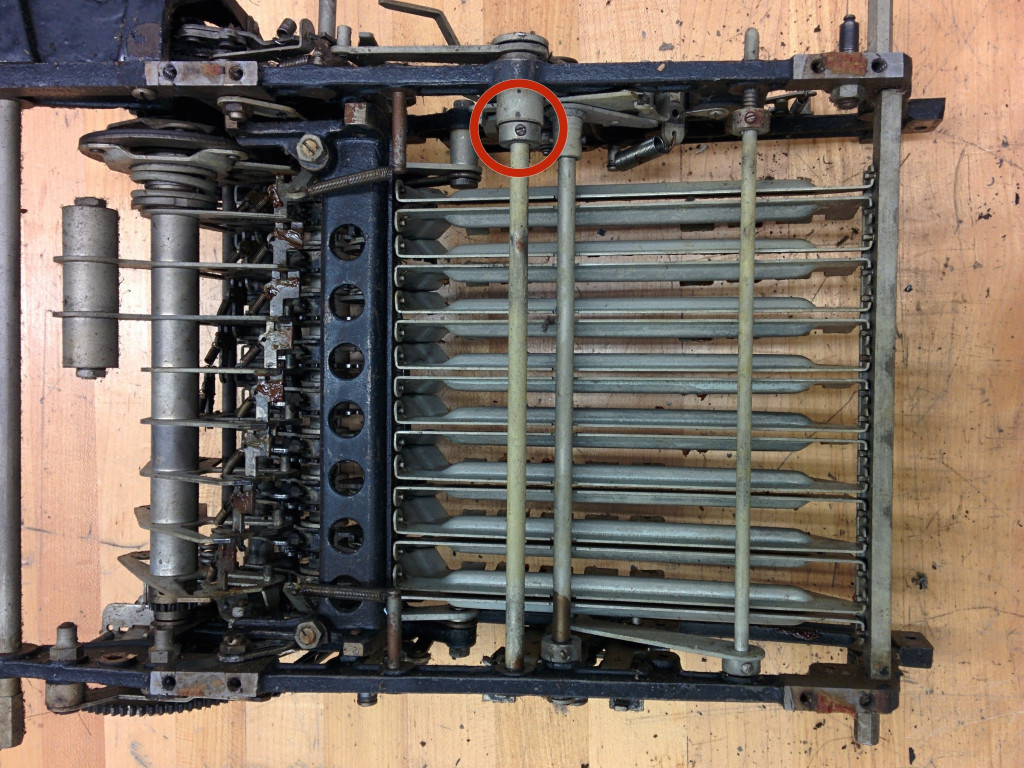
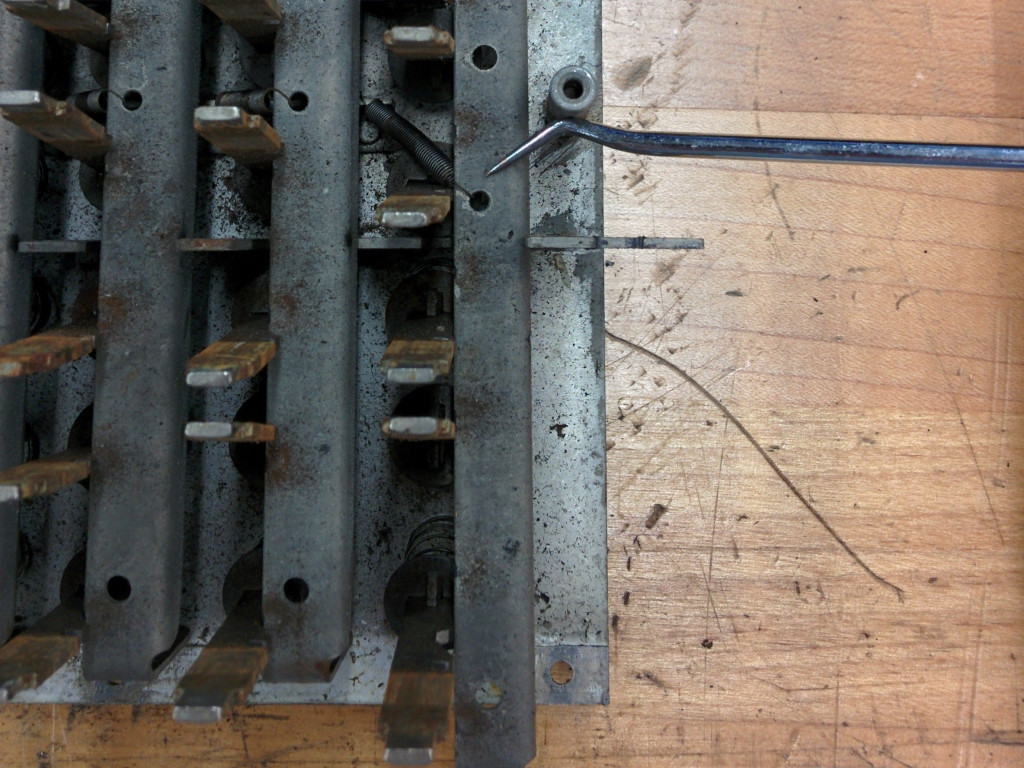
Шаг 47 Remove oiling tube
The oiling tube leads down to a hole in a collar.
On the left side rear, remove this screw and put it in bag 10.
Put the oiling tube into bag 10.
Remove this 3/8" nut and put it into bag 10.
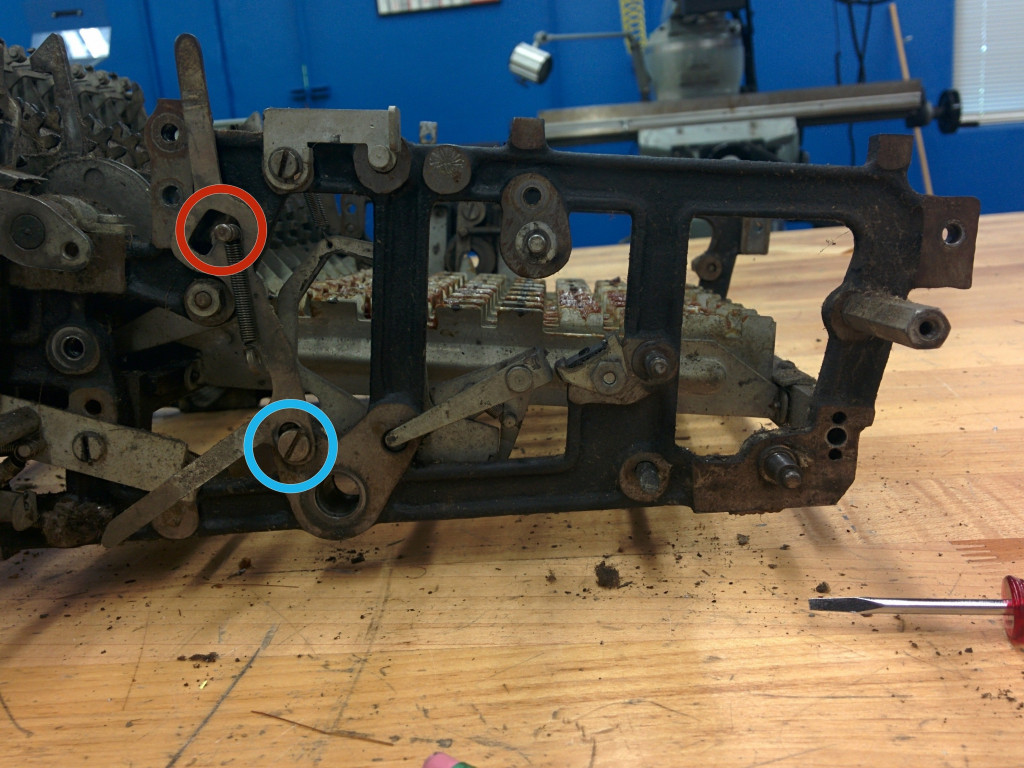
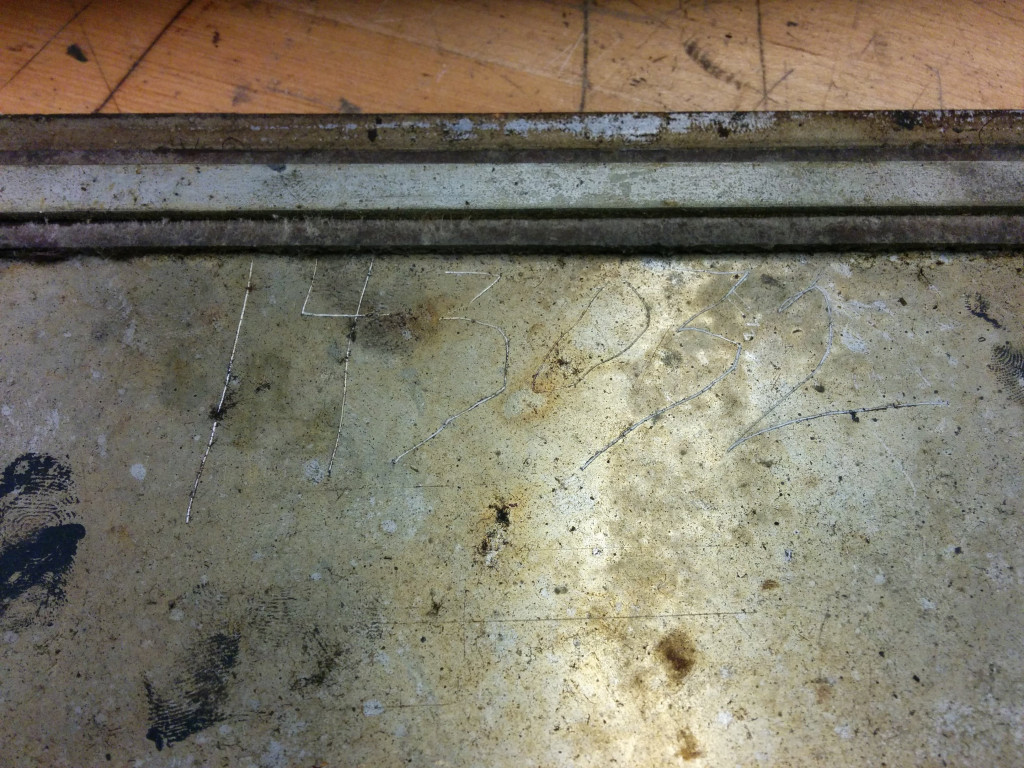
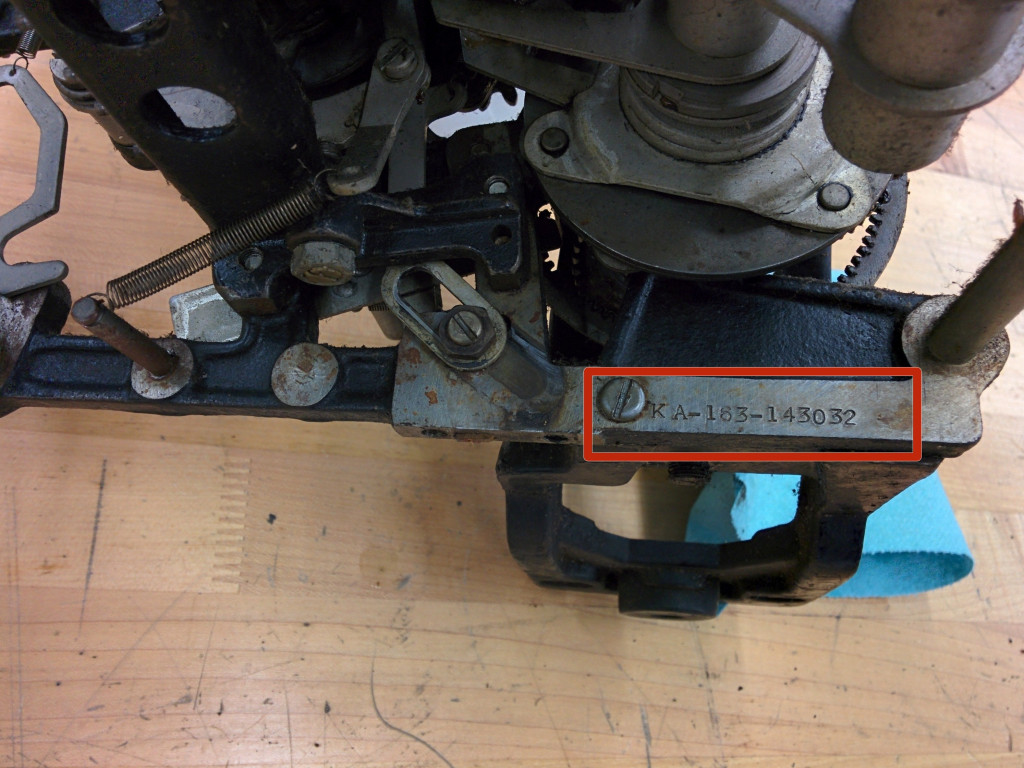
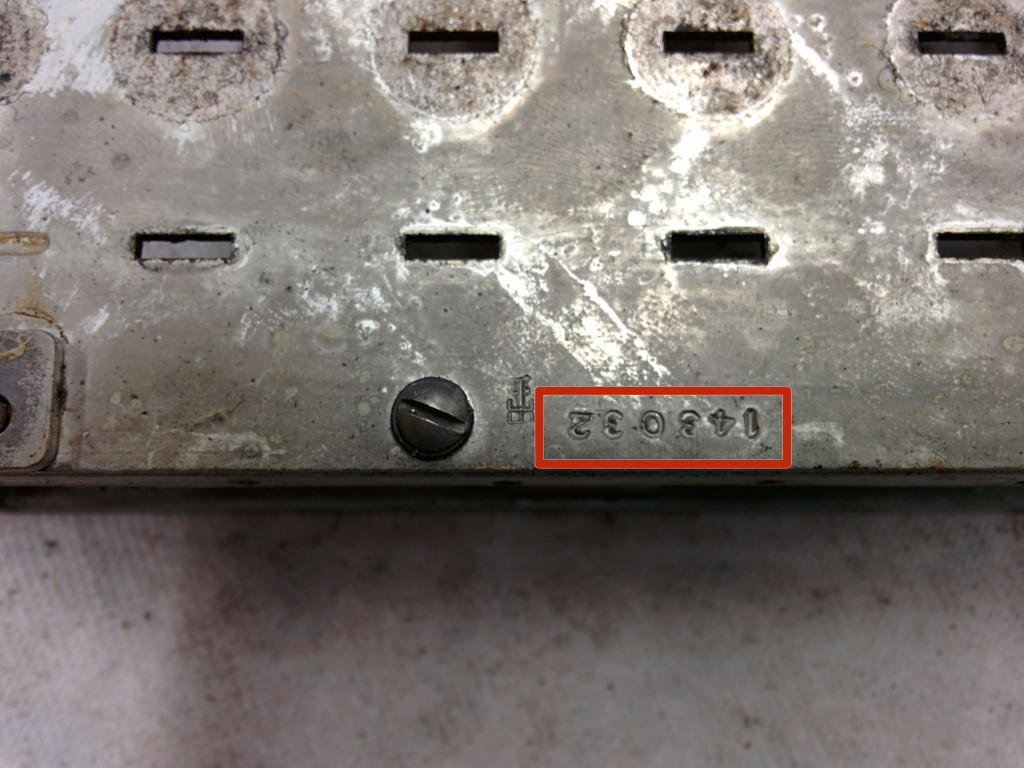
Шаг 48 Look at the model number stamped into the frame.
The model number on this one is KA-163, which indicates a 16 digit accumulator and 3 registers (the accumulator plus two counters).
The rest is the serial number.

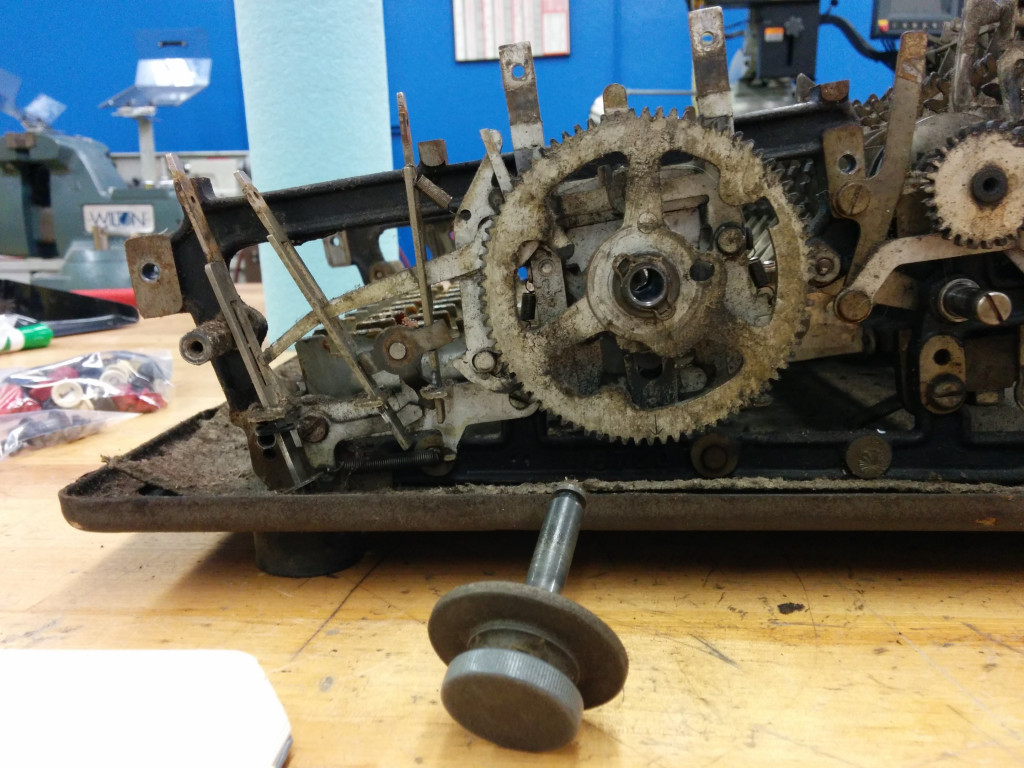
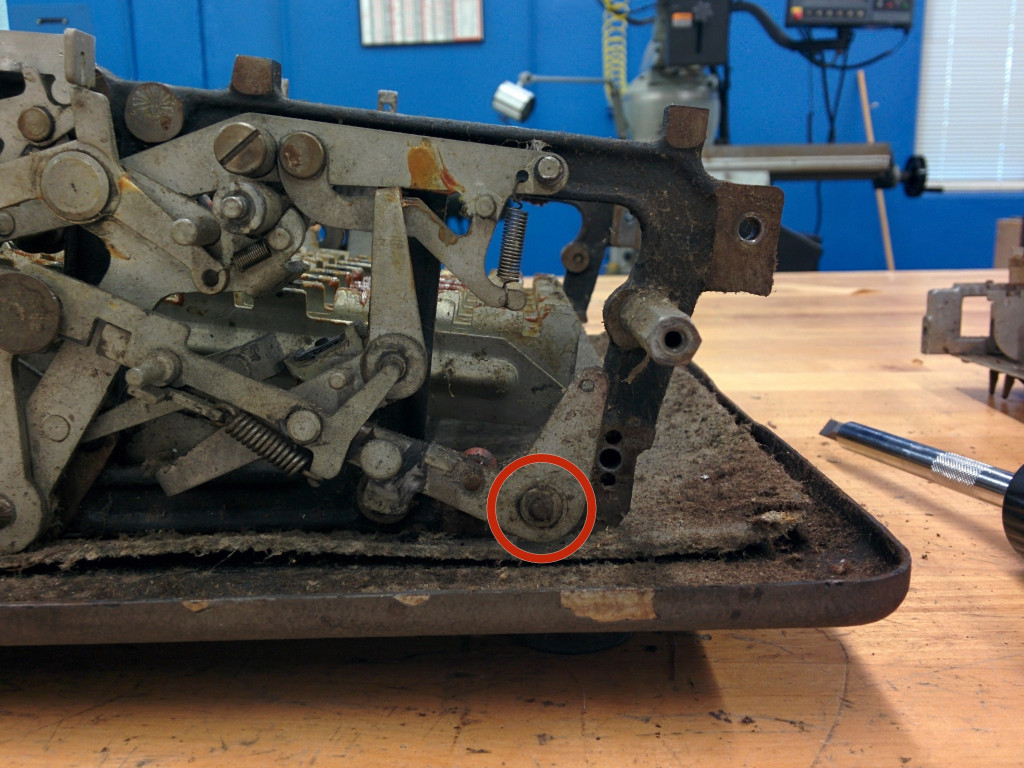
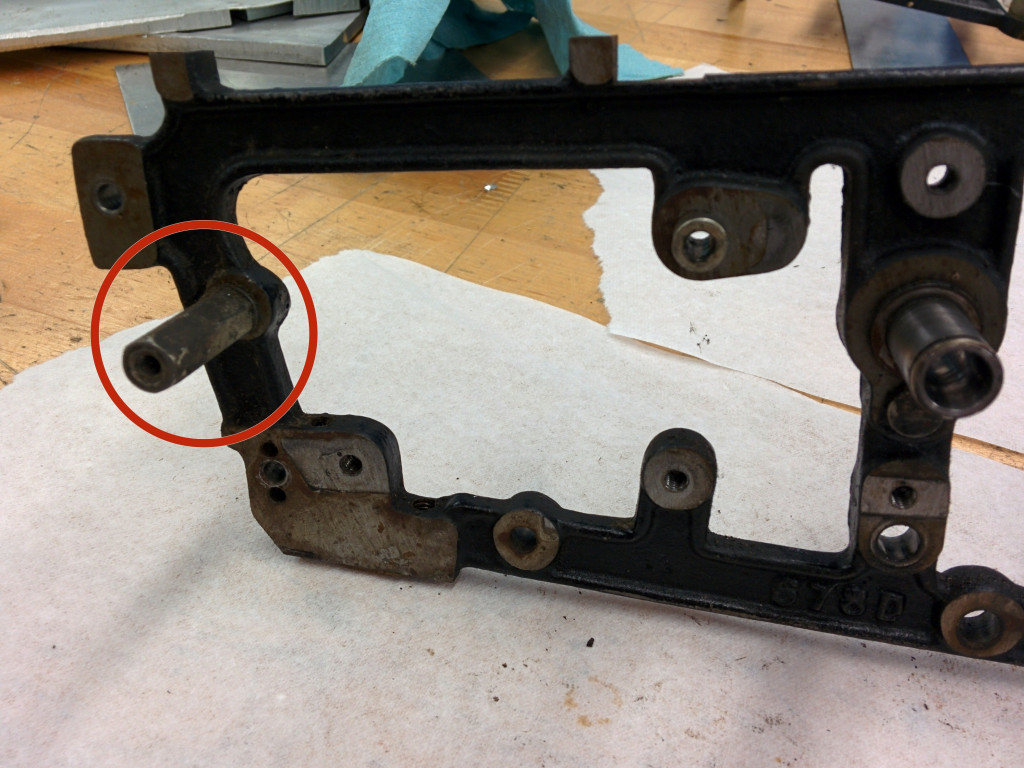
Шаг 49 Remove the standoff
You may need to use wrenches to prevent the shaft from rotating, but probably not.
Place the standoff in bag 10.
Шаг 50 Pull the motor mount off
Отложите это в сторону.
Remove the three 36t/12t gears by just sliding them out. Put them in bag 10.
Шаг 51
Put the screws in bag 10.
Unhook the spring from its lever and put the spring with part into bag 10.
Remove the axle half-bushing and put it in bag 10.


Шаг 52
Remove the half-bushing. Note that it has a larger arc and it has a hole in it where the oil from the oiling tube drips in.
Place screws and half-bushing into bag 10.
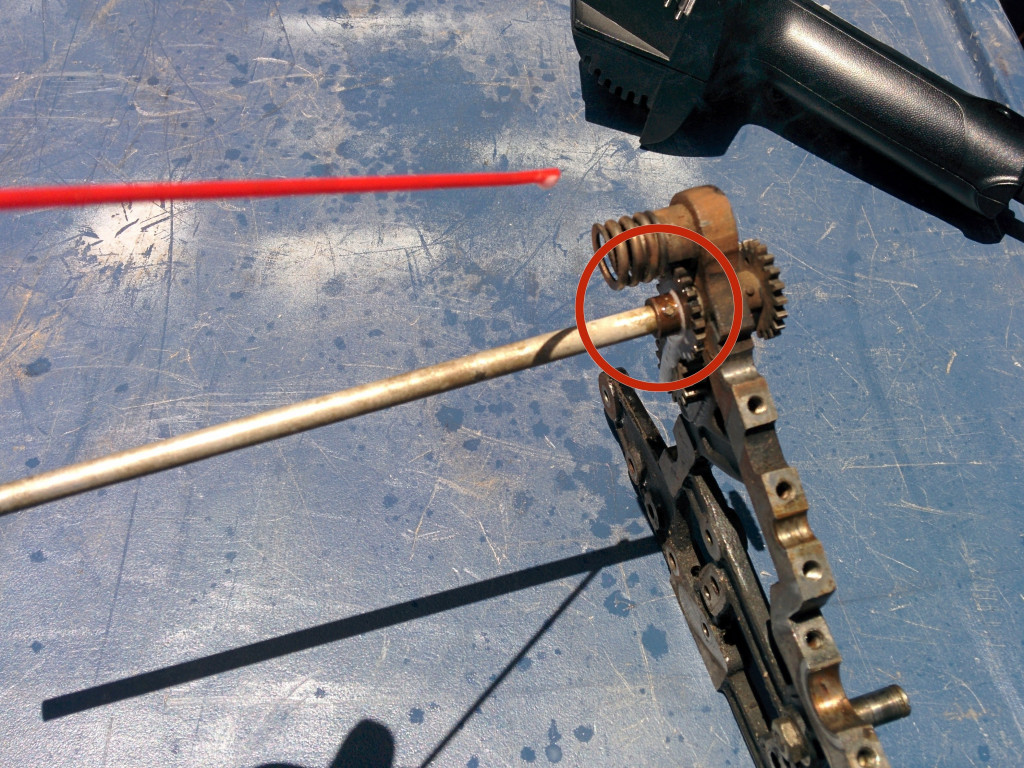
Шаг 53 Remove the carry/drive shaft
The motor drive gear should slide off.
Set these assemblies aside.

Шаг 54 Remove cam follower on small lever
The screw on mine doesn't come off the lever. There is a large bushing between the lever and the frame which does not come off, either.
Place in bag 10.
Шаг 55 Remove cam follower with large lever
There is also a washer, '''3/8" od, 0.047" thickness''', between the lever and the frame.
The screw has an eccentric shoulder on it.
Place all parts in bag 10.
Шаг 56 Remove 3-part lever
Remove lever assembly.
Place all parts in bag 10.
Шаг 57
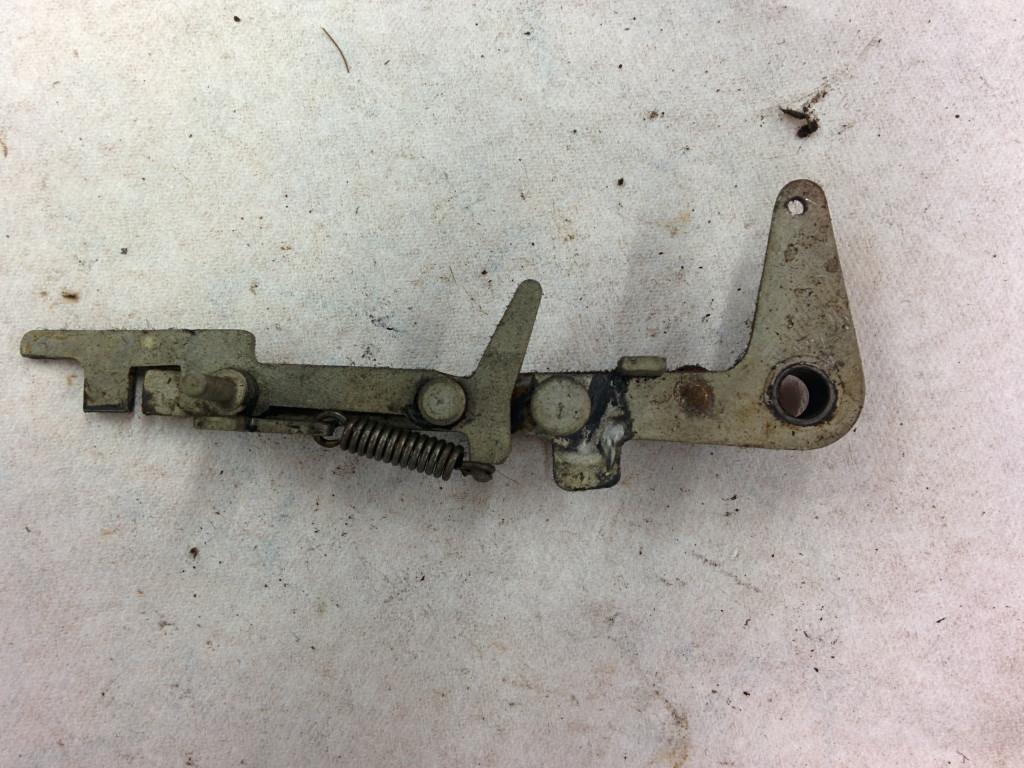
Шаг 58 Remove a clutch assembly
From right side rear, remove '''5/16" hex nut, #6-40, 0.095" thick'''.
On the inside of the right side rear, remove '''5/16" hex nut, 0.156 thick''', and screw, '''#6-40, 1/4"'''.
Remove the lever that the screw was holding in.

Шаг 59
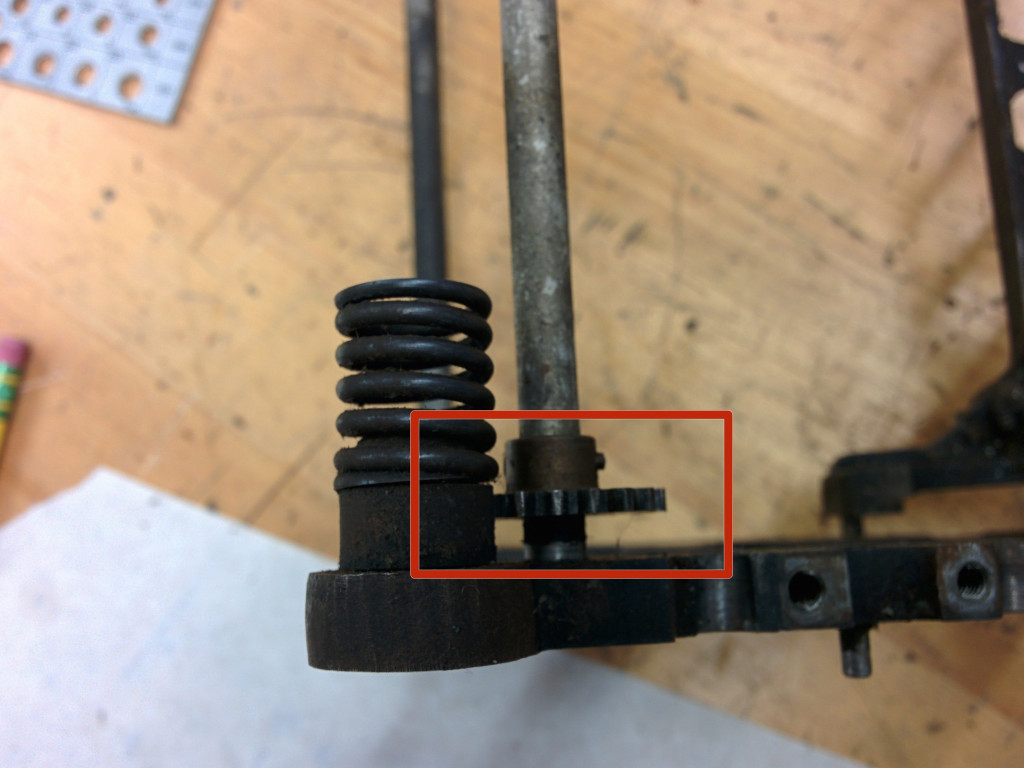
Remove this gear. It will just slide off.
Шаг 60
Шаг 61
Шаг 62
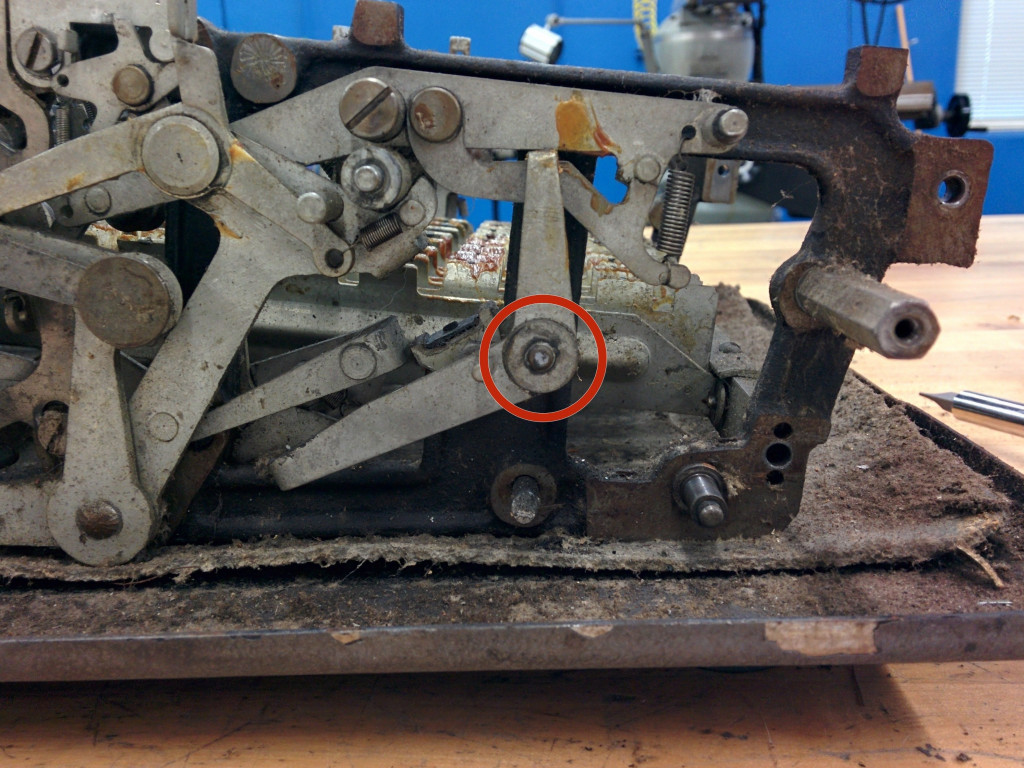
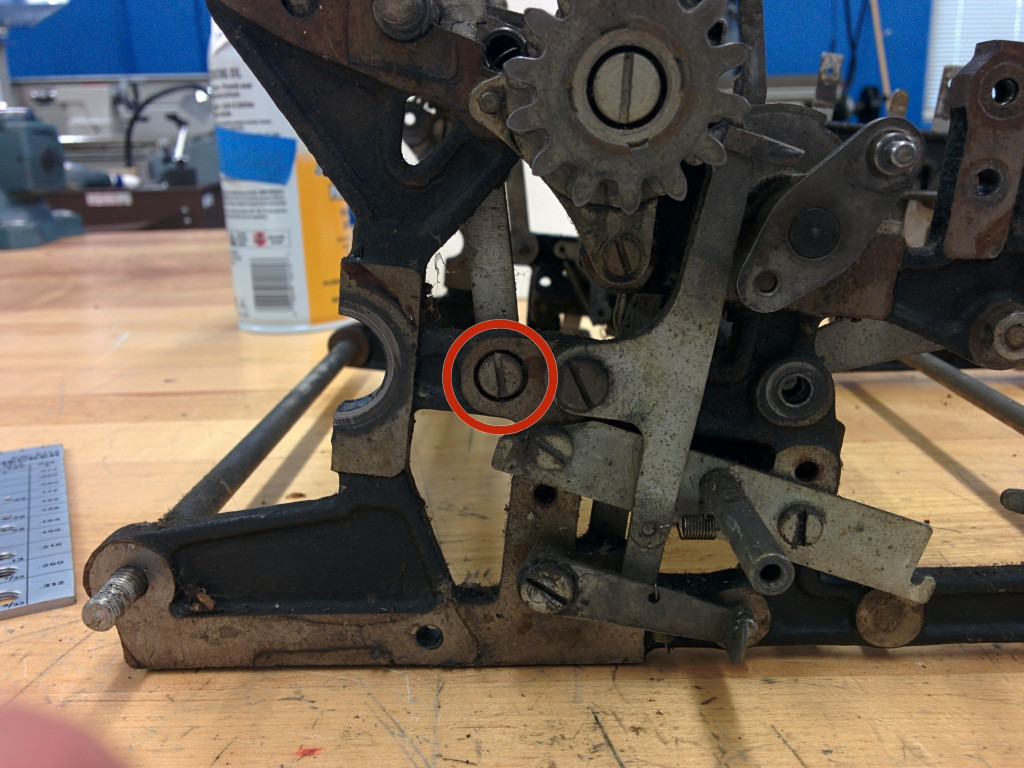
On the inside right rear, remove this screw, '''#8-36, 1/2"''', and the eccentric nut.
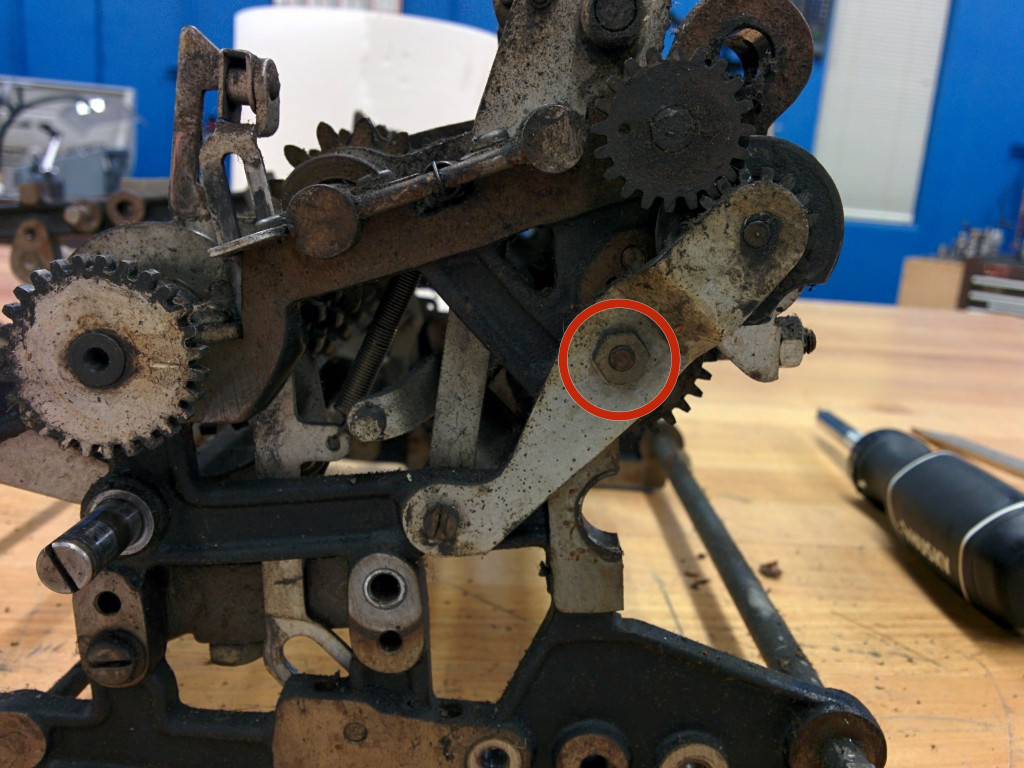

Шаг 63
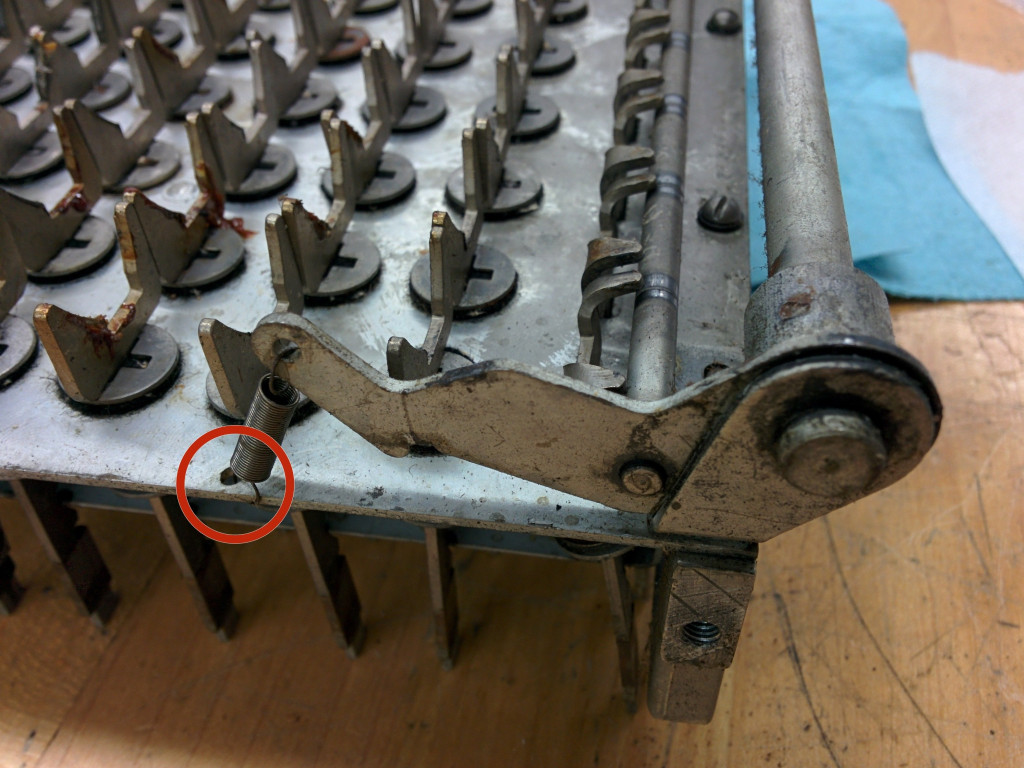
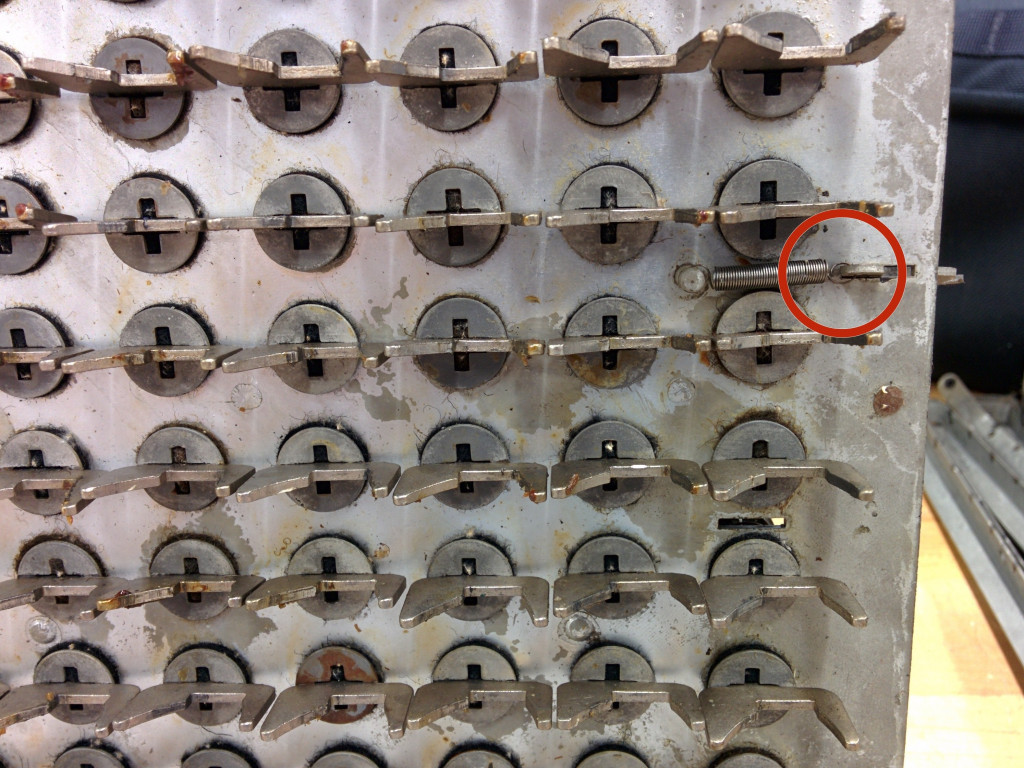
The middle screw holds down a part which has a hook for a spring. Unhook the spring from the hook.
Pull the lever back and manipulate the loose part that you just unscrewed from the third screw to remove it.
Шаг 64
The screw on the right is difficult to get to. Use a long thin screwdriver to loosen the screw a tiny bit, then a smaller screwdriver to remove the screw.
The screw on the right holds down two parts.
The screw on the left has a hook for a spring which runs along the length of the machine. You will likely be able to remove a short segment of the larger surrounding spring. Hook the end of the interior spring around the bushing after removing the short outer spring segment.
Шаг 65
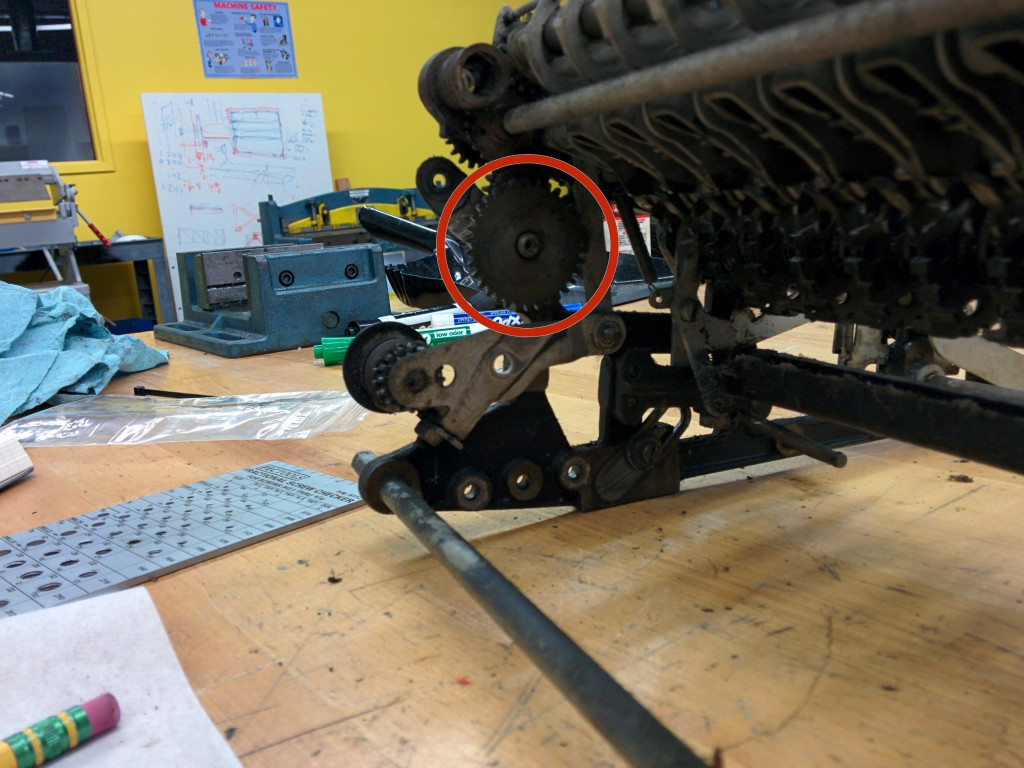
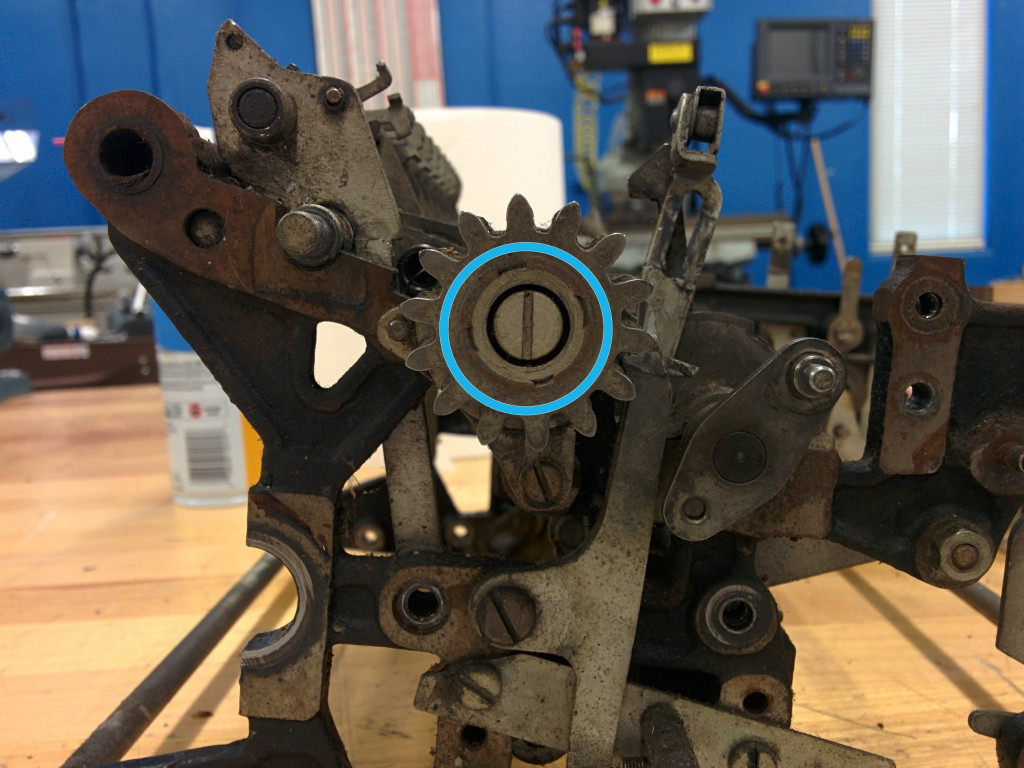
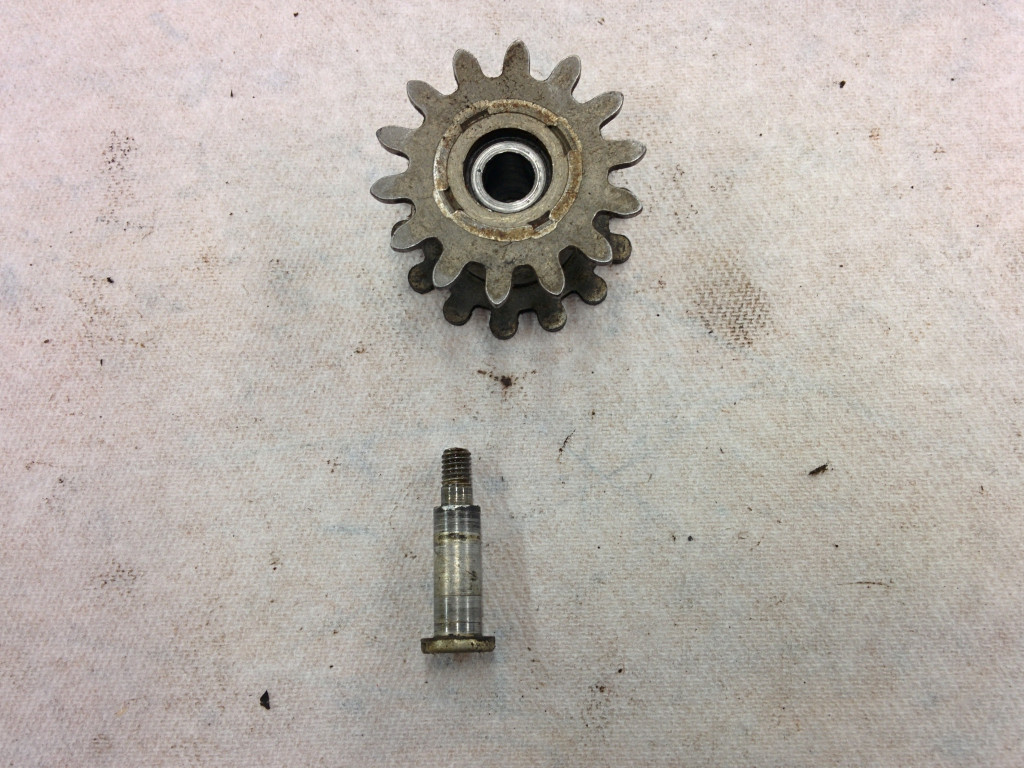
Remove this screw, '''#8-36 with 1/4" shaft'''.
Slide the gear off. Note that this gear has a recess for the screw.
Slide another gear off the right side. This gear does not have a recess. Note: I might have gotten this gear from a few steps farther down, need to verify this.
Шаг 66
From the inside, knock out this screw, 3/16-32.
Now remove the clutch support that you just freed from the screws.
Шаг 67


Шаг 68
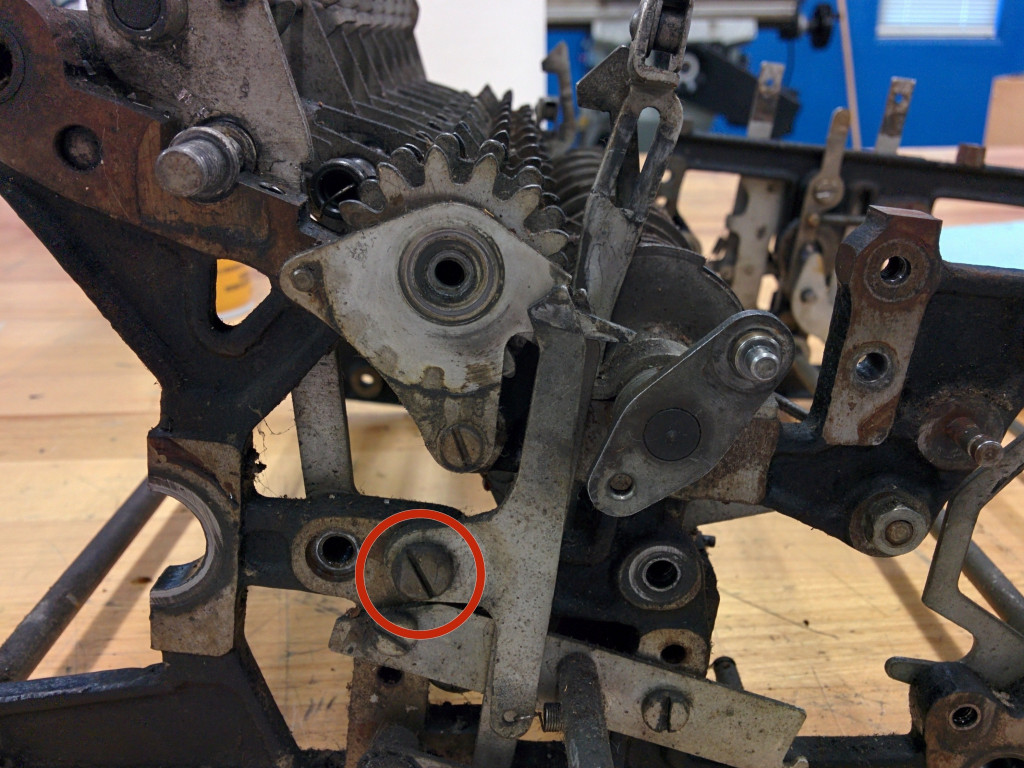
On the left rear side, remove this screw, '''3/16-32, 7/16"''', holding two levers.
Unhook the lever springs. Note that the lever with the shorter arm and shorter spring goes in front.
There is also a washer between the screw head and the first lever, '''9/32" od, 7/64" thick'''.
Шаг 69
Remove the lever and the bushing between the lever and the frame.
Шаг 70
Шаг 71

Шаг 72
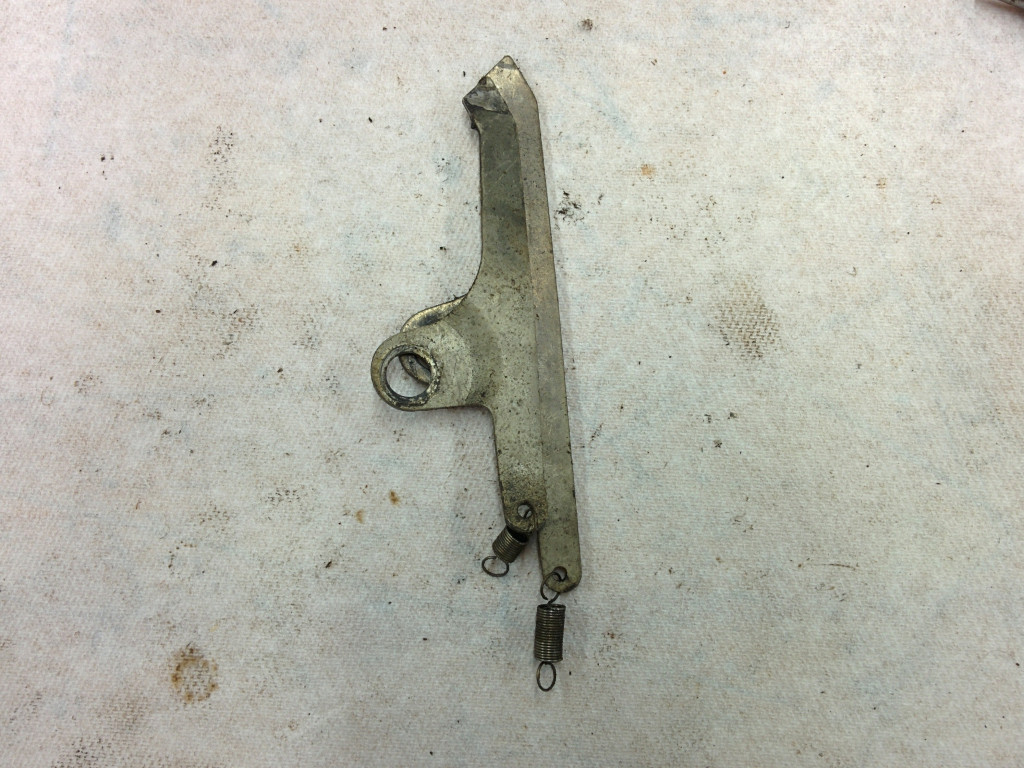
Remove the levers on both right and left side. Note that the tabs on the tops of the levers both face to the left, and that the lever from the left side has its middle tab bent inwards.
Шаг 73
Шаг 74
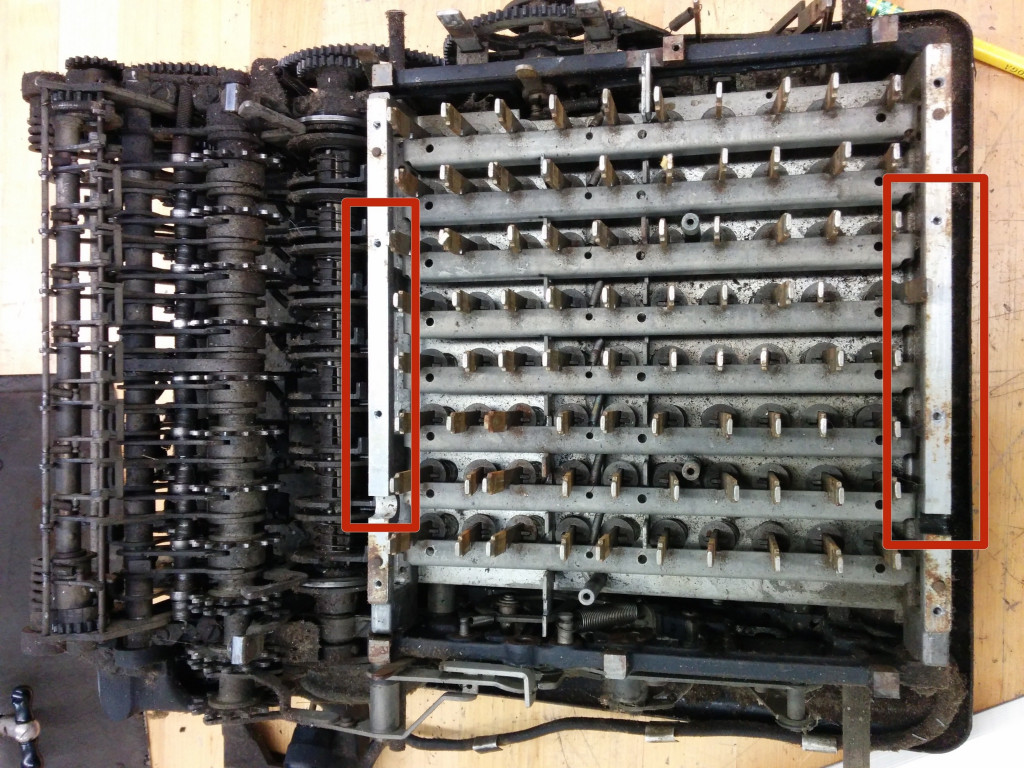
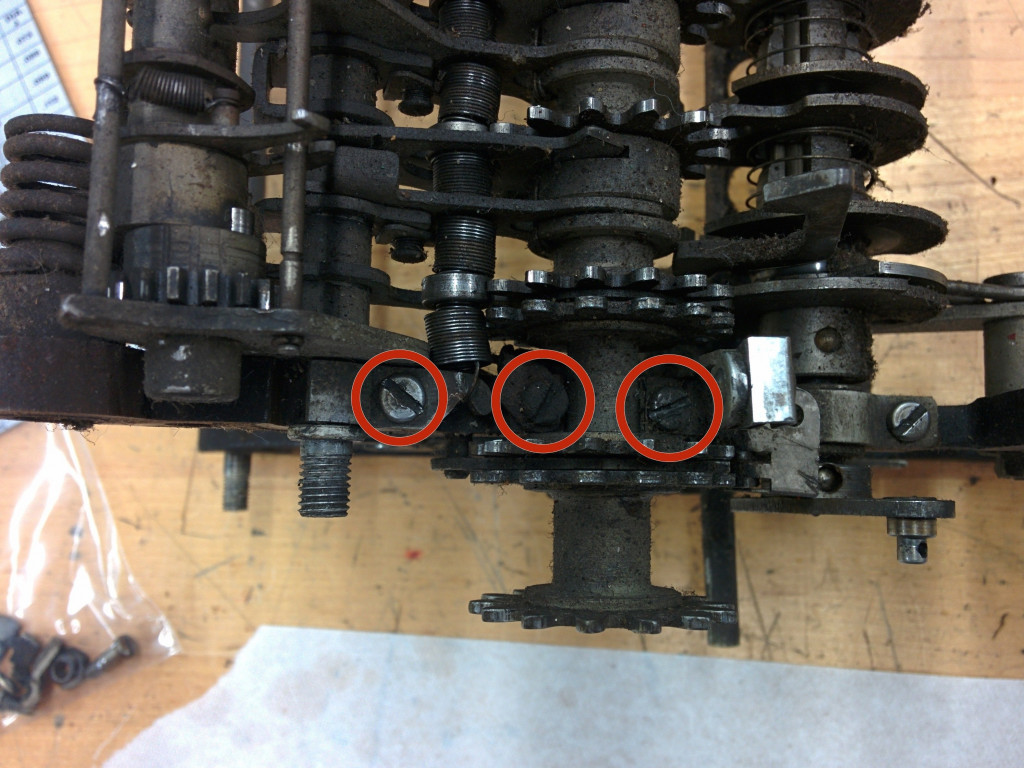
On right side and left side rear, remove four screws, '''#8-36, 5/16"'''.
Remove the semicircular half-bushings.
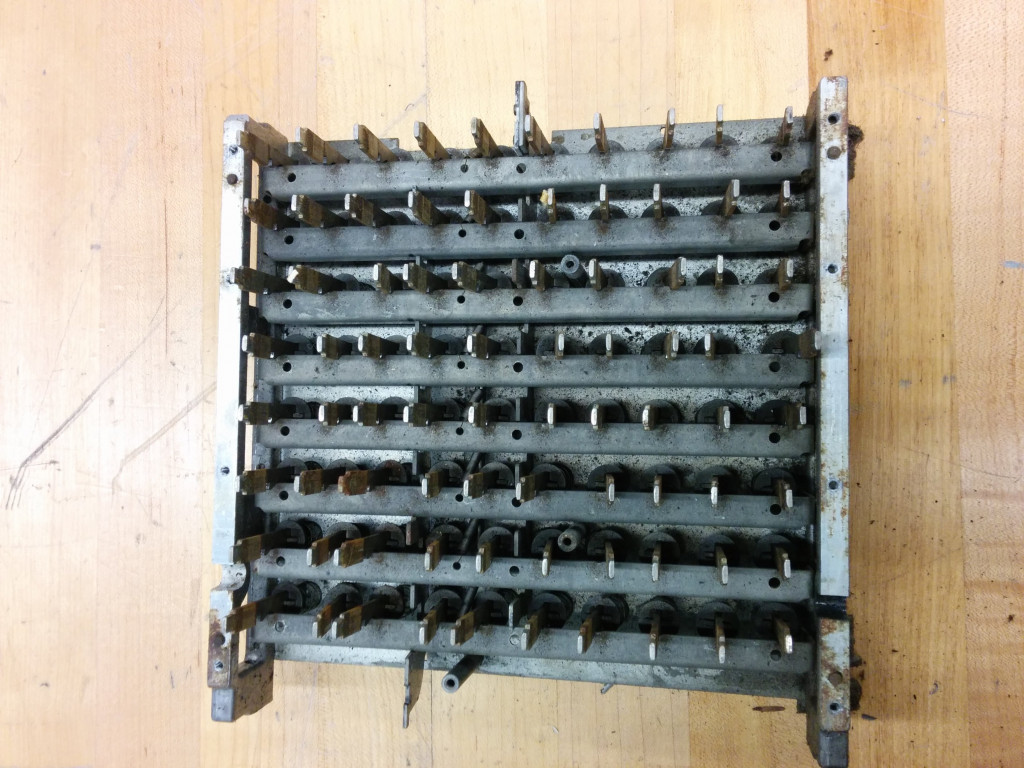
Pry up and out the selecting gear assembly. There are two clips holding the axle, just pull.
Set the selecting gear assembly aside.
Шаг 75
Remove clip and lever.
Шаг 76
Remove lever and clip.
Шаг 77

Шаг 78
On the right side, remove this screw, '''3/16-32 x 5/8"'''.

Шаг 79
Шаг 80
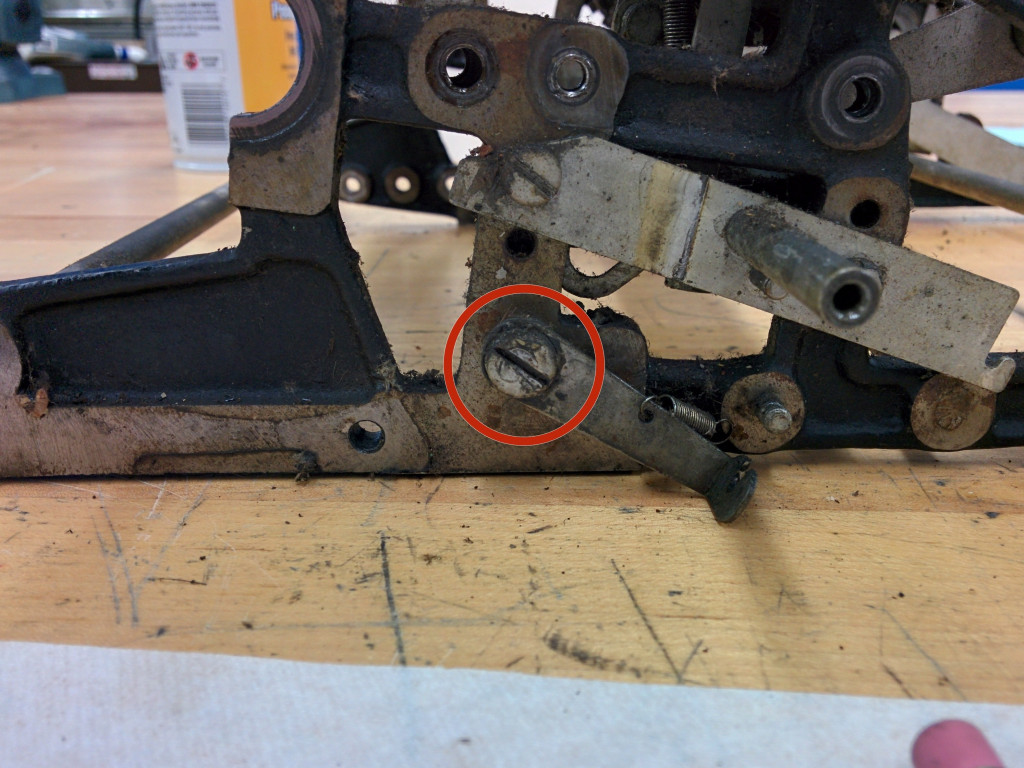
This other spring is on two posts, remove it completely. It is 3/16" in diameter, with a wire size of 0.012".
On the right side rear, unscrew this hex spacer. It has a #8-36 thread.
Шаг 81
Шаг 82
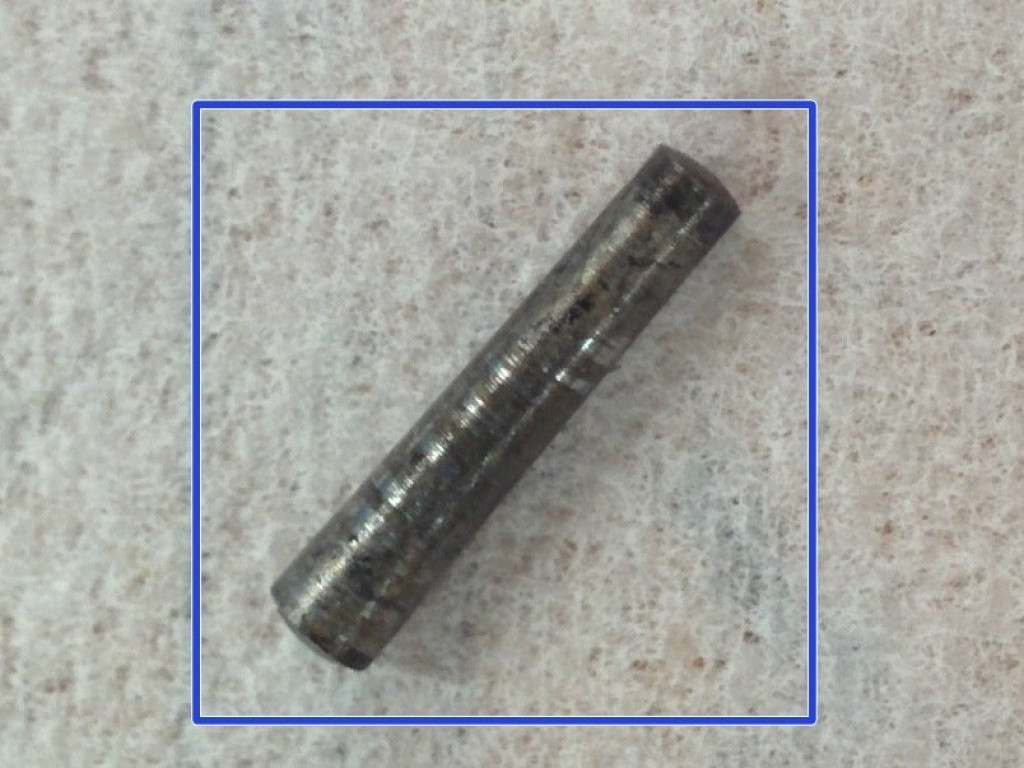
It is fixed to the shaft with a taper pin.
A taper pin is a pin that tapers from a wide end to a narrow end used to affix parts onto a shaft. The machinist would put the gear on the shaft, drill a hole, then taper the hole by using a tapering reamer. Then the machinist would put the taper pin in, give it a few gentle whacks with a hammer, and grind off any end sticking out too much.
Шаг 83 Break time

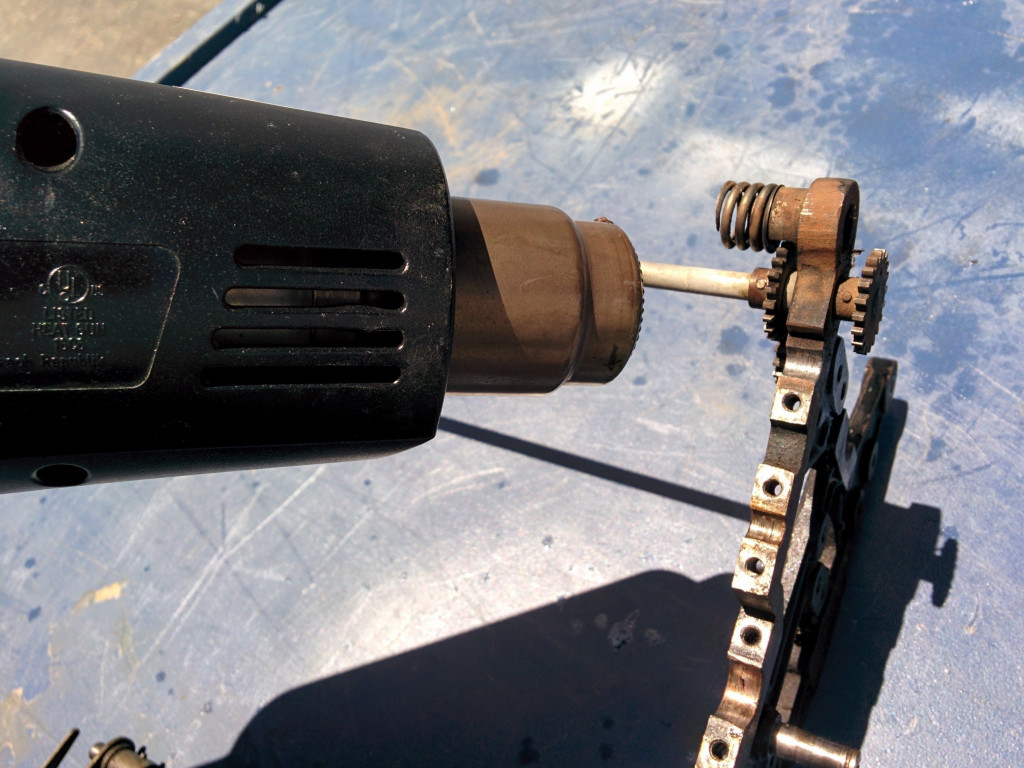
Шаг 84 How to remove 90 year old taper pins
Take a heat gun and blow heat on the part for about two minutes to get it up to maximum temperature.
Spray the part with penetrating lubricant. It will smoke slightly, and it won't ignite.
If the lubricant evaporates, spray some more on, until the lubricant shows no sign of evaporating anymore, meaning that the temperature of the part has dropped significantly.
Repeat the heat - lubricant cycle three more times.
The idea is to break the bond between the taper pin and the part, and get some lubricant in the tiny microscopic gap in between.

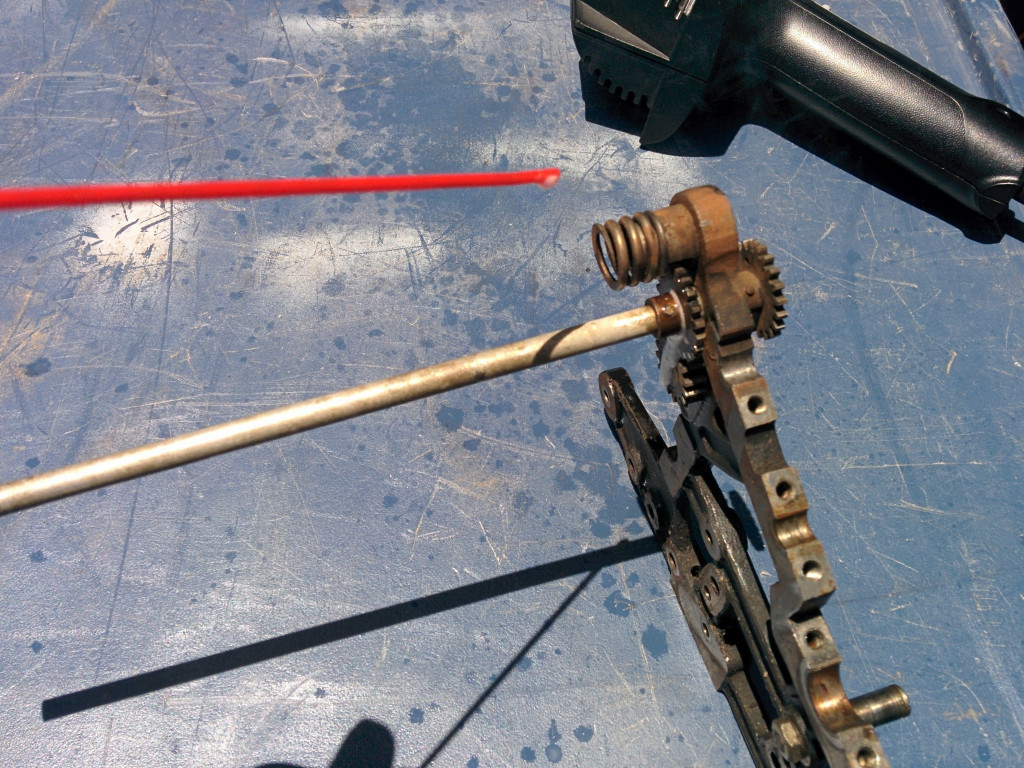
Шаг 85
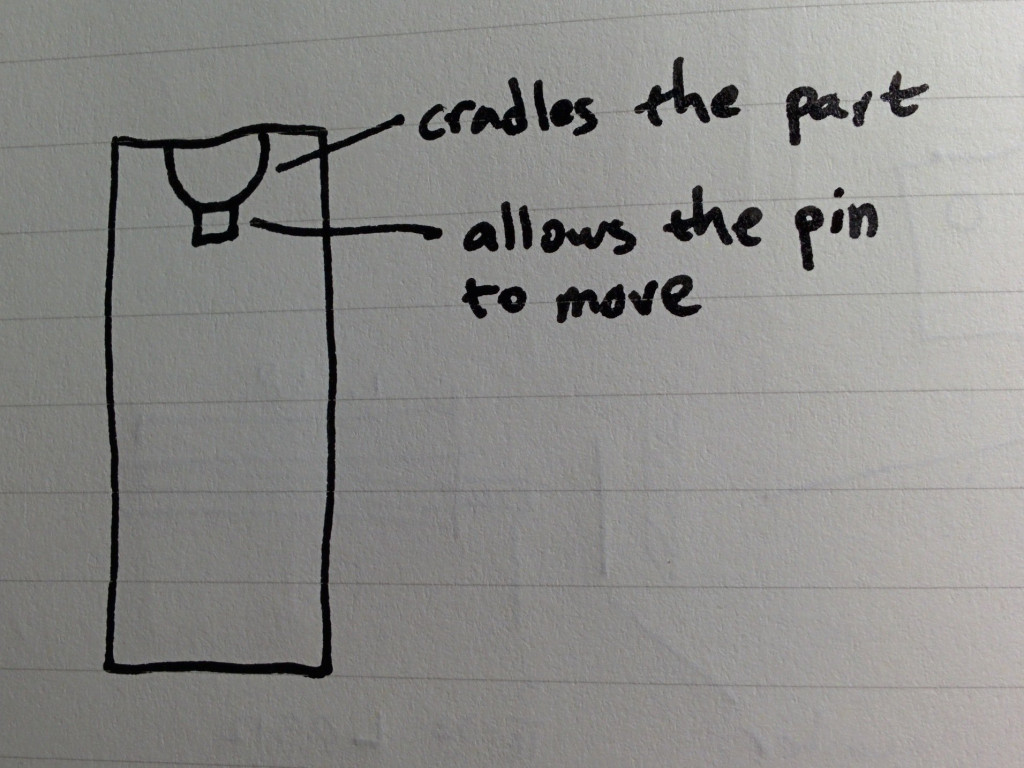
You must support the part against something that will provide maximum surface area to the part, but also allow the taper pin to move at the bottom.
A piece of aluminum with a semicircular depression is perfect. You can do this either with a drill, then sawing off halfway through the diameter of the hole, or with an endmill of the right diameter.
Then cut a smaller notch the length of the depression to allow the pin to move. Again, this could be done with a drill and a saw, or an endmill.
Шаг 86
On my machine, the smaller pins had one end ground flush to the part, and the other sticking out. The end that stuck out was the smaller end.
Many of the larger taper pins have a rounded end and a flat end. The rounded end is the larger end.
Position the part in the arbor press so that the part is supported by the jig you made, and the '''small end''' of the pin is up.
Press on the pin with the arbor press. If you are close to using all of your strength and the pin has still not moved, give it a few more heat - lubricant cycles.
If the thing still doesn't move, you may be pressing on the wrong end. In which case, see the next step.
Шаг 87
Give it a few cycles of heat - lubricant.
Then use a 1/16" flat pin punch and hammer at the pin. But don't use your full strength: that will just compress the pin and expand it, making it more stuck.
If that still doesn't work, you'll have to drill out the entire pin, which is unfortunate because now you will have to replace the pin when you assemble the machine.
Шаг 88
Шаг 89 Back to the disassembly
Bag the taper pin. It should be about 0.086" on the wide end, 0.071" on the narrow end, and about 0.410" long. That is a taper of about 1/2" per 12", which is not a modern standard taper pin size -- 1/4" per 12" is the standard today.
However, If the wide end were 0.080" then we'd get a standard taper. Perhaps the wide end was widened a bit by the installation?
Now you can pull apart the frame. The gear will slide off its shaft. You may have to pry off the big iron piece in the middle, and move one side of the frame, then the other, but eventually the sides will separate.
You can pull of the rightmost rectangular part and the shaft second from the right. Set the rectangular part aside, and bag the spring.
Шаг 90
Now the left frame is free. Set it aside.
Шаг 91
Шаг 92
Remove the spring from its post on the frame, and remove the lever.
The nut should now slide out.


Шаг 93
Шаг 94
Remove the inner taper pin and gear from the shaft at the back.
Slide the shaft out of the right frame.
Remove the remaining taper pin and gear from the shaft.
Set the shaft aside.
Шаг 95
On the right frame, there is a cam ring that is loose. Remove it, if you haven't already.
You should now be able to jiggle these levers loose, Remove their springs first. You will probably have to slide the shaft a bit out, also.
Шаг 96
Now remove the assembly off the frame and bag it.
Шаг 97
The taper pin is larger than the previous ones: 0.112" at the big end, 0.096" at the small end, and 0.517" long. This places the taper at nearly 3/8" per 12", which is not standard.
Again, though, if the wide end were 0.107", then the pin would be standard.
Slide the shaft out of the frame, and slide the bushing off the shaft.
Шаг 98
Шаг 99
Шаг 100
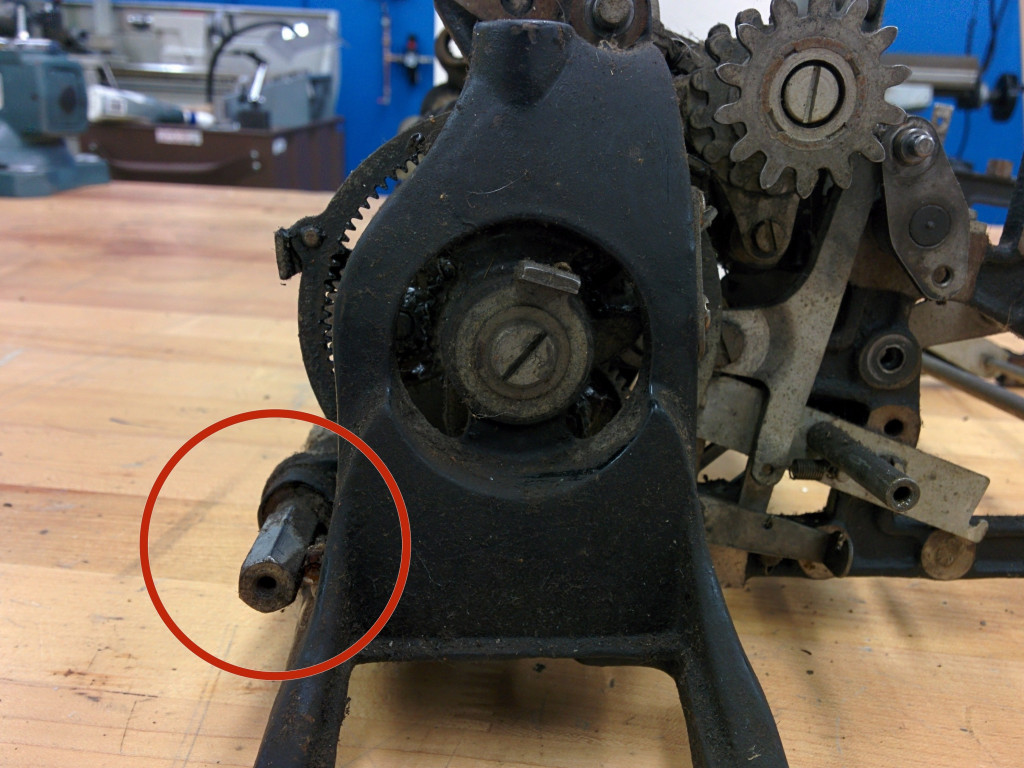
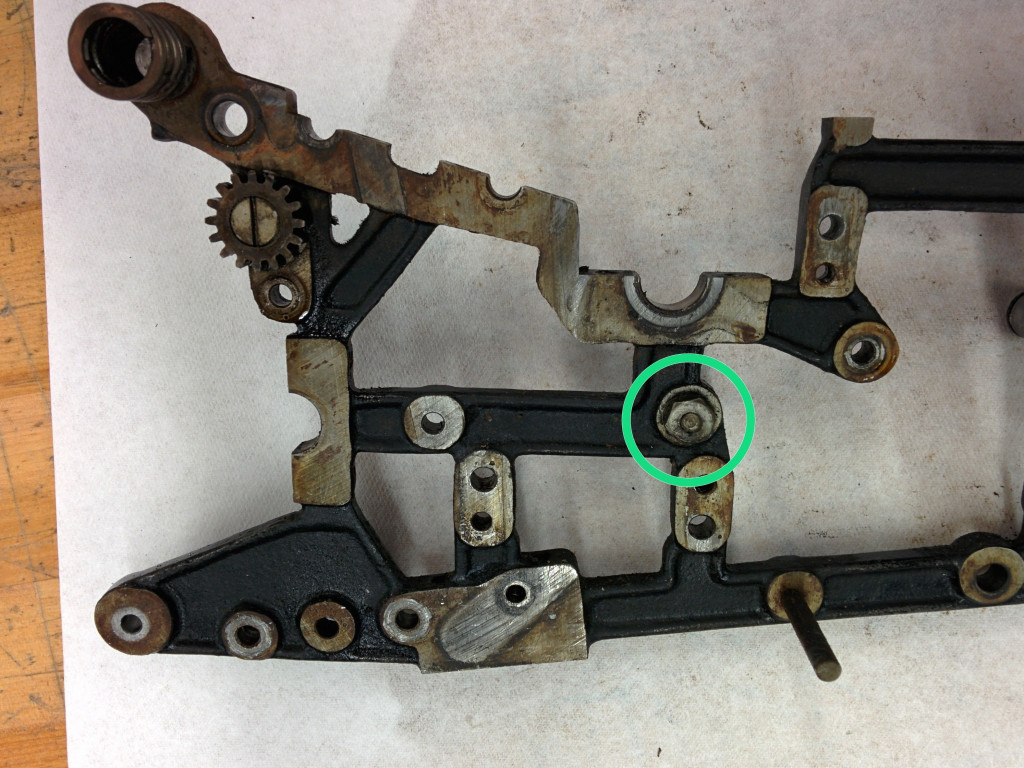
On the front of the right frame, remove this 1" hex standoff with 3/16-32 threaded male end. There is also a washer, o.d. 0.379 x 0.048.
In the middle inside of the right frame, remove this 3/8 nut. There is a split washer on the inside and a regular washer on the outside, plus a screw-in post with 3/16-32 threads.
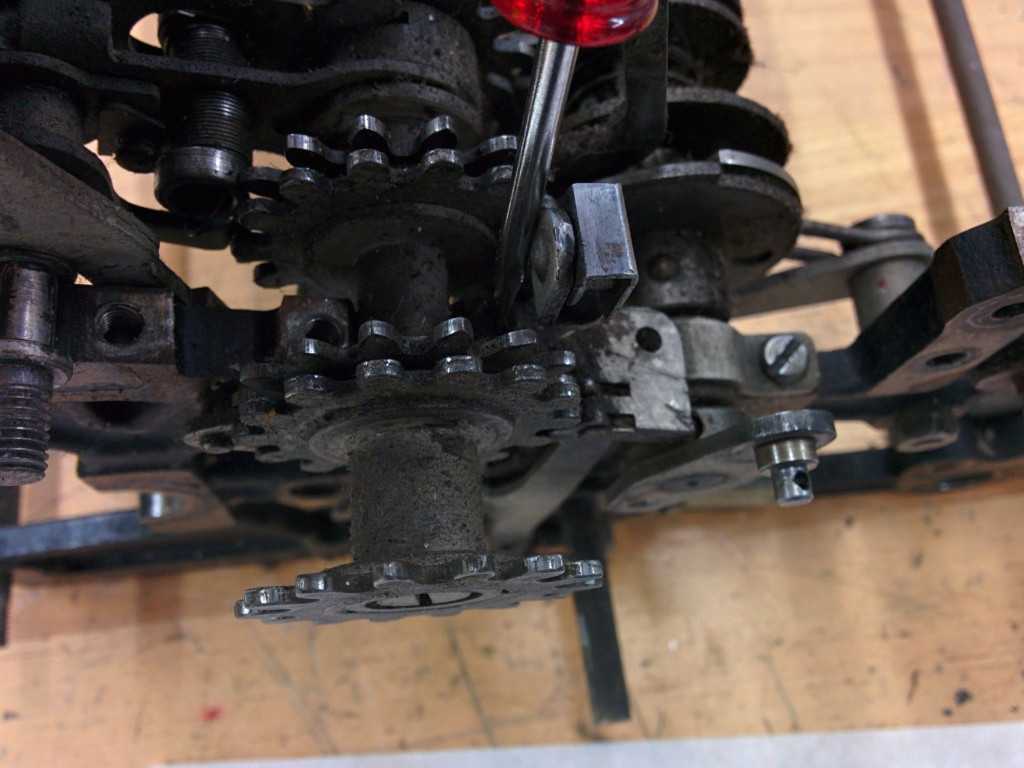
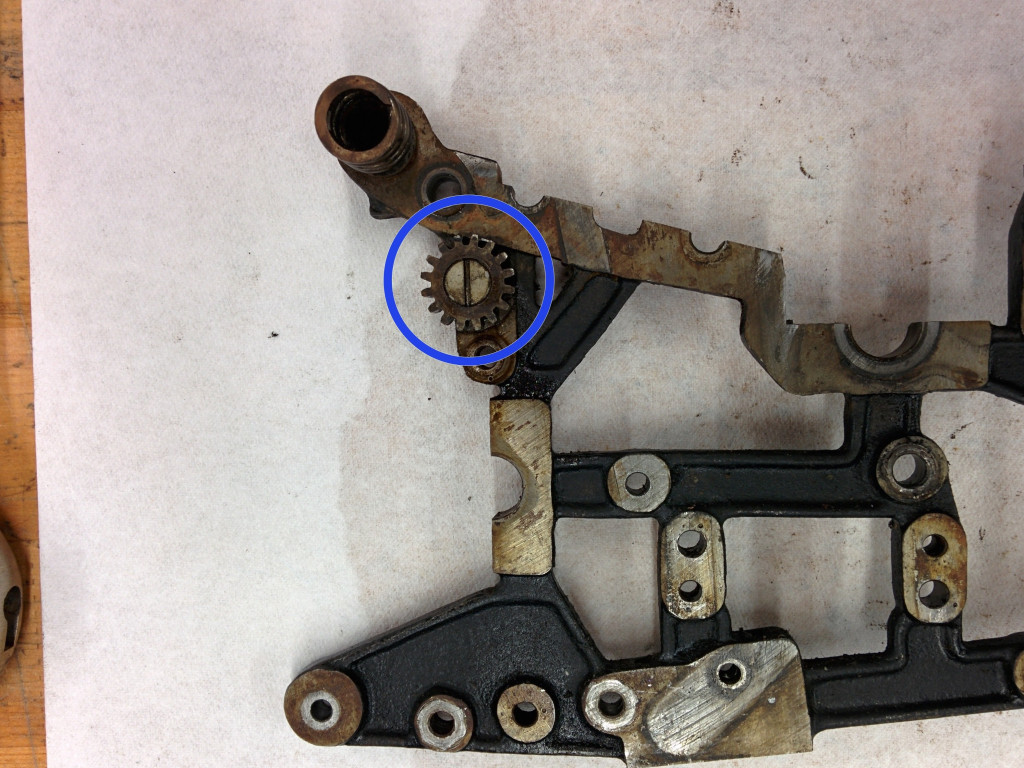
On the back of the right frame, unscrew the #8-36 screw holding the gear.
Шаг 101
In the middle of the left frame, unscrew this #8-32 spring post, remove its accompanying washer and the part it was holding on.
In the front inside of the left frame, remove this 3/8 nut and the spring post 1/4-28 screw.
Шаг 102
We've pulled everything we can off the frames, and have completed the disassembly of the main body.
Шаг 103
Be sure you secure your iPhone.
Шаг 104
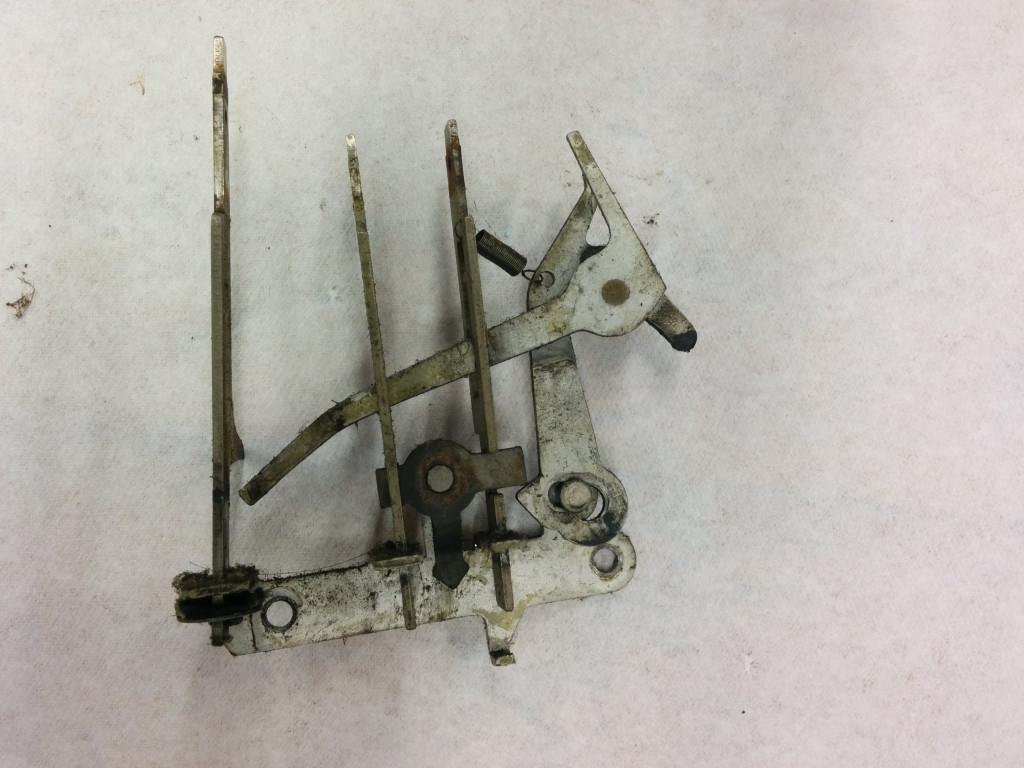
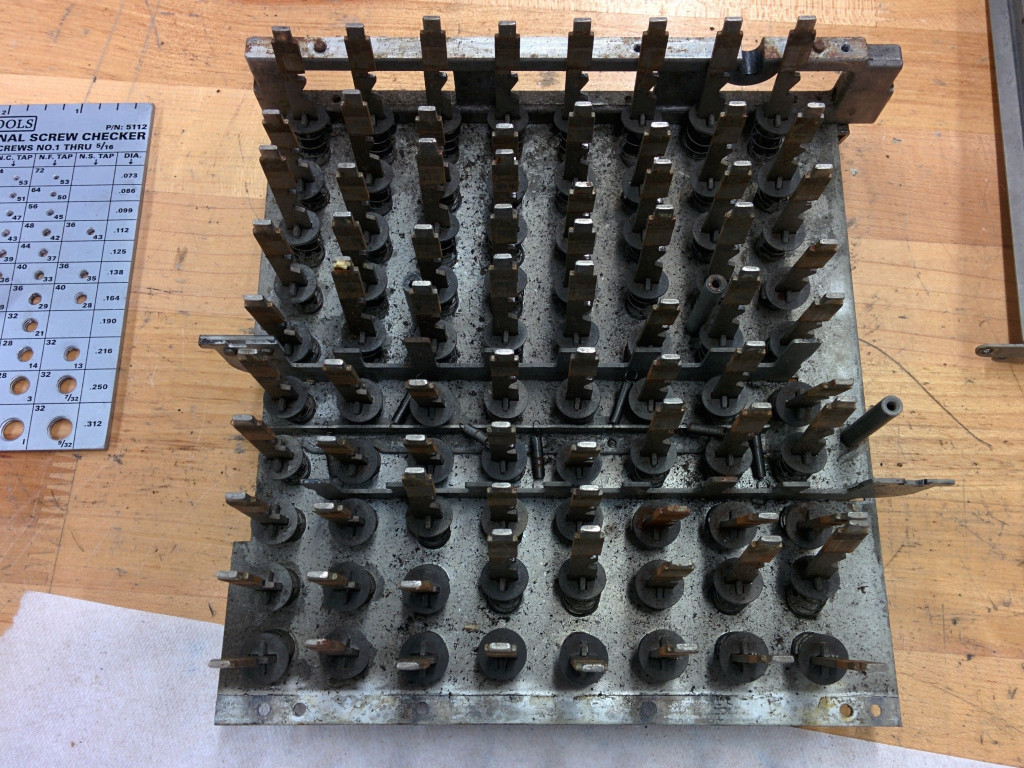
Шаг 105 Taking apart the keyboard assembly
Unhook the spring from the keyboard baseplate.
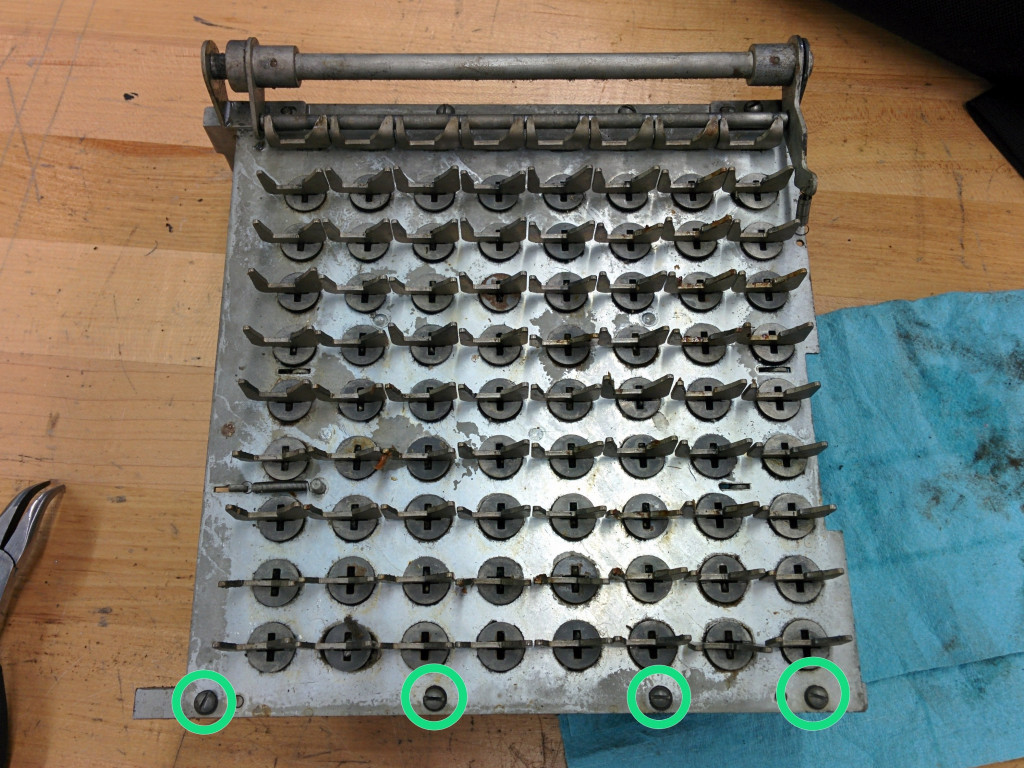
Turn the keyboard assembly so the clearing shaft is at the top, and remove these four #4-48 screws with their lock washers. Put them in bag 19E.

Шаг 106
Шаг 107

Шаг 108
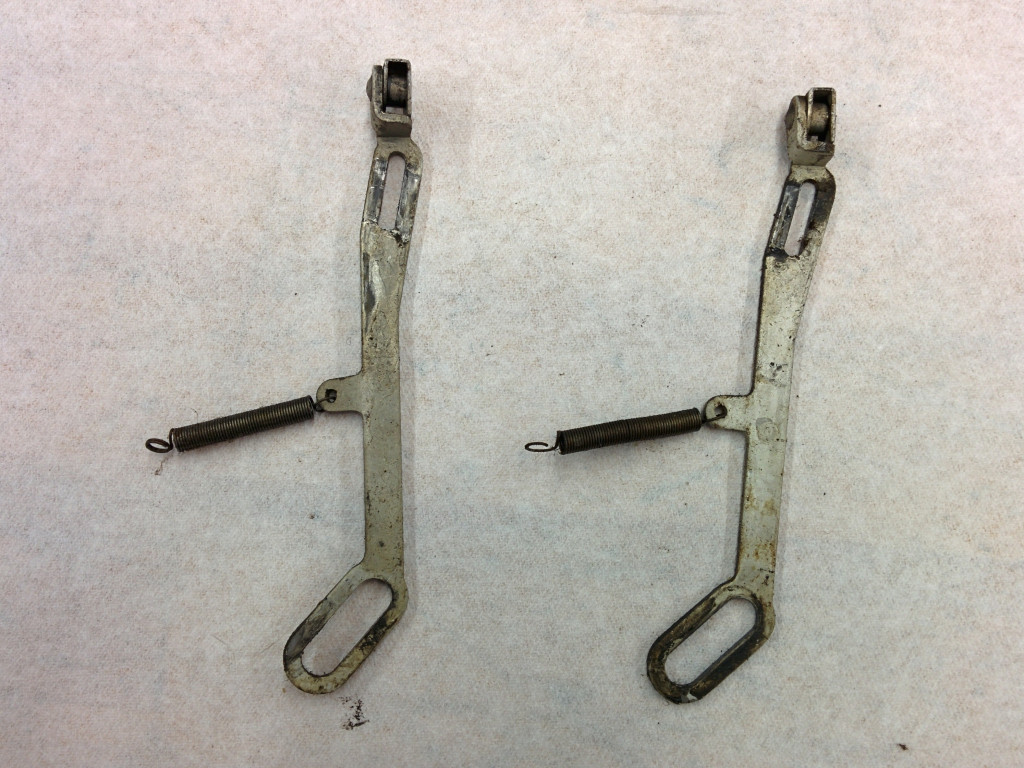
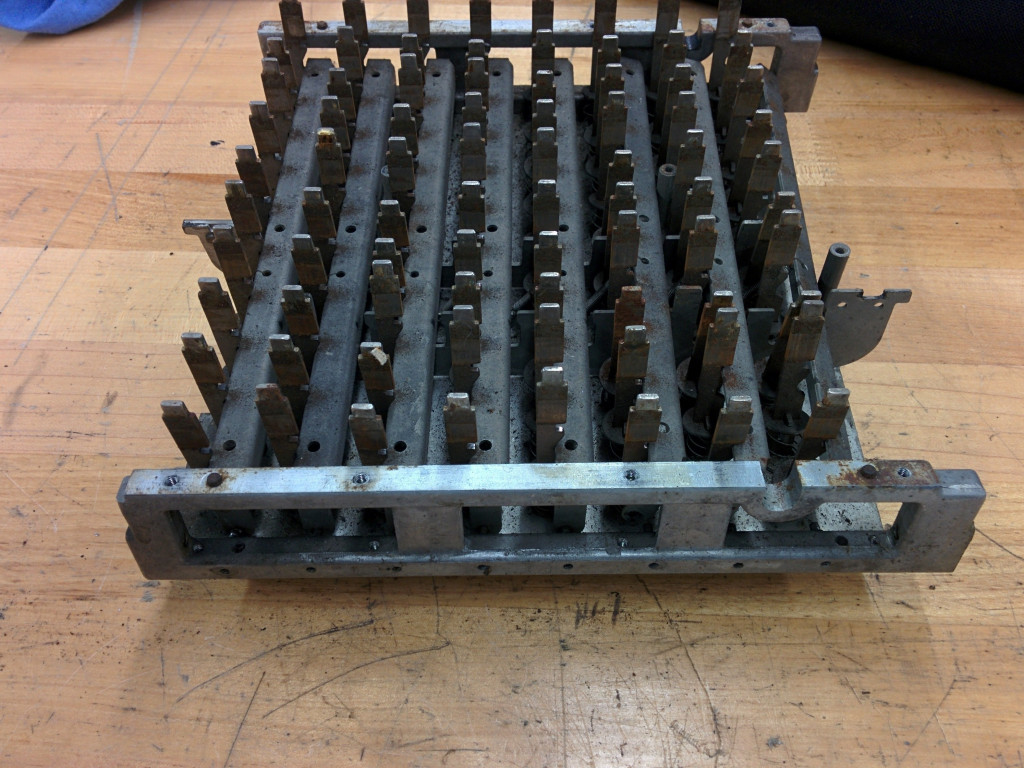
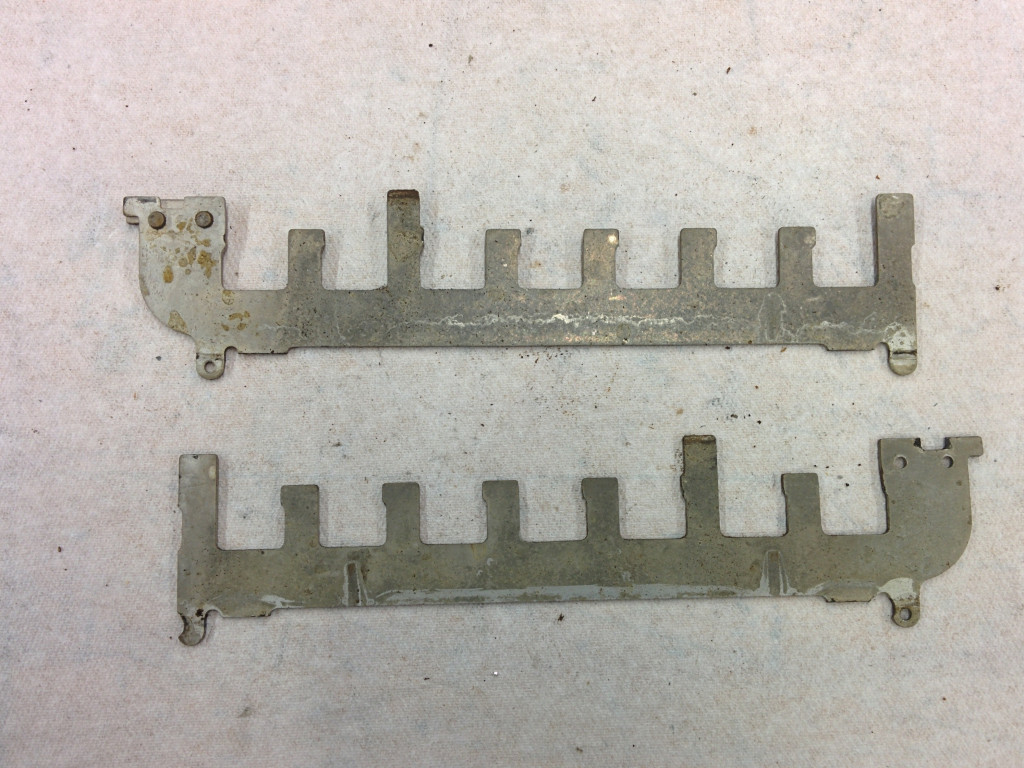
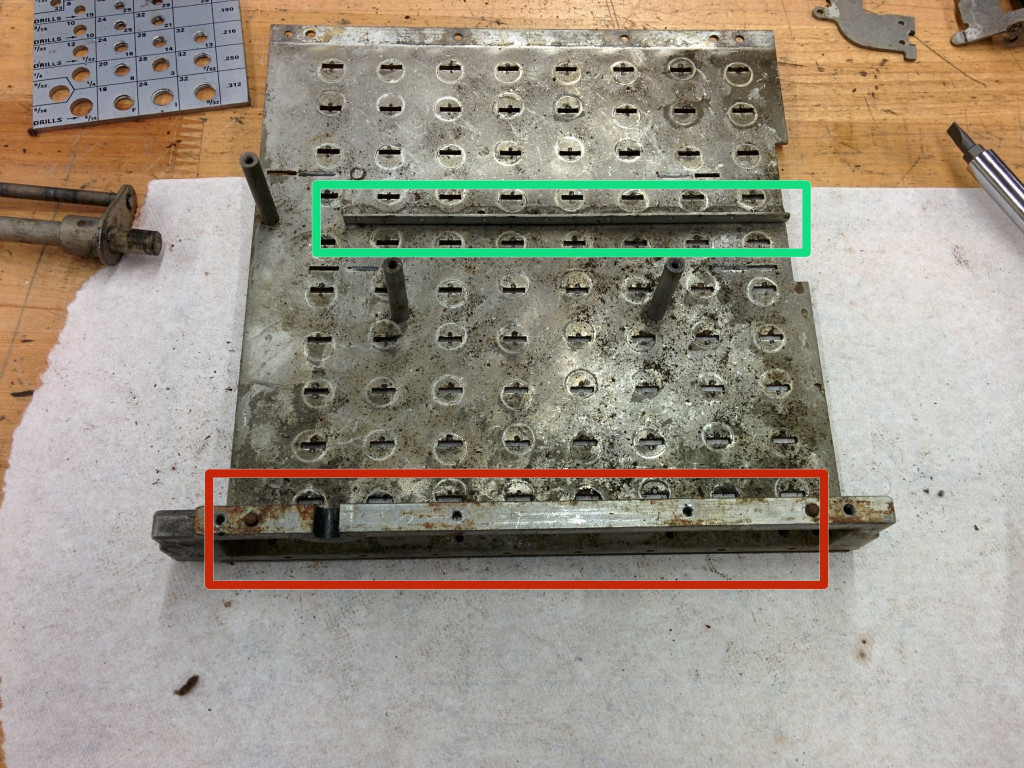
Turn the keyboard over again and remove these two horizontal clear and locking bars.
Note that the bars are identical except that one has an extra piece riveted to it. The riveted bar is farther up and points to the left. The other is lower down and points to the right, as shown in the image.
Шаг 109
Next, lever out the key stem retainer that is in the slot.
Шаг 110
You can now pull the key stem out from the bottom. There will be a metal washer and a felt washer.
Place the stems in bag 19A, the metal washers and retainers in 19B, the felt washers in 19C, and the key springs in 19D.
Do the same for all keys.
Шаг 111
Move and twist the bushing so that it is loose.
Шаг 112
Remove the shaft by sliding it out of the right bushing.
Put the bushing that remains on the shaft in bag 19E.
Also remove the spring that remains and put it in bag 19E.
Шаг 113
Remove these four screws and their lock washers. Place them and the right and left bushings in bag 19E.


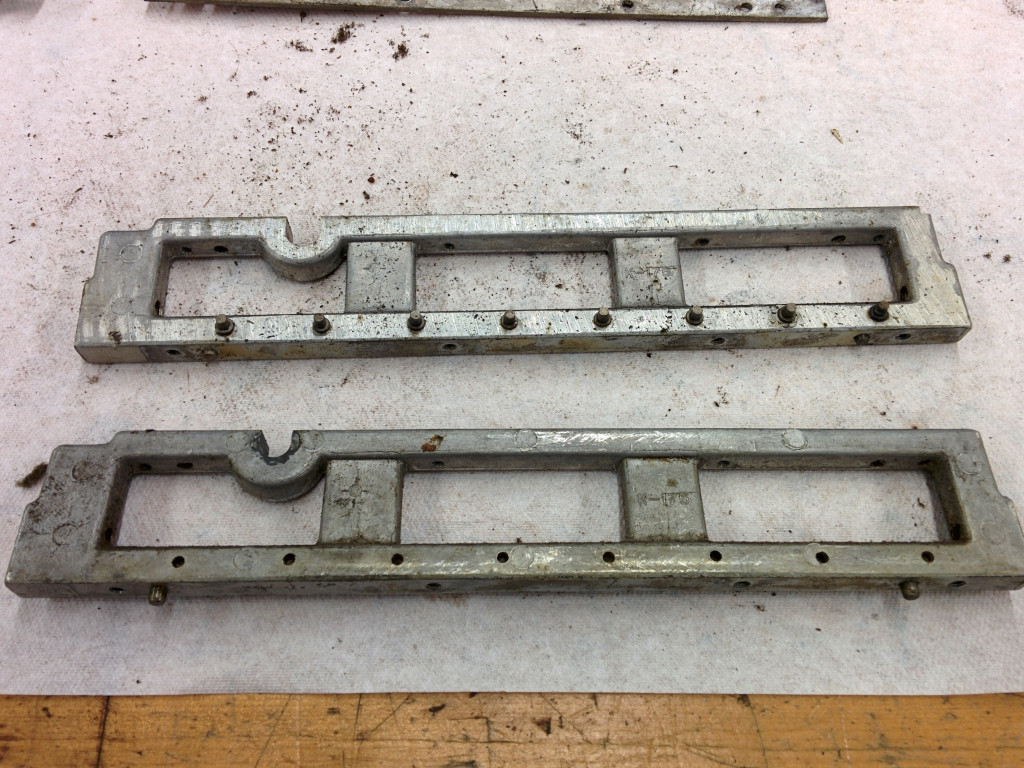
Шаг 114
Now you have two frame pieces.
Also remove the eight springs on the spring strip and place in bag 19E.
Шаг 115 What's in bag 19A?
72 non-zero key stems

Шаг 116 What's in bag 19B?
80 retainers
Шаг 117 What's in bags 19C and 19D?
72 felt washers
Шаг 118 What's in bag 19E?
Комментарии
Пока еще нет ниодного комментария, оставьте комментарий первым!
Также вас могут заинтересовать
Сломалось остальное?
Оставьте заявку на ремонт остальное или просто задайте вопрос мастерам и с вами свяжутся представители сервисных центров для устранения неисправности.